Photoshop为日出图片增加浓郁的霞光韵味
平面设计 发布日期:2026/5/8 浏览次数:1
正在浏览:Photoshop为日出图片增加浓郁的霞光韵味
霞光图片调色不需要太复杂,主要在色温及一些细节上入手,可以直接给图片主色增加暖色,然后在光源位置增加类似阳光的高光即可。
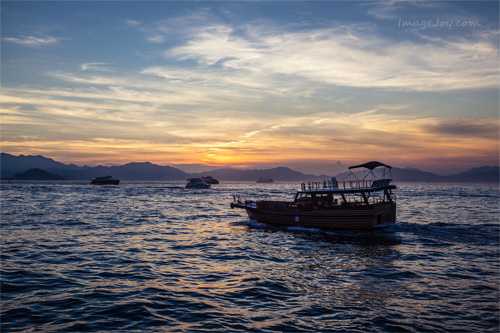
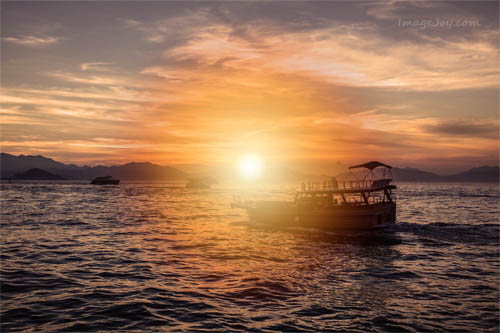
原图
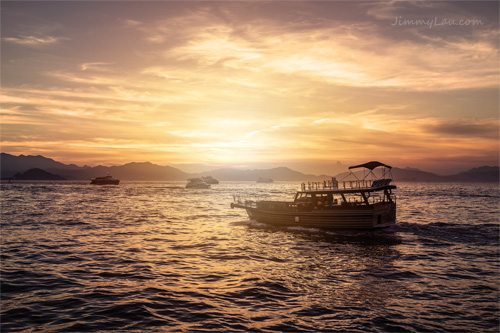
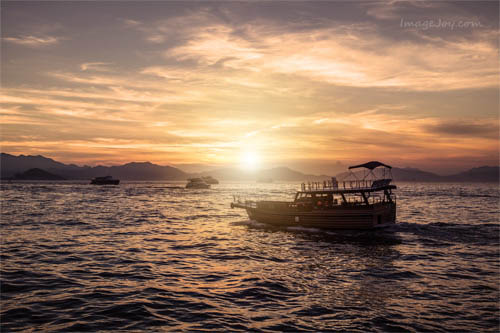
最终效果
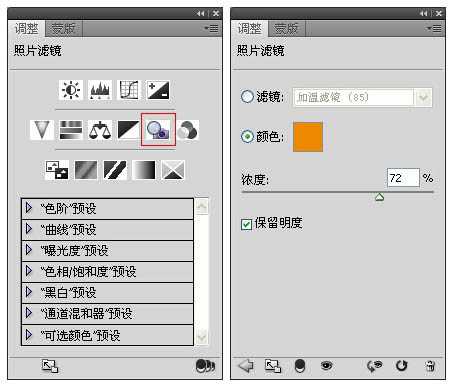
1、若照片已呈橙黄色,可跳过此步,否则大家要把画面都调回橙黄调。
调整色调,最简单的做法是使用“照片滤镜”。 此例使用了“加温滤镜(85)”,并把强度设在72%,但大家可因应自己的照片来调整。整个图面都变成橙黄调了。

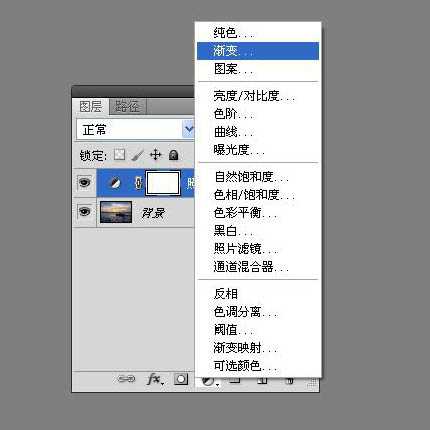
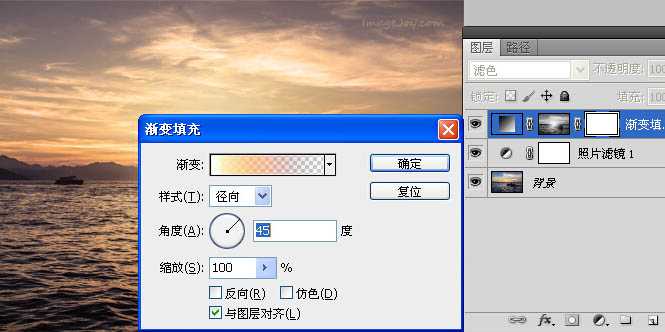
2、最精彩的部份来了,就是制作太阳。首先选取“渐变”。请注意,“渐变” 和尾二的“渐变映射”是两样不同的东西。
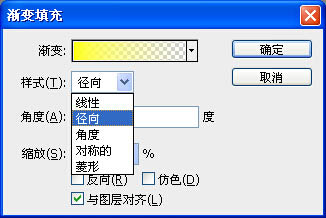
3、选取“渐变””后会出现如下的选项。大家的色阶可能和本文有所出入,不打紧,我们最后会把它调到正确的颜色。请把样式改成径向,因为太阳是圆形的。
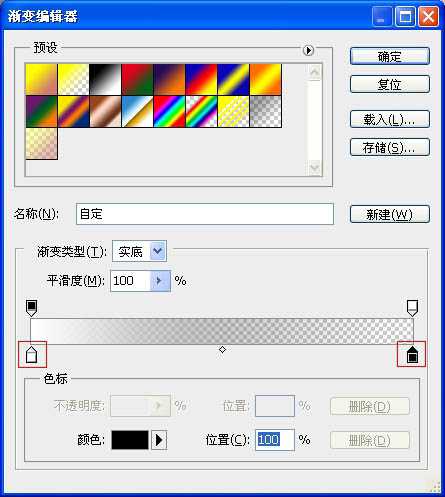
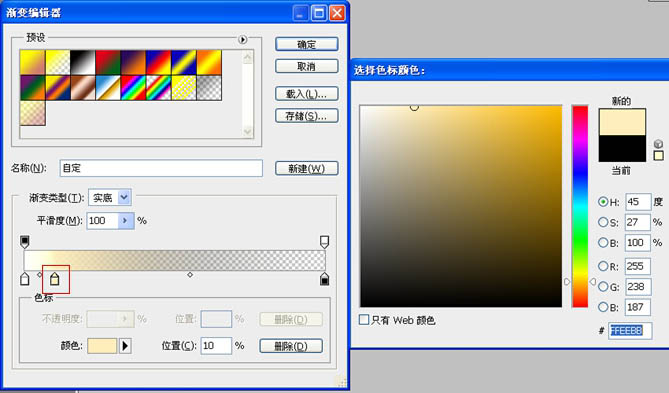
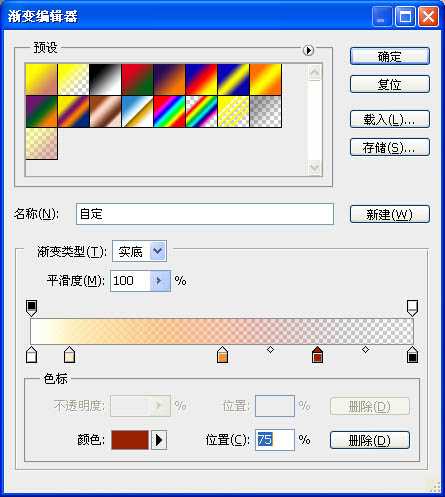
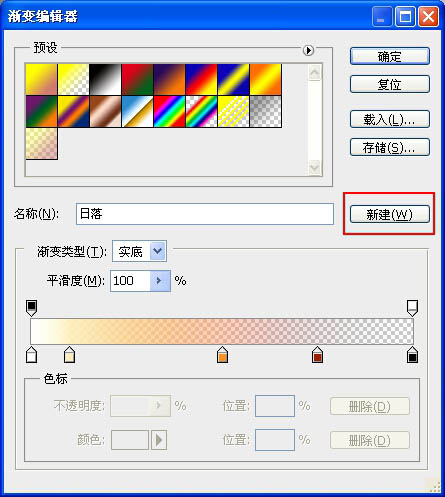
4、接下来是模仿太阳的色阶。按色阶后会弹出视窗。再一次提醒,大家的色阶可能和本文不一样,但没关系。
现在来改变色阶的颜色。上方的色块是控制透明度,而下方的是控制颜色。大家先把左下方的色块设为白色(FFFFFF),而右下的设为黑色(000000)。请检查两端的透明度。
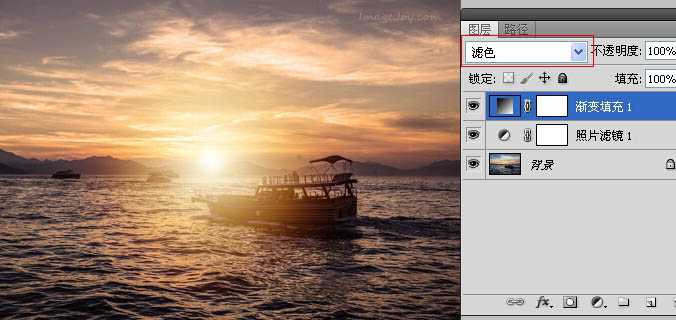
5、把图层的模式改为滤色。现在的效果自然得多了。
太阳走到山前了,但如何改变太阳的位置呢?大家要用鼠标双按“渐变填充”图层才可移动太阳的位置,例如把它调高一点。

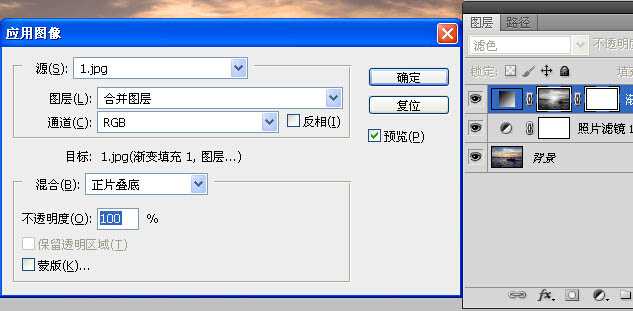
6、为了令太阳再自然一点,大家可按图层蒙板的小图示,再选择菜单图像>应用图像。 选取应用图像后,效果如下图。
7、为了得取最佳效果,大家还可以调整渐变填充的角度。在图示上双按鼠标进入设定版面。本例为45度,大家可因应情况来选择最合适角度。
8、最后,记得储存刚建立的太阳色阶,方便日后使用。在渐变填充图示上双按鼠标进入设定版面,然后按色阶,最后按“新建”按钮。
最终效果:

原图
最终效果
1、若照片已呈橙黄色,可跳过此步,否则大家要把画面都调回橙黄调。
调整色调,最简单的做法是使用“照片滤镜”。 此例使用了“加温滤镜(85)”,并把强度设在72%,但大家可因应自己的照片来调整。整个图面都变成橙黄调了。
2、最精彩的部份来了,就是制作太阳。首先选取“渐变”。请注意,“渐变” 和尾二的“渐变映射”是两样不同的东西。
3、选取“渐变””后会出现如下的选项。大家的色阶可能和本文有所出入,不打紧,我们最后会把它调到正确的颜色。请把样式改成径向,因为太阳是圆形的。
4、接下来是模仿太阳的色阶。按色阶后会弹出视窗。再一次提醒,大家的色阶可能和本文不一样,但没关系。
现在来改变色阶的颜色。上方的色块是控制透明度,而下方的是控制颜色。大家先把左下方的色块设为白色(FFFFFF),而右下的设为黑色(000000)。请检查两端的透明度。
5、把图层的模式改为滤色。现在的效果自然得多了。
太阳走到山前了,但如何改变太阳的位置呢?大家要用鼠标双按“渐变填充”图层才可移动太阳的位置,例如把它调高一点。
6、为了令太阳再自然一点,大家可按图层蒙板的小图示,再选择菜单图像>应用图像。 选取应用图像后,效果如下图。
7、为了得取最佳效果,大家还可以调整渐变填充的角度。在图示上双按鼠标进入设定版面。本例为45度,大家可因应情况来选择最合适角度。
8、最后,记得储存刚建立的太阳色阶,方便日后使用。在渐变填充图示上双按鼠标进入设定版面,然后按色阶,最后按“新建”按钮。
最终效果: