ps打造绝美质感古风照片
平面设计 发布日期:2026/7/15 浏览次数:1
正在浏览:ps打造绝美质感古风照片

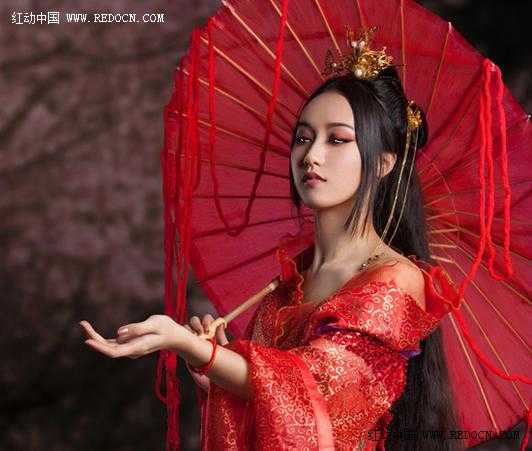
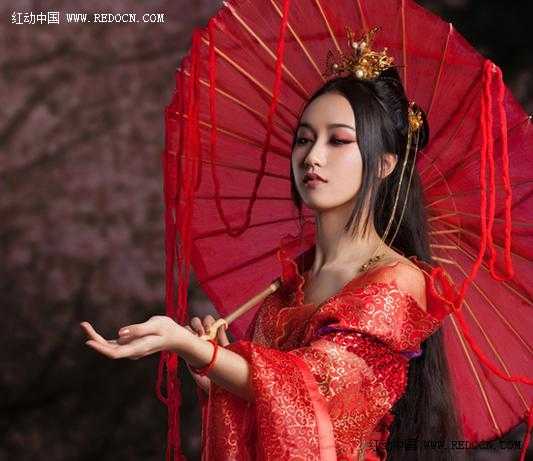
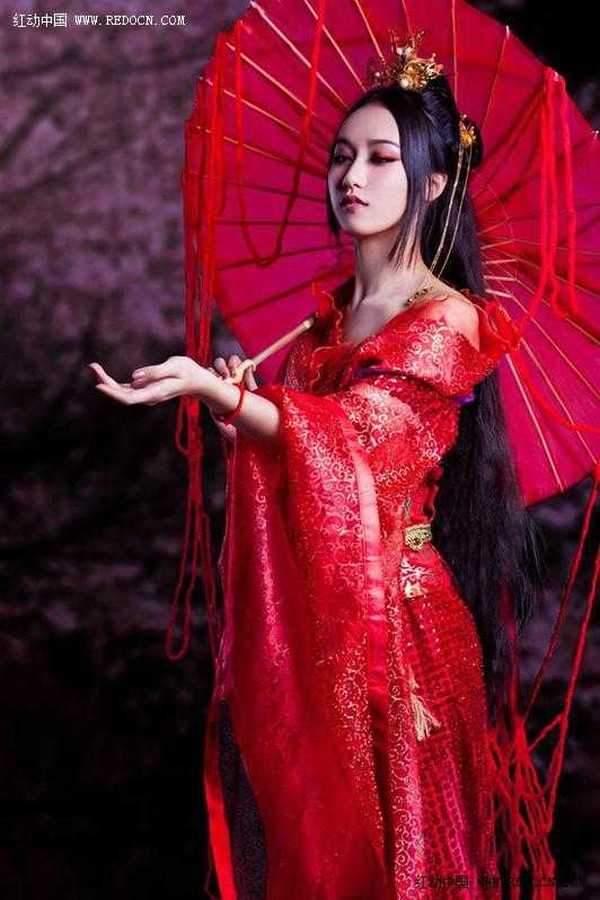
这次的photoshop调色教程是学习用ps打造绝美质感的古风照片,主要用到了素材照片、仿制图章工具、画笔工具、混合模式还有Camera Raw效果。最后的照片,是手持油纸伞的红衣丽人美艳不可方物。按照我自己的风格,有所出入的改动了教程。感兴趣的人不妨一起学习看看,加油。
原图( L8 \% O! J2 N; @0 G* x- J

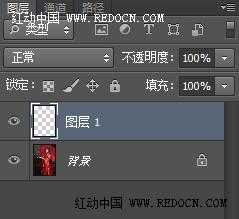
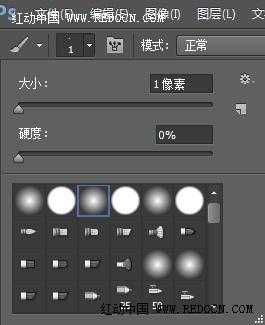
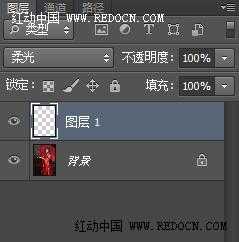
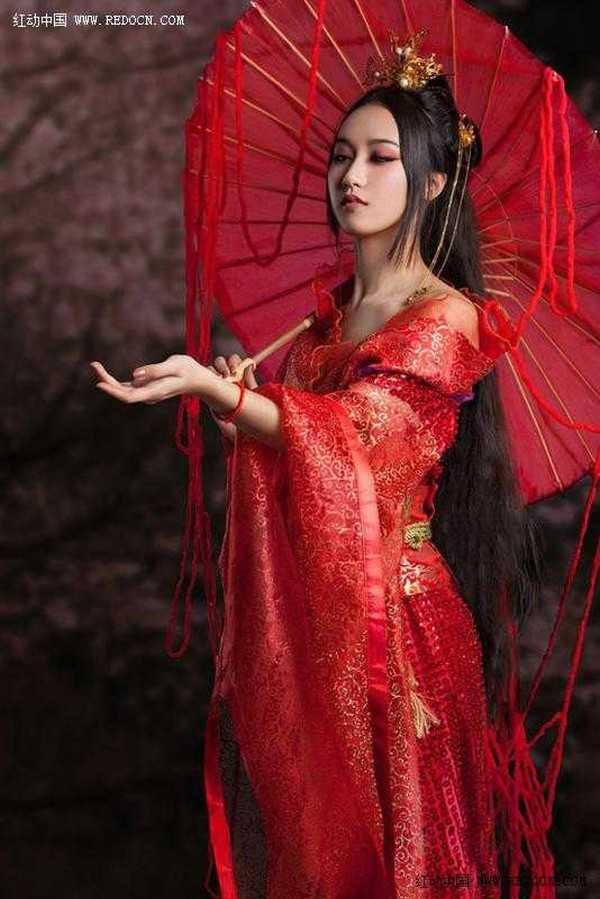
步骤1
打开古风照片,选择仿制图章工具。因为长发很凌乱,选一个柔边圆笔刷,不断仿制垂顺的头发。

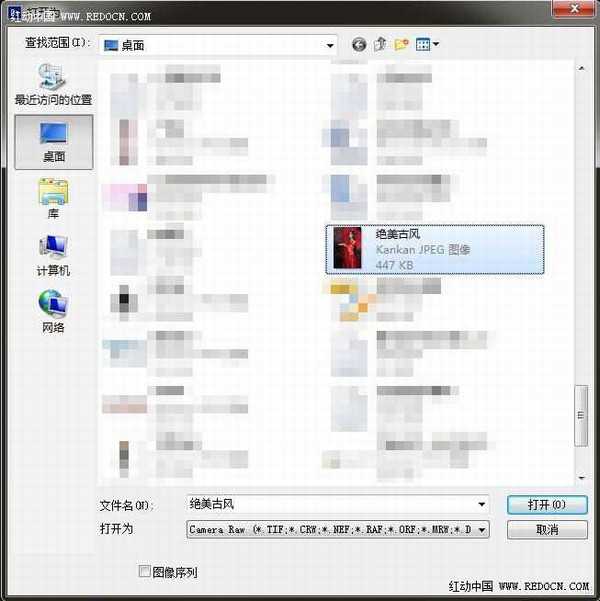
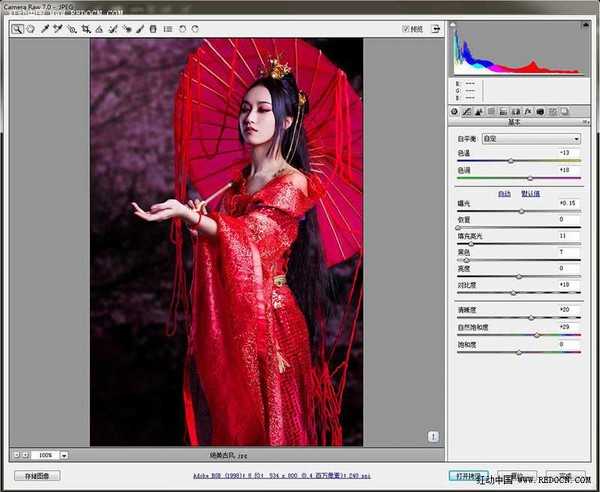
关掉前面的ps文档,执行文件—打开为,找到最后处理好的效果照片。格式选择Camera Raw打开。
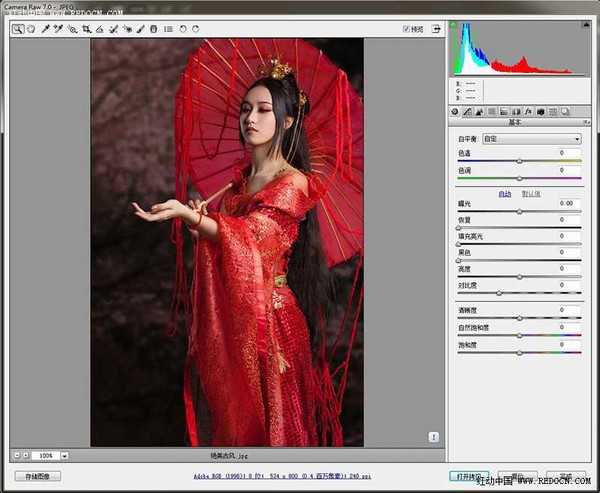
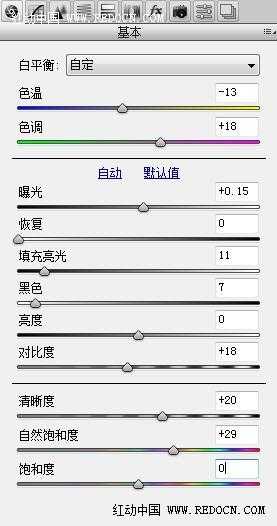
基本数值设置如下。
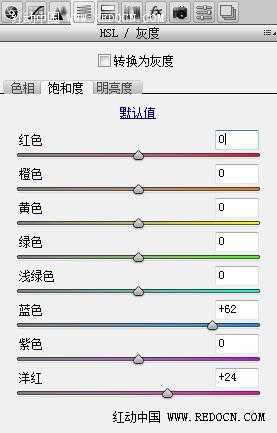
HSL/灰度,饱和度设置如下。
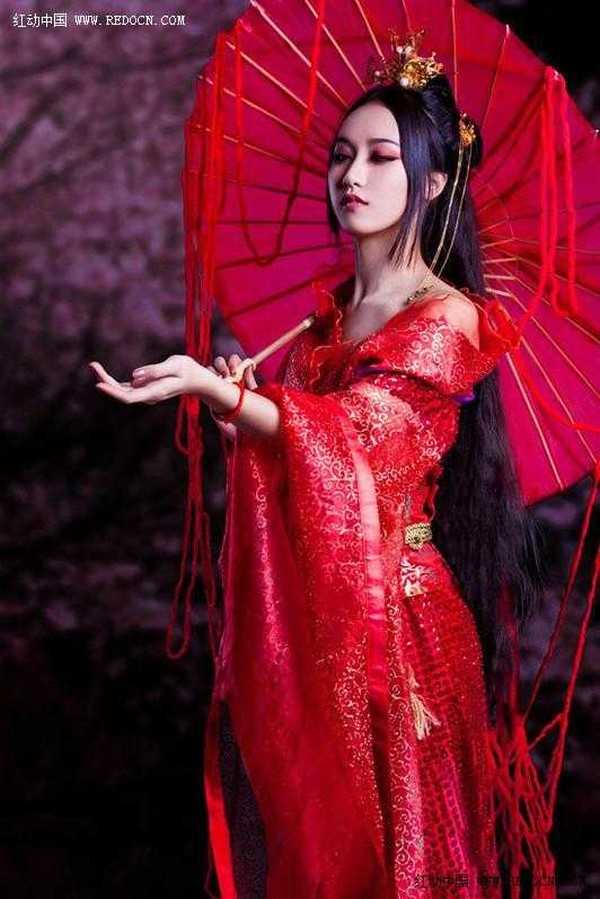

这次的photoshop调色教程是学习用ps打造绝美质感的古风照片,主要用到了素材照片、仿制图章工具、画笔工具、混合模式还有Camera Raw效果。最后的照片,是手持油纸伞的红衣丽人美艳不可方物。按照我自己的风格,有所出入的改动了教程。感兴趣的人不妨一起学习看看,加油。
原图( L8 \% O! J2 N; @0 G* x- J
步骤1
打开古风照片,选择仿制图章工具。因为长发很凌乱,选一个柔边圆笔刷,不断仿制垂顺的头发。
关掉前面的ps文档,执行文件—打开为,找到最后处理好的效果照片。格式选择Camera Raw打开。
基本数值设置如下。
HSL/灰度,饱和度设置如下。