Photoshop为偏暗的美女私房调出粉嫩效果
平面设计 发布日期:2026/5/7 浏览次数:1
正在浏览:Photoshop为偏暗的美女私房调出粉嫩效果
人像摄影后期调色,如何控制好皮肤的颜色以及通透感是很多人像摄影师所困扰的问题,小编请来花不园摄影师yukishot ,实例为大家讲解如何调出自然通透的皮肤。

首先,大家可以留意一下这张原片看上去拍得不是很好,感觉人物有点欠曝。原因是拍摄当时准备较为仓促,只能单机上阵。但现在的数码拍摄强大的功能,为后期作出修正提供了广阔的空间。

以此图为例,拍摄时间为正午, MD背后的大落地窗外光线很强, MD要进行背光拍摄,那么光比就很大了,容易造成背景细节缺失。如何能保留细节又让曝光能正确呢?我用的方法就是拍摄使用RAW格式,然后对MD欠曝拍摄。其原理是利用RAW的高宽容度把MD的正面和过曝的窗户还原,所以,照片看起来虽然是欠曝的,但通过后期能得到还原。
后面我会教大家一步一步的将照片复原。

用PHOTOSHOP打开RAW文件, 显示RAW调整面板(左边的是原始数据,右边的是调整后的数据)
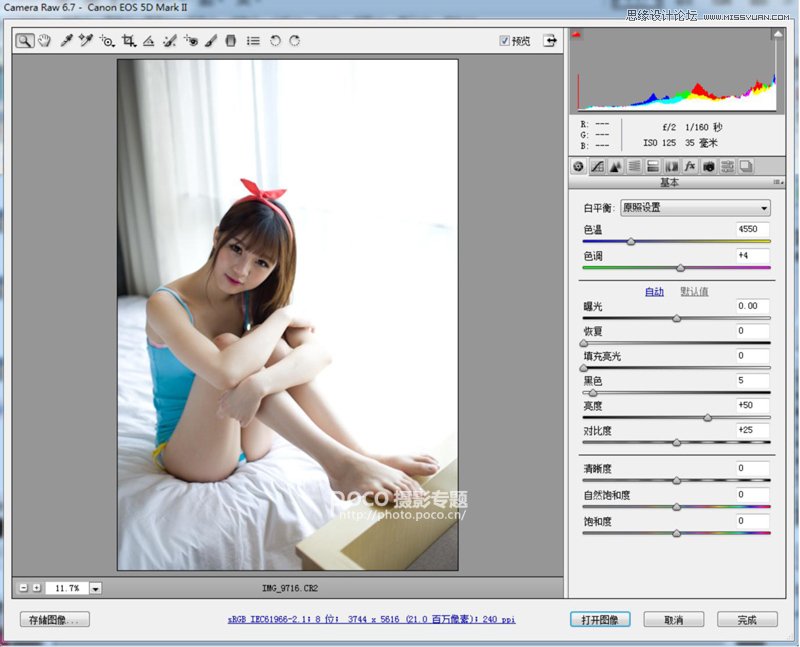
根据画面的需求调整参数, 增加“恢复”到53,让窗户的高光位适度恢复, 增加”填充亮光”数值让暗部变亮, 就一个简单的操作,就能使照片得到了提升,但窗户还是有一点过暴,然后打开图像

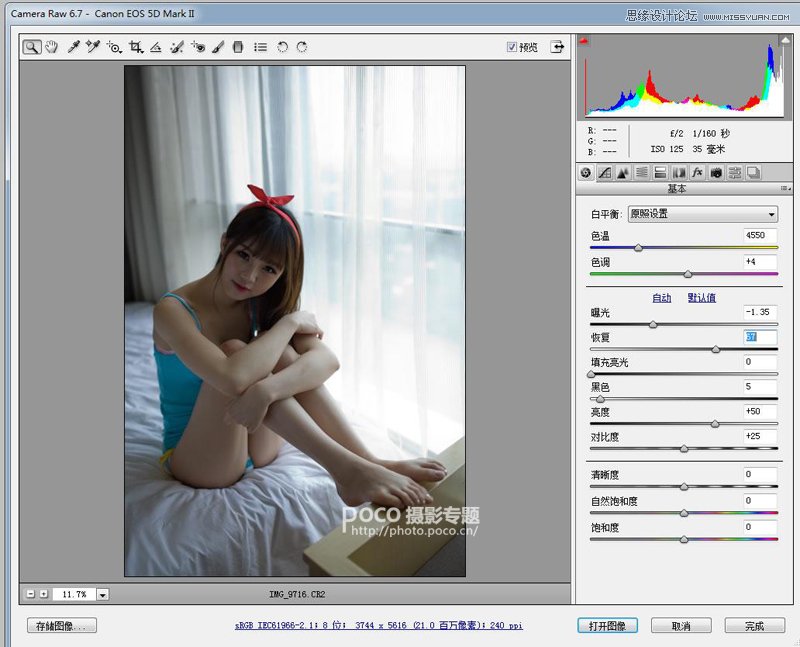
再另外打开一次RAW文件,把暴光调成-1.35,恢复调成67,打开图像。
然后把这张暗调的图拖进刚才打开的图像上面,让她们重叠。

创建蒙板,将窗户部份刷出来,让暴光看起来更加平衡。
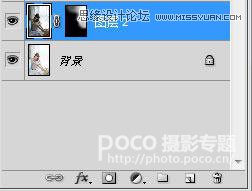
蒙板后的效果。

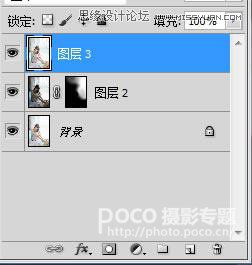
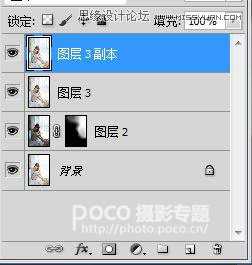
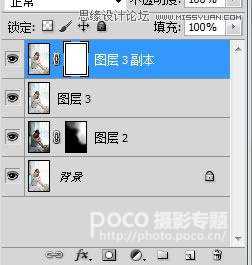
Shift+Ctrl+Alt+E盖印图层,之后的步骤,都是在新图层上完成。
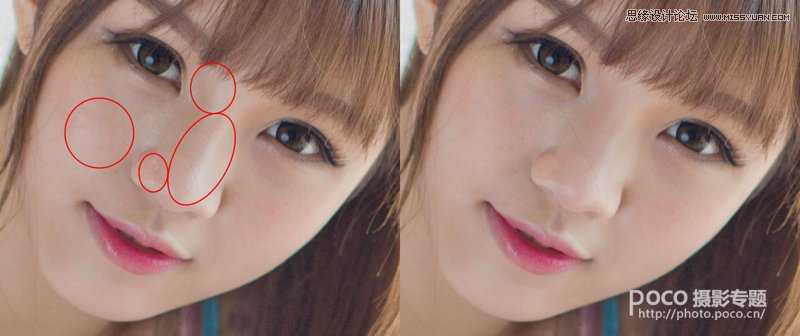
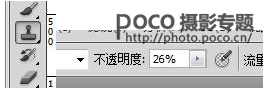
MD脸上的高光不太自然,然后就用仿制图章工具, 不透明度设成26%, 按着ALT键用鼠标点中间光的位置取样, 再涂抹高光位, 使脸光看上去更自然。
为了让MD的皮肤看上去再完美一点,接着就到了磨皮的步骤, 建立个新图层。
磨皮我通常是用 Portraiture, 一个非常方便的磨皮插件,能够自动识别出皮肤部份进行磨皮,然后微调一下参数,开始磨皮。
磨皮完毕后,此时的皮肤已相当的细腻油滑,但脸部的线条的鼻子的线条都有一点点模糊,下一步,我们要时MD 的五官更明晰。

为磨皮的图层创建蒙板。
用画笔+黑色在蒙板处将要清晰显示的线条刷出来。

这时候,皮肤的处理就完成,上看去已没什么挑剔。

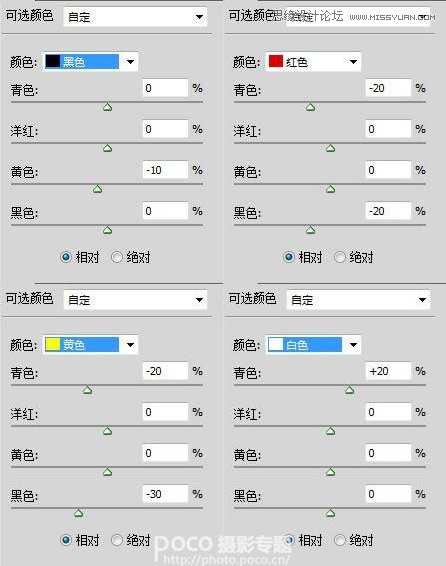
最后,再微调一下颜色,创建“选取颜色”调整图层。

最后的效果图:

提醒: 要调出通透的皮肤,控制曝光度很重要,所以,没把握的时候,我需要在不同的显示器上观察暴光调整是否适当,只要适当的话,效果就一定通透。
首先,大家可以留意一下这张原片看上去拍得不是很好,感觉人物有点欠曝。原因是拍摄当时准备较为仓促,只能单机上阵。但现在的数码拍摄强大的功能,为后期作出修正提供了广阔的空间。
以此图为例,拍摄时间为正午, MD背后的大落地窗外光线很强, MD要进行背光拍摄,那么光比就很大了,容易造成背景细节缺失。如何能保留细节又让曝光能正确呢?我用的方法就是拍摄使用RAW格式,然后对MD欠曝拍摄。其原理是利用RAW的高宽容度把MD的正面和过曝的窗户还原,所以,照片看起来虽然是欠曝的,但通过后期能得到还原。
后面我会教大家一步一步的将照片复原。
用PHOTOSHOP打开RAW文件, 显示RAW调整面板(左边的是原始数据,右边的是调整后的数据)
根据画面的需求调整参数, 增加“恢复”到53,让窗户的高光位适度恢复, 增加”填充亮光”数值让暗部变亮, 就一个简单的操作,就能使照片得到了提升,但窗户还是有一点过暴,然后打开图像
再另外打开一次RAW文件,把暴光调成-1.35,恢复调成67,打开图像。
然后把这张暗调的图拖进刚才打开的图像上面,让她们重叠。
创建蒙板,将窗户部份刷出来,让暴光看起来更加平衡。
蒙板后的效果。
Shift+Ctrl+Alt+E盖印图层,之后的步骤,都是在新图层上完成。
MD脸上的高光不太自然,然后就用仿制图章工具, 不透明度设成26%, 按着ALT键用鼠标点中间光的位置取样, 再涂抹高光位, 使脸光看上去更自然。
为了让MD的皮肤看上去再完美一点,接着就到了磨皮的步骤, 建立个新图层。
磨皮我通常是用 Portraiture, 一个非常方便的磨皮插件,能够自动识别出皮肤部份进行磨皮,然后微调一下参数,开始磨皮。
磨皮完毕后,此时的皮肤已相当的细腻油滑,但脸部的线条的鼻子的线条都有一点点模糊,下一步,我们要时MD 的五官更明晰。
为磨皮的图层创建蒙板。
用画笔+黑色在蒙板处将要清晰显示的线条刷出来。
这时候,皮肤的处理就完成,上看去已没什么挑剔。
最后,再微调一下颜色,创建“选取颜色”调整图层。
最后的效果图:
提醒: 要调出通透的皮肤,控制曝光度很重要,所以,没把握的时候,我需要在不同的显示器上观察暴光调整是否适当,只要适当的话,效果就一定通透。