Photoshop为灰暗的建筑图片加上清爽的蓝天
平面设计 发布日期:2026/6/15 浏览次数:1
正在浏览:Photoshop为灰暗的建筑图片加上清爽的蓝天
更换天空最好的办法就是把主体部分选取出来,方法有很多。可以用通道、魔棒、套索等工具。教程中用到的是魔棒工具,这种方法快,不过细节处理就麻烦一点。
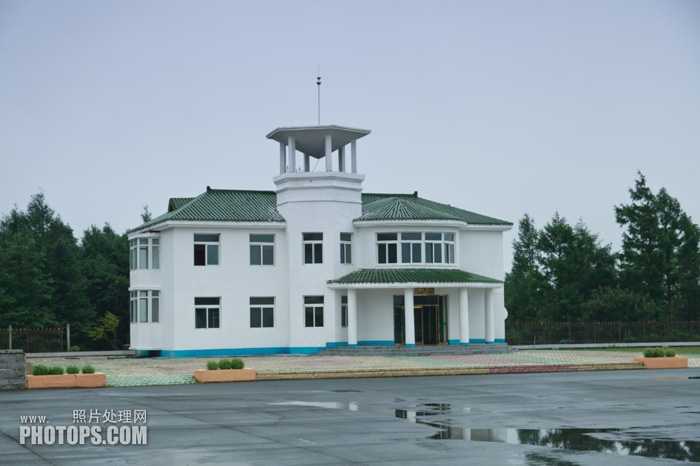
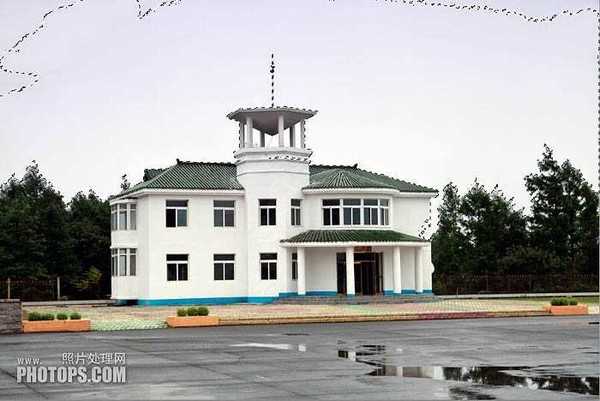
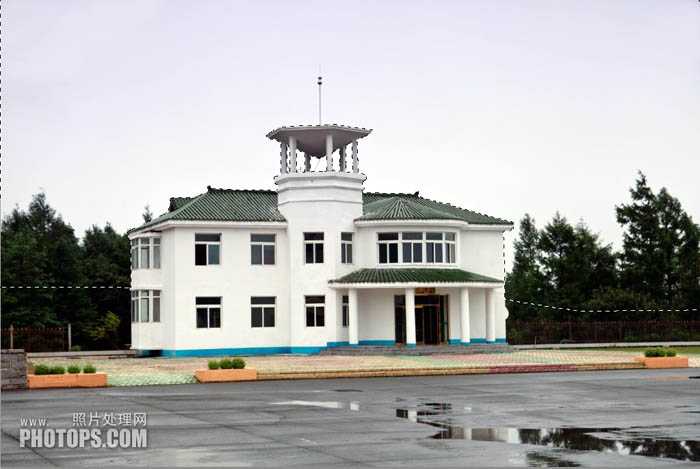
原图
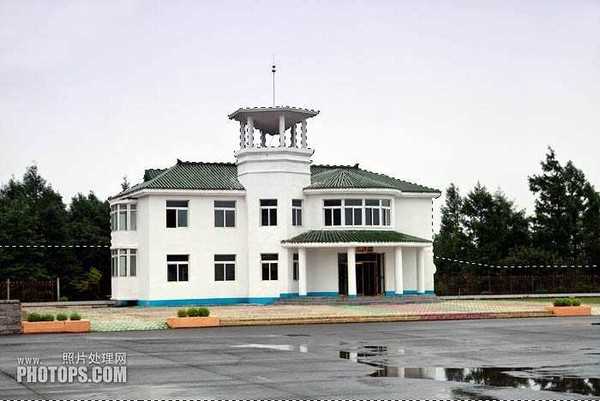
最终效果

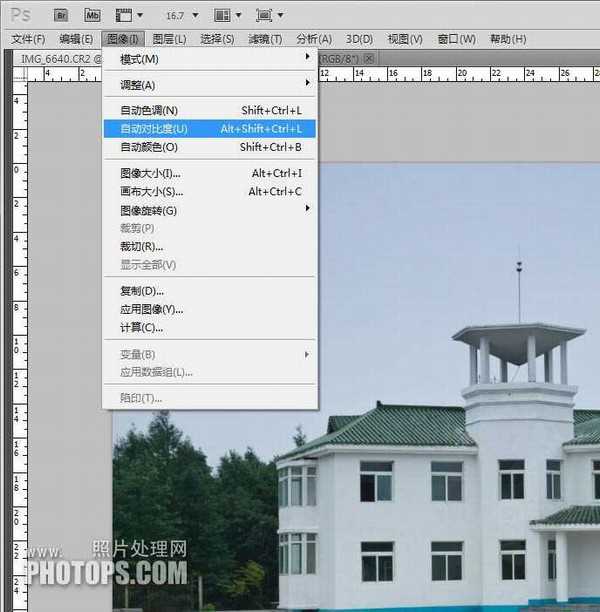
1、打开素材图片,对图片进行自动对比调整。
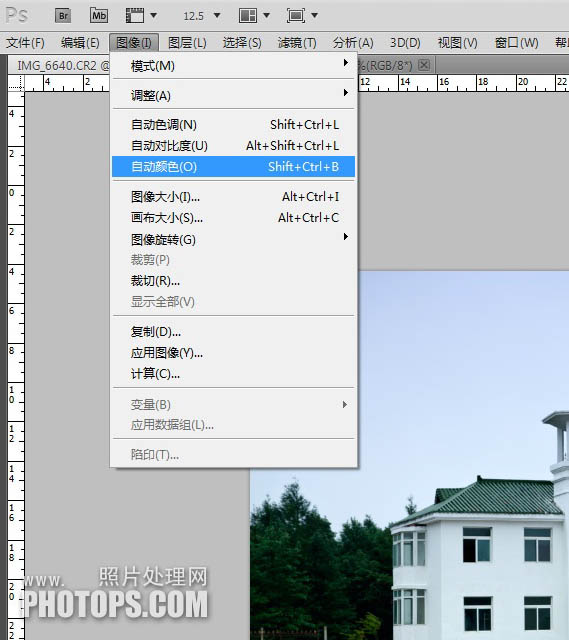
2、自动颜色调整。
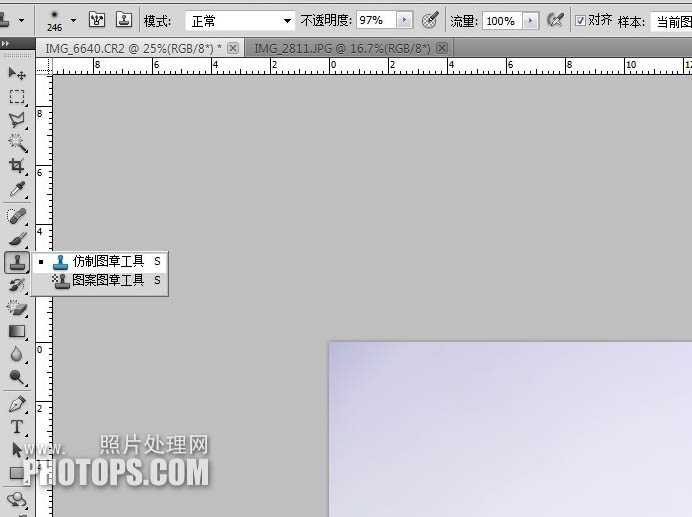
3、选择图章工具。
4、用图章工具修改图片左右上角灰暗处。

5、打开图像栏选择曝光度。
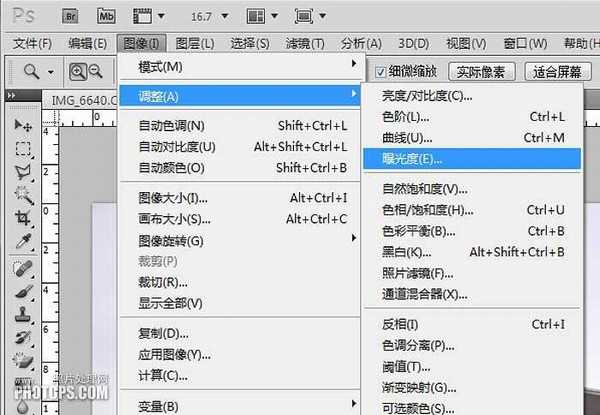
6、对图片进行灰度系数调整。

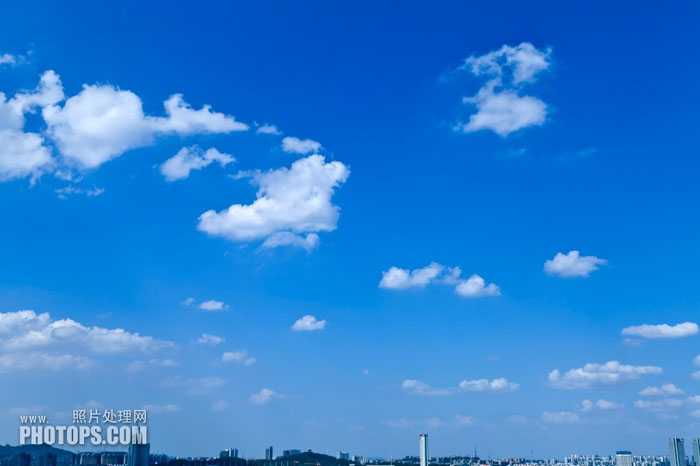
7、选择一张蓝天,这里要说明一下,如果建筑是阴天拍摄,没有阳光照射,可以选择白天正午时光(上午10点-下午14点)的蓝天白云片子。如果建筑物是在阳光下拍摄,要根据光线折射角度寻找一张同一时间段的蓝天白云片子。千万不能用反相光线蓝天白云添加,那样会适得其反,造成自然还原不协调的痕迹出现。
下面这张是夏天在玄武湖拍摄,正好是下午14点前光线,比较合适建筑环境。
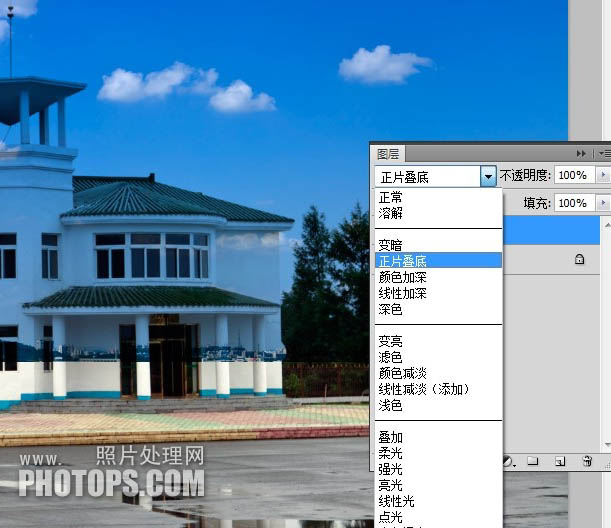
8、把蓝天白云复制到建筑图层上,并往上移动位置,混合模式正片叠底。
9、用工具栏的矩形选框工具。
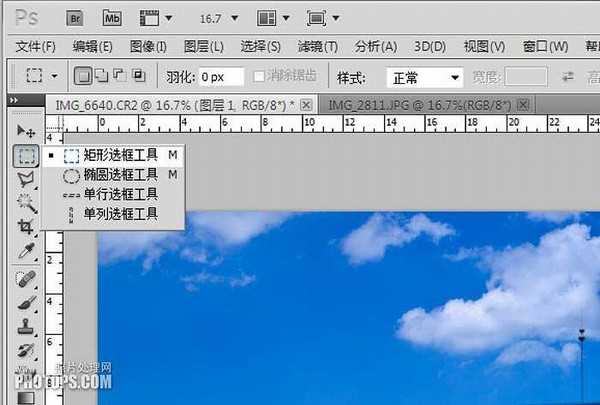
10、用矩形工具框住蓝天白云底边一小段边缘。

11、按键盘上SHIFT键不松手再按F6,会跳出提示框:羽化半径250,原图是6000x4000,图片越大,羽化半径就越大,相反就小。
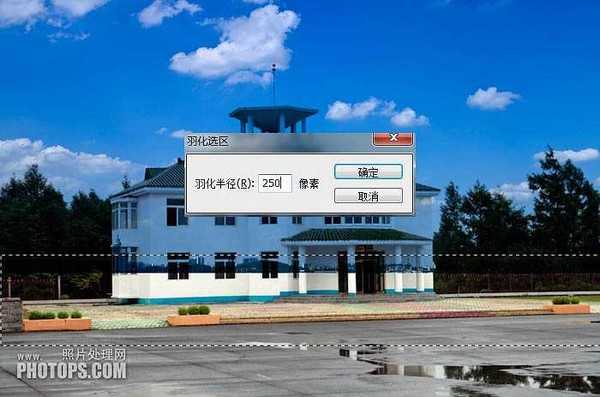
12、羽化后按键盘上DELETE键三下,清楚被框住的边缘。

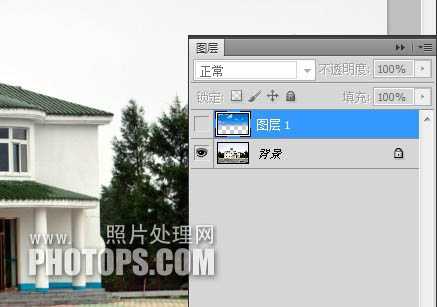
13、隐藏蓝天白云图层。
14、用工具栏魔棒工具。

15、对着建筑物图层天空点击,会出现有部分没有扩张大。
16、另外还发现建筑因和天空颜色接近,也被框进内。

17、用工具栏多边形套索工具。
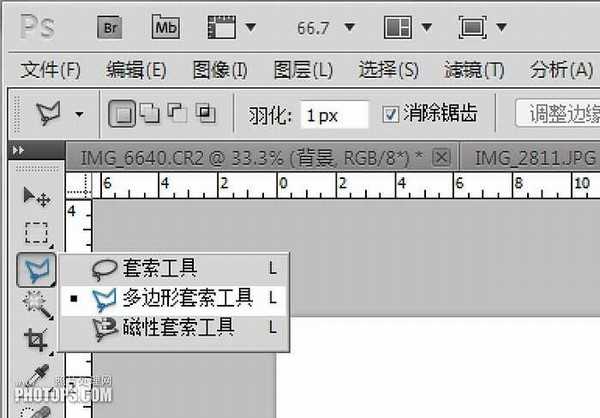
18、对建筑被框进的颜色进行减除。

19、套索工具抠出天空与建筑物轮廓。
20、还是按键SHIFT键不松手再按F6,羽化半径1。

21、按键盘SHIFT键不松手再按F7,会看到被框住的天空反到下面。
上一页12 下一页 阅读全文
原图
最终效果
1、打开素材图片,对图片进行自动对比调整。
2、自动颜色调整。
3、选择图章工具。
4、用图章工具修改图片左右上角灰暗处。
5、打开图像栏选择曝光度。
6、对图片进行灰度系数调整。
7、选择一张蓝天,这里要说明一下,如果建筑是阴天拍摄,没有阳光照射,可以选择白天正午时光(上午10点-下午14点)的蓝天白云片子。如果建筑物是在阳光下拍摄,要根据光线折射角度寻找一张同一时间段的蓝天白云片子。千万不能用反相光线蓝天白云添加,那样会适得其反,造成自然还原不协调的痕迹出现。
下面这张是夏天在玄武湖拍摄,正好是下午14点前光线,比较合适建筑环境。
8、把蓝天白云复制到建筑图层上,并往上移动位置,混合模式正片叠底。
9、用工具栏的矩形选框工具。
10、用矩形工具框住蓝天白云底边一小段边缘。
11、按键盘上SHIFT键不松手再按F6,会跳出提示框:羽化半径250,原图是6000x4000,图片越大,羽化半径就越大,相反就小。
12、羽化后按键盘上DELETE键三下,清楚被框住的边缘。
13、隐藏蓝天白云图层。
14、用工具栏魔棒工具。
15、对着建筑物图层天空点击,会出现有部分没有扩张大。
16、另外还发现建筑因和天空颜色接近,也被框进内。
17、用工具栏多边形套索工具。
18、对建筑被框进的颜色进行减除。
19、套索工具抠出天空与建筑物轮廓。
20、还是按键SHIFT键不松手再按F6,羽化半径1。
21、按键盘SHIFT键不松手再按F7,会看到被框住的天空反到下面。
上一页12 下一页 阅读全文
上一篇:PS后期添加胶片漏光效果