Photoshop利用通道抠出透明婚纱
平面设计 发布日期:2026/6/18 浏览次数:1
正在浏览:Photoshop利用通道抠出透明婚纱
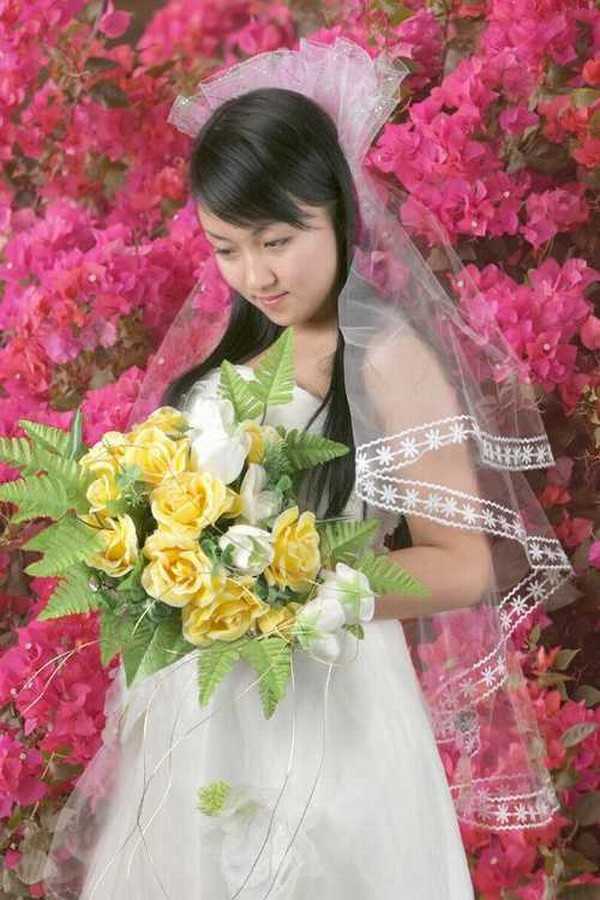
图00
1、打开文件,这样单色背景的婚纱照,拍摄之后可以按照客户的要求,把整个背景替换成为风光、教室或者其他场景。
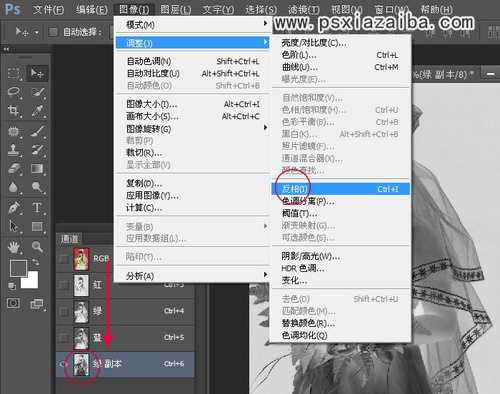
2、在通道中创建选区。打开通道面板,挑选一个人物和婚纱都比较容易分辨的通道。这里选择了绿色通道,将这个通道复制为绿色副本通道,按Ctrl+I键将这个通道做做反相。这样处理的目的主要是为了将背景变为浅颜色,以便得后面选择背景更加方便。
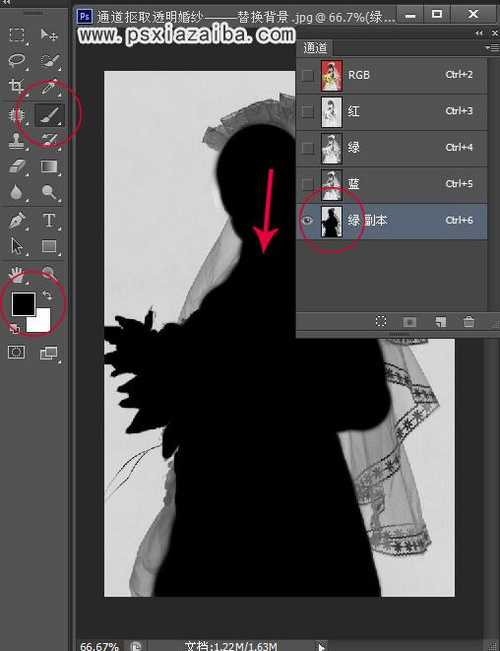
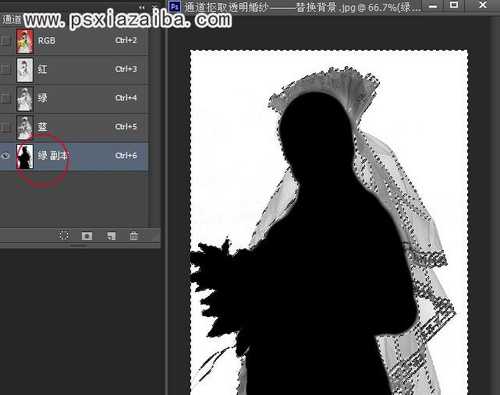
3、在工具箱中选择画笔,设置前景色为黑色,在选项中设置合适的画笔直径和硬度,将人物小心地涂为黑色。由于头发和手臂边缘的虚实不同,因此在涂的时候,一定要根据实际情况及时调整画笔的硬度。
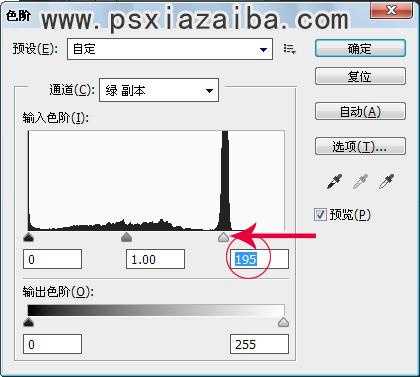
4、打开色阶。将最右边的滑标向左边移动,可以看到背景变白了。
5、按住Ctrl健,用鼠标单击通道面板上的当前通道,当通道的选区被载入,看到蚂蚁线了。
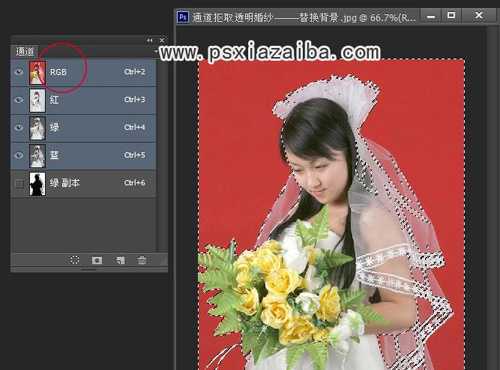
6、点击RGB通道。
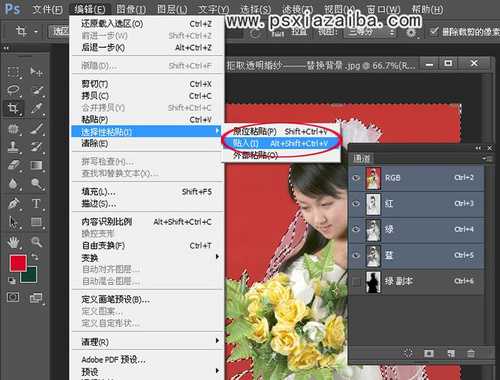
7、打开准备的背景图。

8、按Ctrl+A全选,打开“编辑/拷贝”。

9、选择“编辑/选择性粘贴/贴入”。
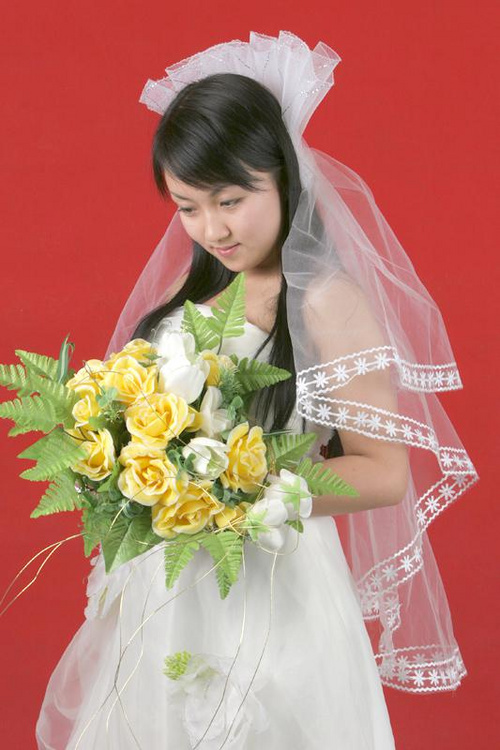
10、最终效果图

图00
1、打开文件,这样单色背景的婚纱照,拍摄之后可以按照客户的要求,把整个背景替换成为风光、教室或者其他场景。
2、在通道中创建选区。打开通道面板,挑选一个人物和婚纱都比较容易分辨的通道。这里选择了绿色通道,将这个通道复制为绿色副本通道,按Ctrl+I键将这个通道做做反相。这样处理的目的主要是为了将背景变为浅颜色,以便得后面选择背景更加方便。
3、在工具箱中选择画笔,设置前景色为黑色,在选项中设置合适的画笔直径和硬度,将人物小心地涂为黑色。由于头发和手臂边缘的虚实不同,因此在涂的时候,一定要根据实际情况及时调整画笔的硬度。
4、打开色阶。将最右边的滑标向左边移动,可以看到背景变白了。
5、按住Ctrl健,用鼠标单击通道面板上的当前通道,当通道的选区被载入,看到蚂蚁线了。
6、点击RGB通道。
7、打开准备的背景图。
8、按Ctrl+A全选,打开“编辑/拷贝”。
9、选择“编辑/选择性粘贴/贴入”。
10、最终效果图