PS合成超酷光线美女海报
平面设计 发布日期:2026/3/29 浏览次数:1
正在浏览:PS合成超酷光线美女海报
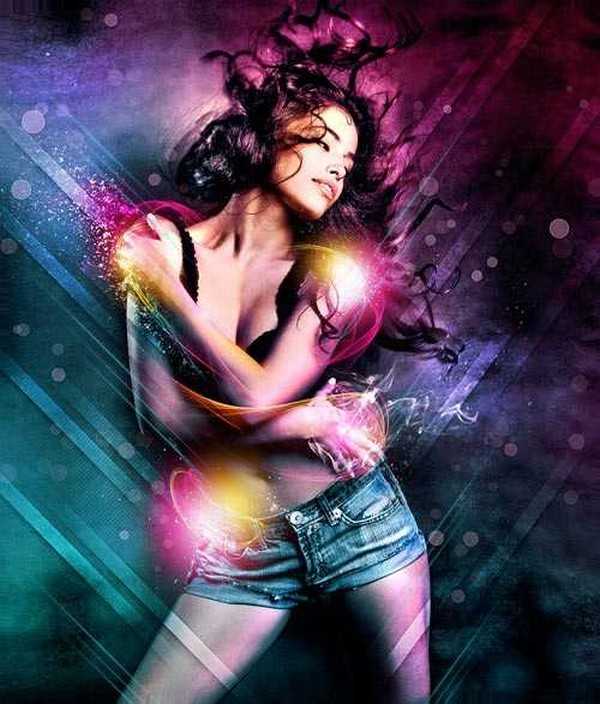
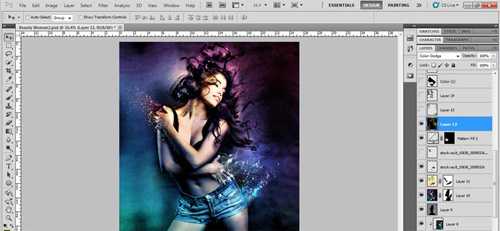
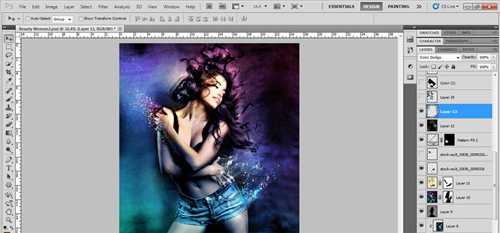
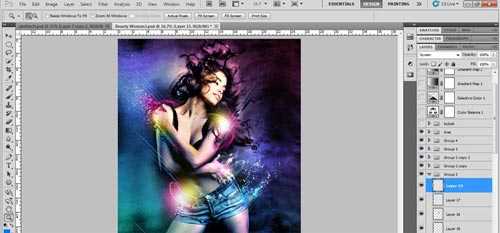
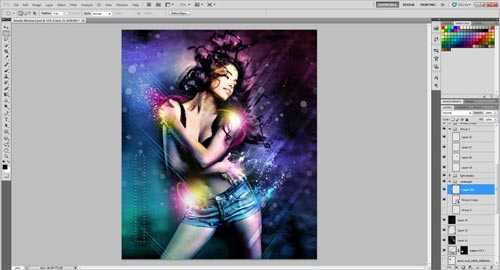
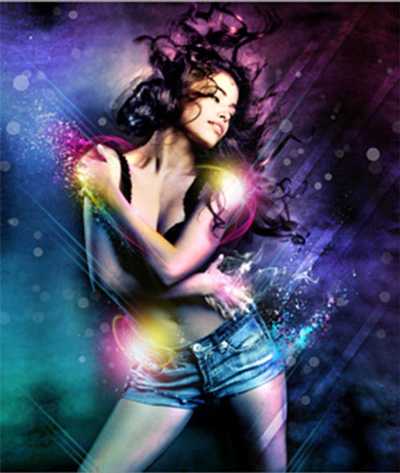
我们先来看看最终的效果图吧:
1.Step
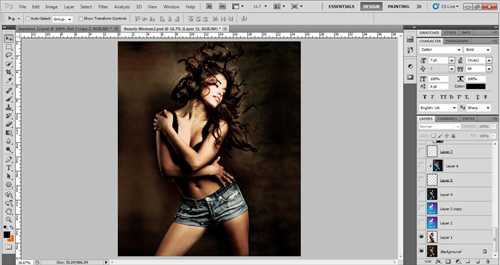
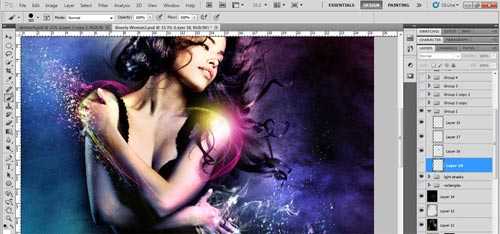
选择一张漂亮的模特图片,我习惯用钢笔工具选中人物,头发使用通道抠图,当然在网上有很多抠图的实用性教程,这里用到的 只是其中的一部分。
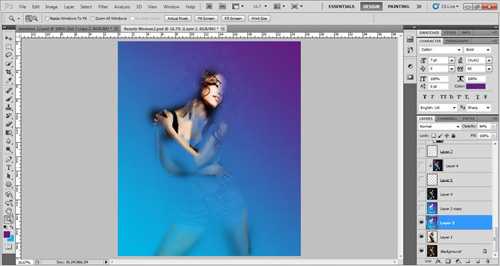
新建图层,制作如图渐变图层;或下载背景图片(推荐网站:Deviantart and Sxc.hu),通过橡皮擦擦出如图效果。
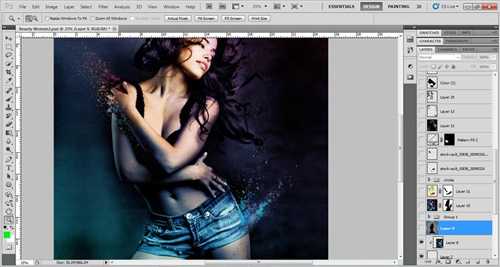
新建图层,选择飞溅笔刷(可以在网站下载),使用笔刷的颜色不做要求,我用的是在 Bittbox网站中下载的高分辨率飞溅笔刷,画出如图效果。将该图层放到盖印复制图层的下方,点击盖印复制图层,Ctrl+Alt+G创建剪贴蒙版,用选择工具进行调整。
4.Step
可以根据自己的喜好在不同的位置做出上面的飞溅式效果,如图所示:
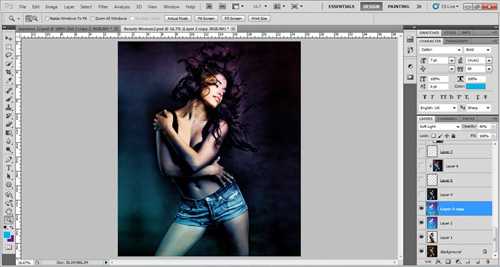
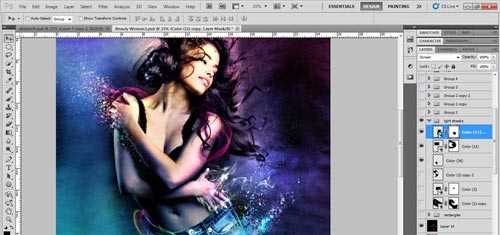
新建图层,填充黑色-混合模式"线性减淡"-不透明度77%,用不同颜色(比如:颜色值#696a70,品红,粉红)的软画笔刷背景,以增加背景的绚丽度。
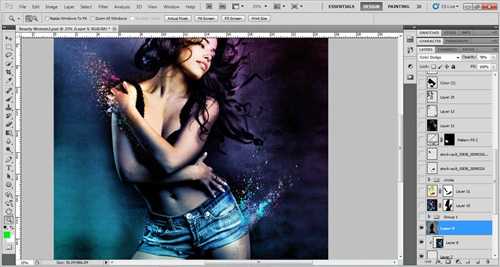
该绚丽背景图层:滤镜->扭曲->波浪,点击"随机化"按钮3-4次,确定。添加图层蒙版,通过画笔擦出理想中的自然效果:
Before layer mask:蒙版之前的效果:
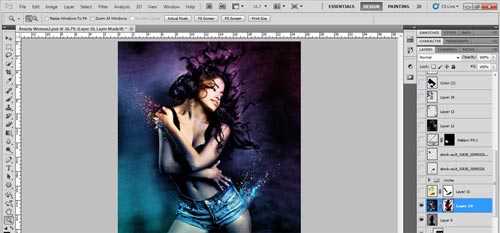

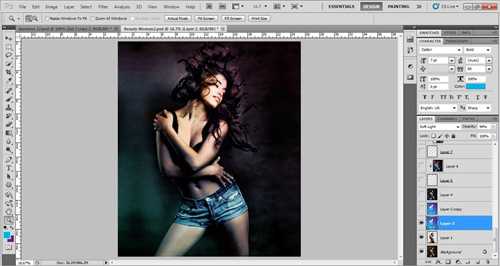
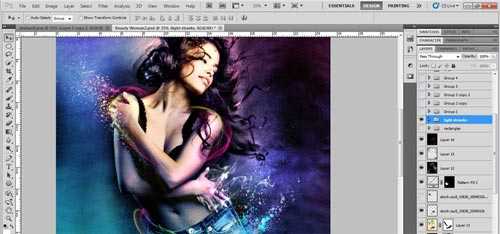
盖印图层,滤镜-风格化- 发光边缘,设置:宽度"3" 边缘亮度"9 "平滑"1"。图像-调整-反相(ctrl+I),混合模式-Multiply 叠加or divide ,降低不透明度为15%,这将呈现出更加强烈的色彩。
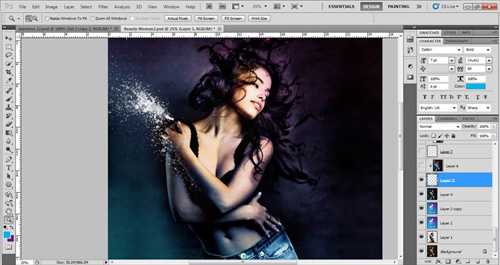
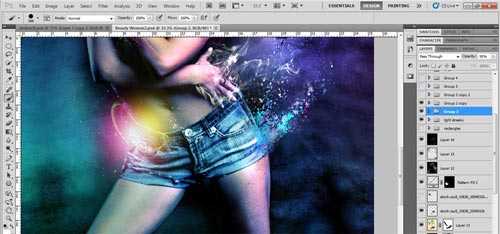
现在在右手的位置添加烟雾效果,我的素材来源于deviantart 和sxc.hu网站。将烟雾素材放到合适的位置,并缩放到合适的大小,"Ctrl+U"去色,"ctrl+L"调整色阶,向右移动黑色滑块。如图所示:
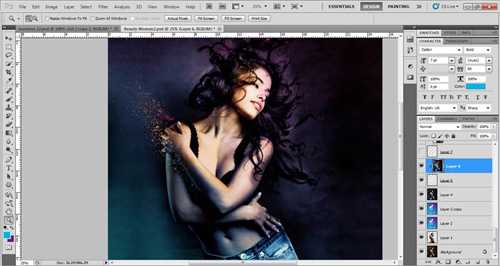
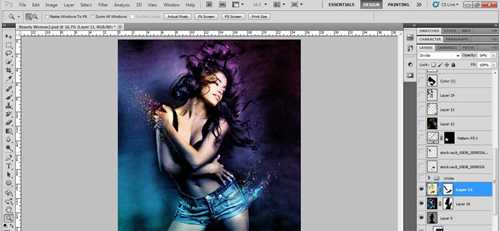
新建图层,椭圆工具绘制半圆,在其内部我选择填充斜线以便和图片整体的运动的趋势保持一致,然后:混合模式-柔光,不透明度22%。效果如下:
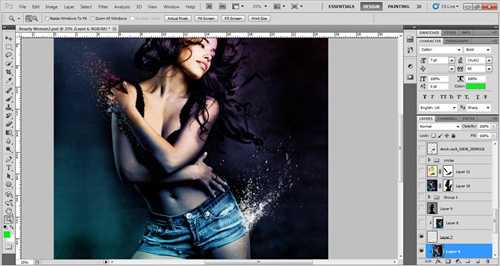
新建图层——填充黑色——混合模式,——颜色减淡——在图层上随意绘制各种颜色(这里选用的颜色值是784c13 4f4e0e 718290)。效果如下:
混合模式to Color dodge用颜色(数值:748694)重复以上的过程,混合模式 颜色减淡.
新建图层—在手部和腿部用颜色(数值4f163b)按下面图层的方式绘制效果。
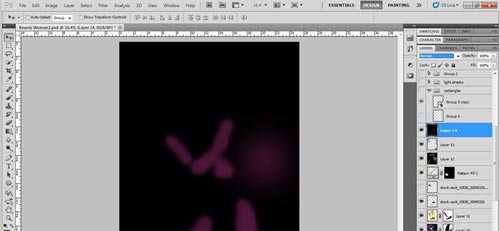
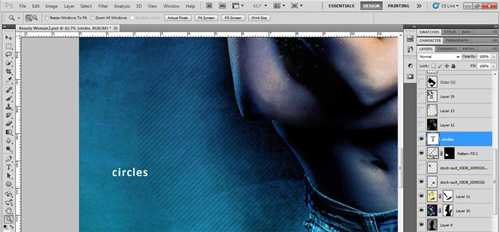
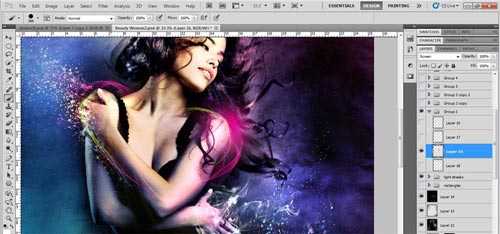
下载如图光线条纹的素材,放在肩部的附近,调整大小——栅格化图层——添加图层蒙版,用画笔涂抹删去不需要的部分,最后改变混合模式。
下面加入黄色,浅蓝色和洋红(色值:ec188f)亮光条纹,形成一个光影效果。新建图层,选软笔刷,流量30-40%,选择合适的混合模式。
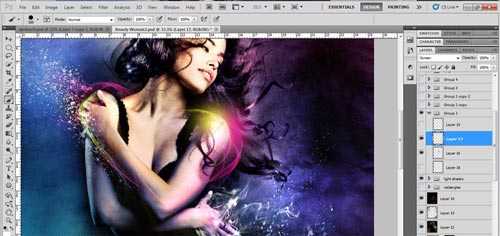
用同样的方法在她的腿和手的附近创建此光炫效果。
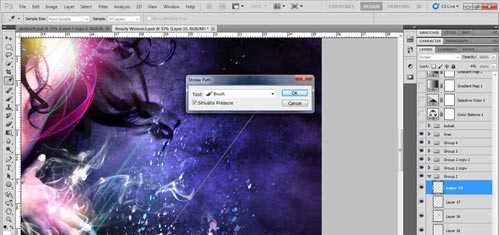
新建图层,设置"笔刷2-5px", 钢笔工具绘制一条斜线,右击,选择"描边路径"——"画笔"——点击"确定"。选择不同的颜色,同样的方法绘制出如图效果。
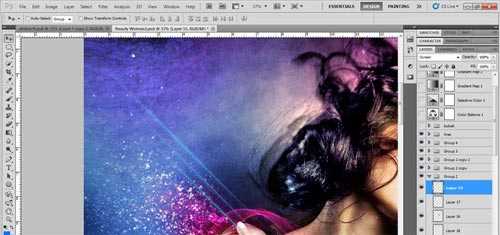
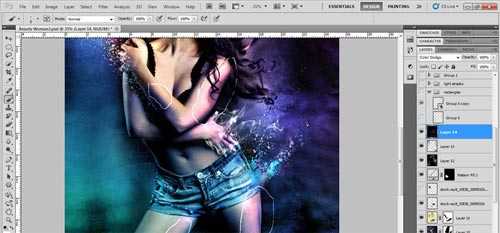
复制以上光线效果,放在模特不同的位置,效果如下:
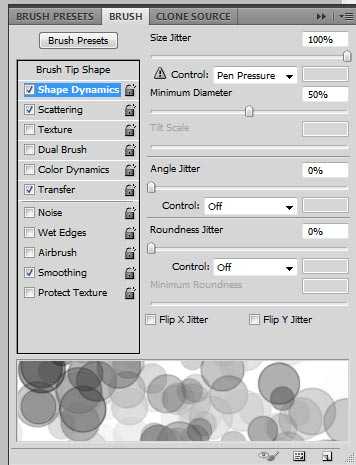
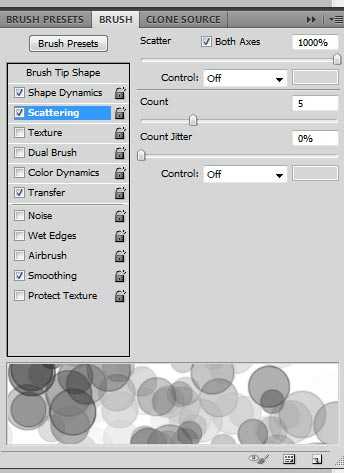
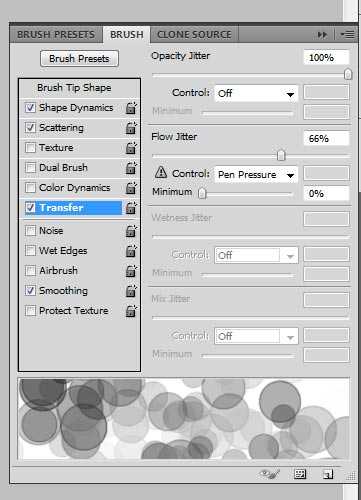
网站上下载一些bokeh 笔刷,F5-画笔—画笔预设—勾选"形状动态(大小抖动100%,最小直径50%)、散布(两轴1000%,数量5)、传递(不透明度100%,流量抖动66%,控制—钢笔压力)、平滑。"
19.Step
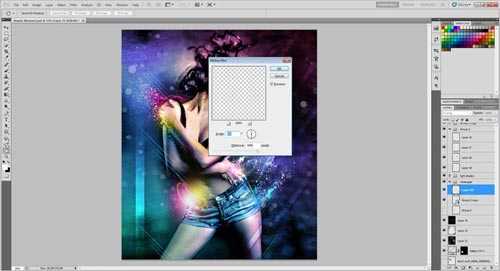
新建图层——选择"矩形选框工具",绘制矩形——填充白色——滤镜——模糊——动感模糊(角度90,距离999);调整混合模式,降低透明度,最后增加阴影效果。如图所示:
"Ctrl + T"旋转矩形45℃或50℃,"Ctrl + J"复制多个矩形,放于图像的角落。如图所示:
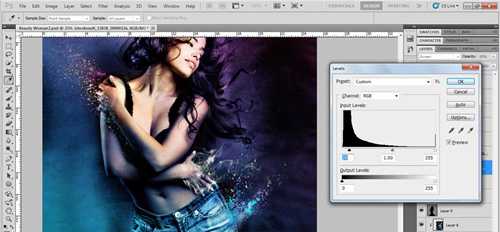
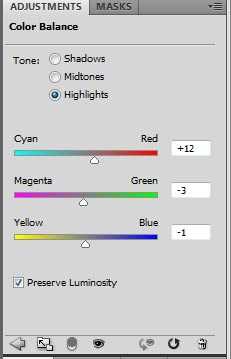
色彩不同的颜色值尝试:图像——调整——色彩平衡(阴影,-9、-13、0,勾选保持明度;中间调,3、-19、3、勾选保持明度;高光,12、-3、1,勾选保持明度)。如图所示:


Make another adjustment layer of selective color and correct reds, yellow,blue, magentas . I experiment with different settings and values.
23.Step
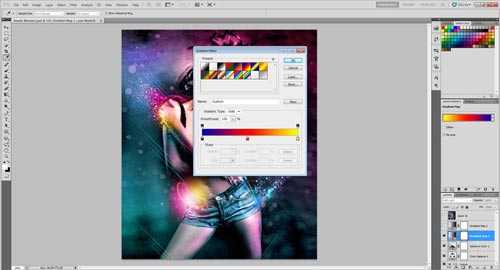
渐变工具——蓝红黄渐变,调整色滑块;混合模式——柔光,不透明度11%。
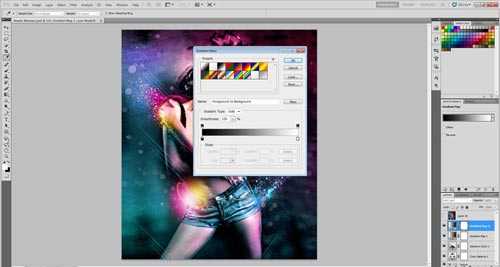
渐变工具——黑白渐变;混合模式——柔光,不透明度16%。
1.Step
选择一张漂亮的模特图片,我习惯用钢笔工具选中人物,头发使用通道抠图,当然在网上有很多抠图的实用性教程,这里用到的 只是其中的一部分。
新建图层,制作如图渐变图层;或下载背景图片(推荐网站:Deviantart and Sxc.hu),通过橡皮擦擦出如图效果。
新建图层,选择飞溅笔刷(可以在网站下载),使用笔刷的颜色不做要求,我用的是在 Bittbox网站中下载的高分辨率飞溅笔刷,画出如图效果。将该图层放到盖印复制图层的下方,点击盖印复制图层,Ctrl+Alt+G创建剪贴蒙版,用选择工具进行调整。
4.Step
可以根据自己的喜好在不同的位置做出上面的飞溅式效果,如图所示:
新建图层,填充黑色-混合模式"线性减淡"-不透明度77%,用不同颜色(比如:颜色值#696a70,品红,粉红)的软画笔刷背景,以增加背景的绚丽度。
该绚丽背景图层:滤镜->扭曲->波浪,点击"随机化"按钮3-4次,确定。添加图层蒙版,通过画笔擦出理想中的自然效果:
Before layer mask:蒙版之前的效果:
盖印图层,滤镜-风格化- 发光边缘,设置:宽度"3" 边缘亮度"9 "平滑"1"。图像-调整-反相(ctrl+I),混合模式-Multiply 叠加or divide ,降低不透明度为15%,这将呈现出更加强烈的色彩。
现在在右手的位置添加烟雾效果,我的素材来源于deviantart 和sxc.hu网站。将烟雾素材放到合适的位置,并缩放到合适的大小,"Ctrl+U"去色,"ctrl+L"调整色阶,向右移动黑色滑块。如图所示:
新建图层,椭圆工具绘制半圆,在其内部我选择填充斜线以便和图片整体的运动的趋势保持一致,然后:混合模式-柔光,不透明度22%。效果如下:
新建图层——填充黑色——混合模式,——颜色减淡——在图层上随意绘制各种颜色(这里选用的颜色值是784c13 4f4e0e 718290)。效果如下:
混合模式to Color dodge用颜色(数值:748694)重复以上的过程,混合模式 颜色减淡.
新建图层—在手部和腿部用颜色(数值4f163b)按下面图层的方式绘制效果。
下载如图光线条纹的素材,放在肩部的附近,调整大小——栅格化图层——添加图层蒙版,用画笔涂抹删去不需要的部分,最后改变混合模式。
下面加入黄色,浅蓝色和洋红(色值:ec188f)亮光条纹,形成一个光影效果。新建图层,选软笔刷,流量30-40%,选择合适的混合模式。
用同样的方法在她的腿和手的附近创建此光炫效果。
新建图层,设置"笔刷2-5px", 钢笔工具绘制一条斜线,右击,选择"描边路径"——"画笔"——点击"确定"。选择不同的颜色,同样的方法绘制出如图效果。
复制以上光线效果,放在模特不同的位置,效果如下:
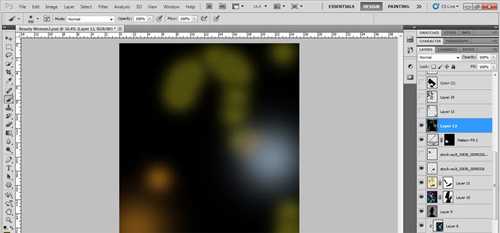
网站上下载一些bokeh 笔刷,F5-画笔—画笔预设—勾选"形状动态(大小抖动100%,最小直径50%)、散布(两轴1000%,数量5)、传递(不透明度100%,流量抖动66%,控制—钢笔压力)、平滑。"
19.Step
新建图层——选择"矩形选框工具",绘制矩形——填充白色——滤镜——模糊——动感模糊(角度90,距离999);调整混合模式,降低透明度,最后增加阴影效果。如图所示:
"Ctrl + T"旋转矩形45℃或50℃,"Ctrl + J"复制多个矩形,放于图像的角落。如图所示:
色彩不同的颜色值尝试:图像——调整——色彩平衡(阴影,-9、-13、0,勾选保持明度;中间调,3、-19、3、勾选保持明度;高光,12、-3、1,勾选保持明度)。如图所示:
Make another adjustment layer of selective color and correct reds, yellow,blue, magentas . I experiment with different settings and values.
23.Step
渐变工具——蓝红黄渐变,调整色滑块;混合模式——柔光,不透明度11%。
渐变工具——黑白渐变;混合模式——柔光,不透明度16%。