photoshop快速将偏暗的森林图片打造迷人的霞光色
平面设计 发布日期:2026/5/20 浏览次数:1
正在浏览:photoshop快速将偏暗的森林图片打造迷人的霞光色
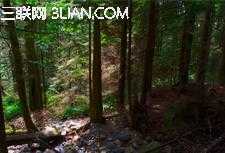
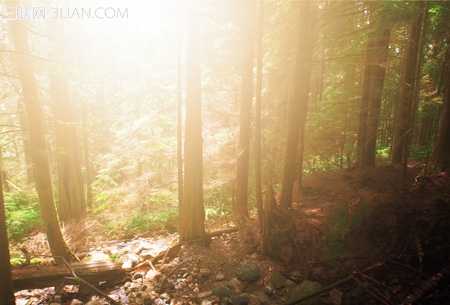
教程效果图

首先,在Photoshop中打开您需要的图片。您可以在"文件"菜单中选择"打开…"。如果您手头没有能用的照片,您可以
点击此处下载本教程所用的照片。
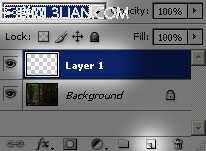
在图层面板,点击"创建新图层"。然后将Layer 1的混合模式改为滤色。
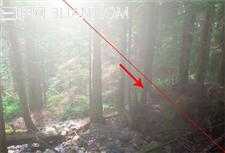
先将前景色设置为白色。您可以选择使用快捷键,先后摁下键盘d和x。接下来在左侧工具栏中选择渐变工具,使用径向渐变效果(默认的是线性渐变)。模拟太阳发光的效果,用鼠标划出一道线条。当然,您可以撤销操作多试几次,直到光线看起来无比自然。
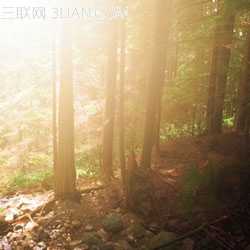
好了,现在我们要添加一个照片滤镜调整层。去"图层"→"新建调整图层"→"照片滤镜"。使用默认设置,不透明度设为100%。
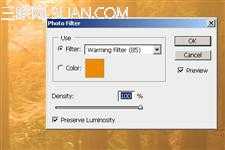
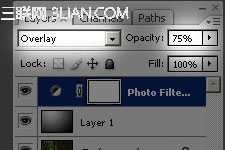
如果需要的话,改混合模式为叠加,并降低不透明度。
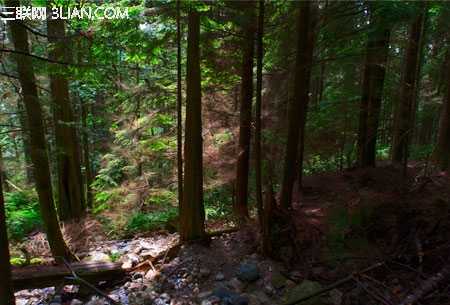
原图
首先,在Photoshop中打开您需要的图片。您可以在"文件"菜单中选择"打开…"。如果您手头没有能用的照片,您可以
点击此处下载本教程所用的照片。
在图层面板,点击"创建新图层"。然后将Layer 1的混合模式改为滤色。
先将前景色设置为白色。您可以选择使用快捷键,先后摁下键盘d和x。接下来在左侧工具栏中选择渐变工具,使用径向渐变效果(默认的是线性渐变)。模拟太阳发光的效果,用鼠标划出一道线条。当然,您可以撤销操作多试几次,直到光线看起来无比自然。
好了,现在我们要添加一个照片滤镜调整层。去"图层"→"新建调整图层"→"照片滤镜"。使用默认设置,不透明度设为100%。
如果需要的话,改混合模式为叠加,并降低不透明度。
原图