Photoshop快速修复人物脸部局部过曝的肤色
平面设计 发布日期:2026/6/13 浏览次数:1
正在浏览:Photoshop快速修复人物脸部局部过曝的肤色
图片局部过曝是非常常见的,修复的方法有很多,下面介绍一种最为快捷的。过程:先用色彩范围等把过曝的区域选取出来,把选区适当羽化后再用照片滤镜等调色工具校正即可。
原图

最终效果

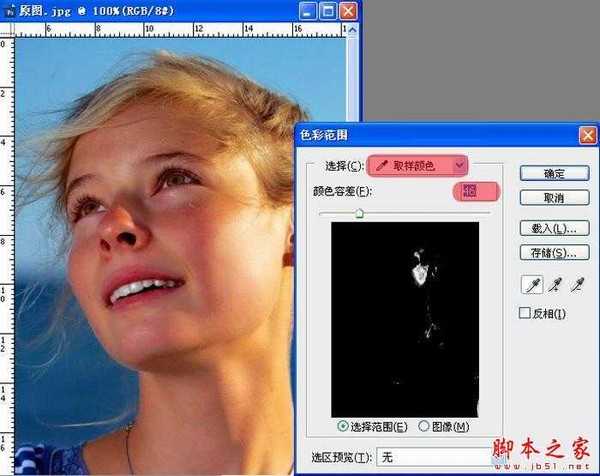
1、选择高光光斑范围,我觉得还是用色彩范围进行选择比较好一点。
撒开素材图片,选择菜单:选择/色彩范围,用取样工具点脸部高光,根据高光范围调整颜色容差。
2、通过色彩范围,建立了选区,最好进行一下羽化,目的是使过渡自然。

3、图像/调整/照片滤镜,选择“颜色”,把“保持明度”勾去掉,再调整好“浓度”,具体调多少浓度,看预览。颜色可以自动进行自定义,如果是皮肤,可以选择正常肤色作为目标色。


最终效果:

原图
最终效果
1、选择高光光斑范围,我觉得还是用色彩范围进行选择比较好一点。
撒开素材图片,选择菜单:选择/色彩范围,用取样工具点脸部高光,根据高光范围调整颜色容差。
2、通过色彩范围,建立了选区,最好进行一下羽化,目的是使过渡自然。
3、图像/调整/照片滤镜,选择“颜色”,把“保持明度”勾去掉,再调整好“浓度”,具体调多少浓度,看预览。颜色可以自动进行自定义,如果是皮肤,可以选择正常肤色作为目标色。
最终效果: