Photoshop快速为偏暗的美女照片美白
平面设计 发布日期:2026/6/26 浏览次数:1
正在浏览:Photoshop快速为偏暗的美女照片美白
我们拍出的照片往往由于光线不足,致使人物皮肤偏暗,在Photoshop中怎样为人物美白呢?今天为大家带来一篇小的人物美白教程,简单却实用。只需简单的三步,我们来学习一下吧,希望你会喜欢。
第1步:
在Photoshop中Ctrl+O打开需要处理的图片。Ctrl+J复制一层。

第2步:
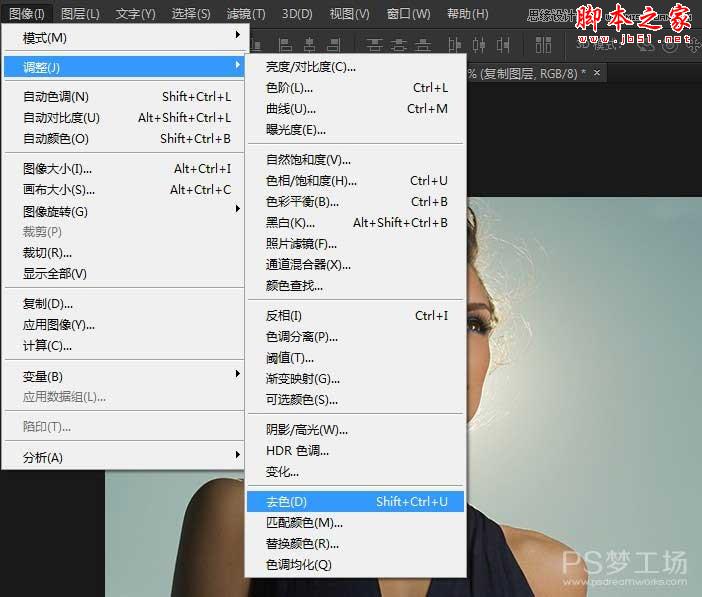
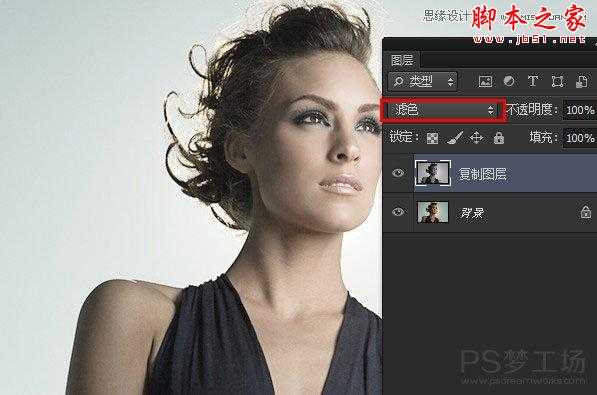
执行菜单图像>调整>去色(Shift+Ctrl+U)命令。并将此图层混合模式设置为滤色。
第3步:
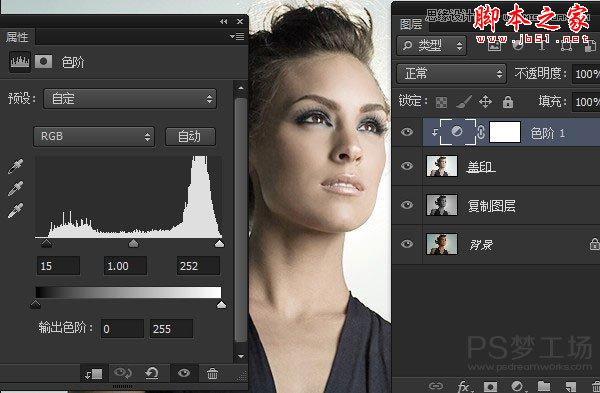
Ctrl+Shift+Alt+E进行盖印图层,即将所有可见图层合并成为一个新层。为其添加色阶调整层。
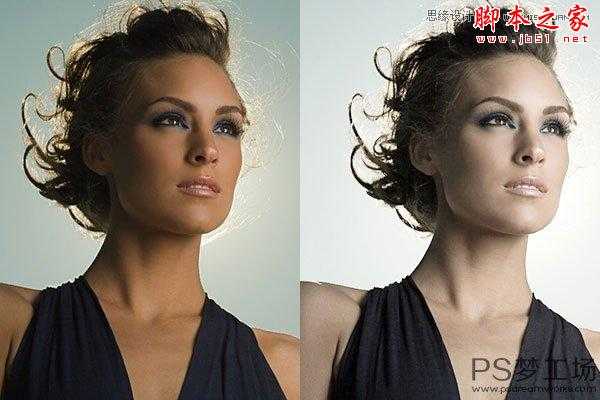
OK,图像处理好了,看看效果吧。
第1步:
在Photoshop中Ctrl+O打开需要处理的图片。Ctrl+J复制一层。
第2步:
执行菜单图像>调整>去色(Shift+Ctrl+U)命令。并将此图层混合模式设置为滤色。
第3步:
Ctrl+Shift+Alt+E进行盖印图层,即将所有可见图层合并成为一个新层。为其添加色阶调整层。
OK,图像处理好了,看看效果吧。