Photoshop将草地上的人物调制出淡美的阳光色
平面设计 发布日期:2026/1/20 浏览次数:1
正在浏览:Photoshop将草地上的人物调制出淡美的阳光色
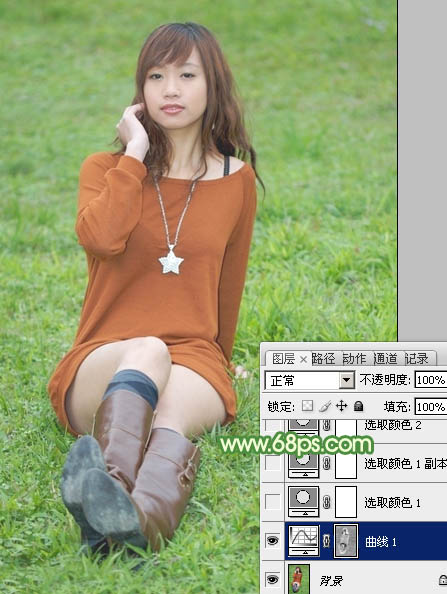
阳光色重点是高光的把握,调色过程也非常简单:先把图片整体颜色调淡,高光部分增加一些暖色,然后选择一个合适的角度加上类似阳光的高光即可。
原图

最终效果

1、打开素材图片,按Ctrl + Alt + 2 调出高光选区,按Ctrl + Shift + I 反选,然后创建曲线调整图层,对RGB,蓝色通道进行调整,参数设置如图1,效果如图2。这一步主要增加图片暗部亮度。

<图1>

<图2>
2、创建可选颜色调整图层,对红、黄、绿进行调整,暗色设置如图3 - 5,效果如图6。这一步给草地增加淡黄色。

<图3>

<图4>

<图5>

<图6>
3、按Ctrl + J 把当前可选颜色调整图层复制一层,不透明度改为:50%,效果如下图。

<图7>
4、创建可选颜色调整图层,对红、绿、白、黑进行调整,参数设置如图8 - 11,效果如图12。这一步主要把图片中的绿色调淡。

<图8>

<图9>

<图10>

<图11>

<图12>
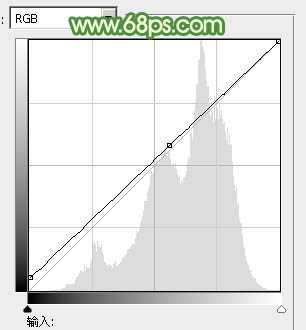
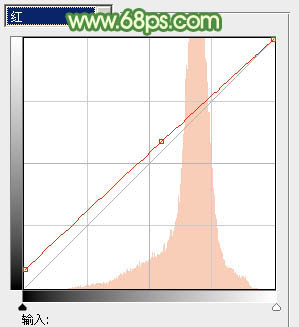
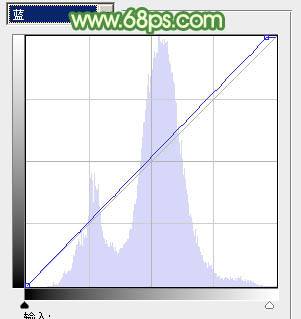
5、创建曲线调整图层,对RGB、红、绿、蓝各通道进行调整,参数设置如图13 - 16,效果如图17。这一步主要给图片增加黄褐色。

<图13>

<图14>

<图15>

<图16>
上一页12 下一页 阅读全文
原图

最终效果

1、打开素材图片,按Ctrl + Alt + 2 调出高光选区,按Ctrl + Shift + I 反选,然后创建曲线调整图层,对RGB,蓝色通道进行调整,参数设置如图1,效果如图2。这一步主要增加图片暗部亮度。

<图1>

<图2>
2、创建可选颜色调整图层,对红、黄、绿进行调整,暗色设置如图3 - 5,效果如图6。这一步给草地增加淡黄色。

<图3>

<图4>

<图5>

<图6>
3、按Ctrl + J 把当前可选颜色调整图层复制一层,不透明度改为:50%,效果如下图。

<图7>
4、创建可选颜色调整图层,对红、绿、白、黑进行调整,参数设置如图8 - 11,效果如图12。这一步主要把图片中的绿色调淡。

<图8>

<图9>

<图10>

<图11>

<图12>
5、创建曲线调整图层,对RGB、红、绿、蓝各通道进行调整,参数设置如图13 - 16,效果如图17。这一步主要给图片增加黄褐色。

<图13>

<图14>

<图15>

<图16>
上一页12 下一页 阅读全文