Photoshop快速为多斑的人物图片修复美白
平面设计 发布日期:2026/6/23 浏览次数:1
正在浏览:Photoshop快速为多斑的人物图片修复美白
首先,我们一起来看看PS处理前后的对比效果图:
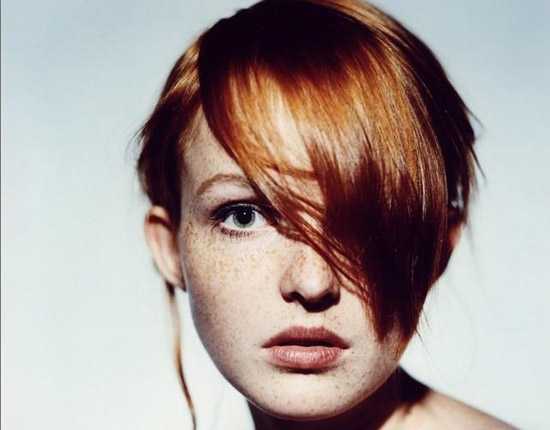
原图:
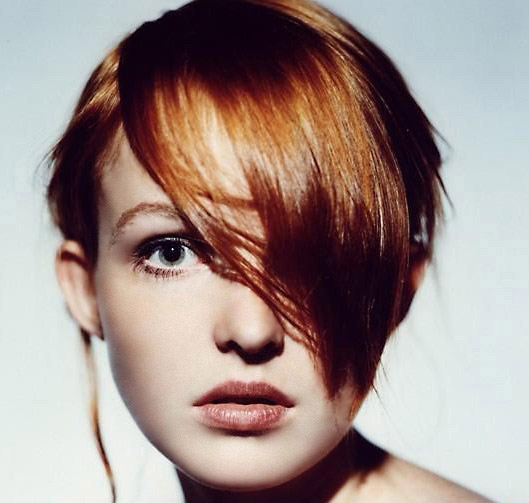
效果图:
具体步骤如下:
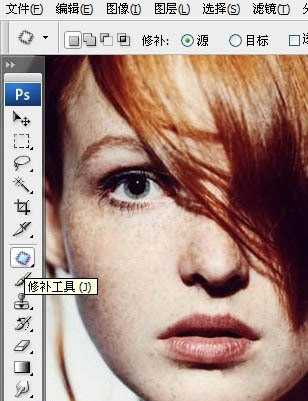
步骤一、首先利用PS软件打开原图,然后按下键盘的【CTRL+ +】使图片放大,接着选择工具箱中的修复工具来修复比较大的色斑,如图所示:
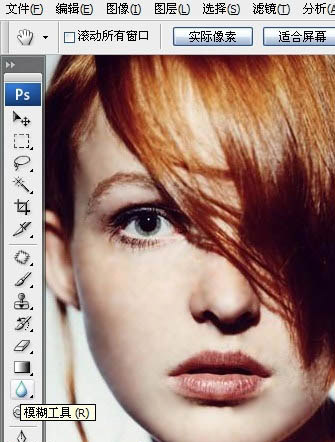
步骤二、接着选择工具箱中的模糊工具使人物的脸部进行模糊,这样脸部效果就出来了,如图所示:
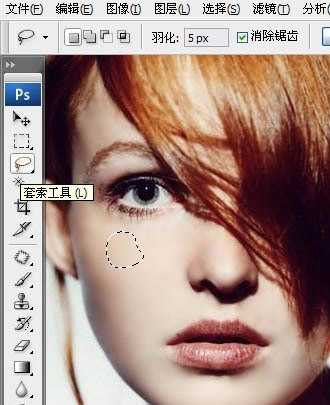
步骤三、选择工具箱中的套索工具,在脸部选择一些比较接近的色斑,然后进行羽化,羽化值自己设定,接着在使用高斯模糊进行处理,将得到如下效果:
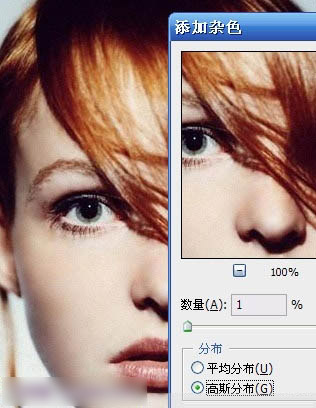
步骤四、接着选择刚才的图层,然后按下键盘的【CTRL+J】进行复制,得到一个图层,然后点击菜单栏中的滤镜杂色添加杂色,设置半径为1,选择高斯模糊,如图所示:
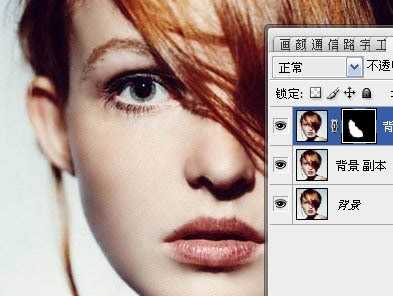
步骤五、接着在添加图层蒙版,添加之后,我们利用工具箱中的画笔工具设置前景色为黑色进行涂抹,如图所示:
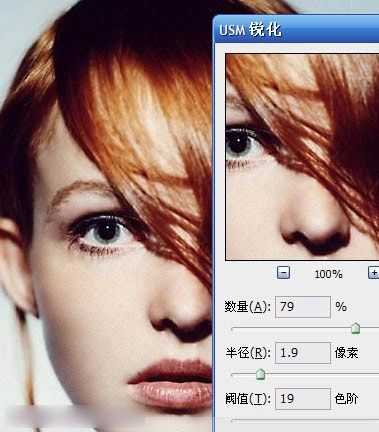
步骤六、再新建一个图层,然后按下键盘的【CTRL+ALT+SHIFT+E】进行盖印图层,然后选择菜单栏中的滤镜锐化USM锐化处理,在弹出的界面中设置参数为79 1.9 19,如图所示:
最后,我们就得到很好的效果:
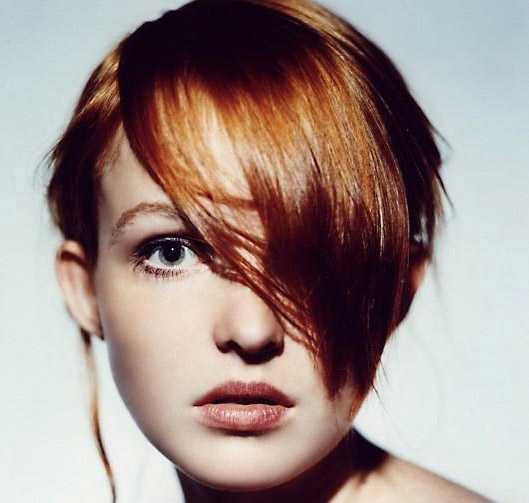
原图:
效果图:
具体步骤如下:
步骤一、首先利用PS软件打开原图,然后按下键盘的【CTRL+ +】使图片放大,接着选择工具箱中的修复工具来修复比较大的色斑,如图所示:
步骤二、接着选择工具箱中的模糊工具使人物的脸部进行模糊,这样脸部效果就出来了,如图所示:
步骤三、选择工具箱中的套索工具,在脸部选择一些比较接近的色斑,然后进行羽化,羽化值自己设定,接着在使用高斯模糊进行处理,将得到如下效果:
步骤四、接着选择刚才的图层,然后按下键盘的【CTRL+J】进行复制,得到一个图层,然后点击菜单栏中的滤镜杂色添加杂色,设置半径为1,选择高斯模糊,如图所示:
步骤五、接着在添加图层蒙版,添加之后,我们利用工具箱中的画笔工具设置前景色为黑色进行涂抹,如图所示:
步骤六、再新建一个图层,然后按下键盘的【CTRL+ALT+SHIFT+E】进行盖印图层,然后选择菜单栏中的滤镜锐化USM锐化处理,在弹出的界面中设置参数为79 1.9 19,如图所示:
最后,我们就得到很好的效果: