Photoshop使用滤镜清除淡化严重雀斑技巧
平面设计 发布日期:2026/6/20 浏览次数:1
正在浏览:Photoshop使用滤镜清除淡化严重雀斑技巧
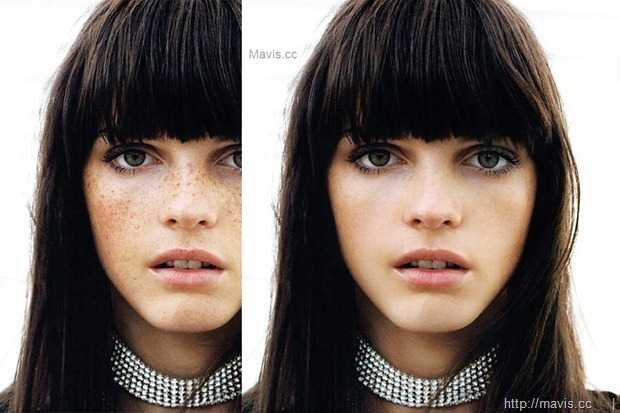
 修复笔刷工具完成,但是遇到严重的斑点问题是不是会忍不住觉得传统方法过于麻烦呢?这里教你同时处理所有雀斑问题。
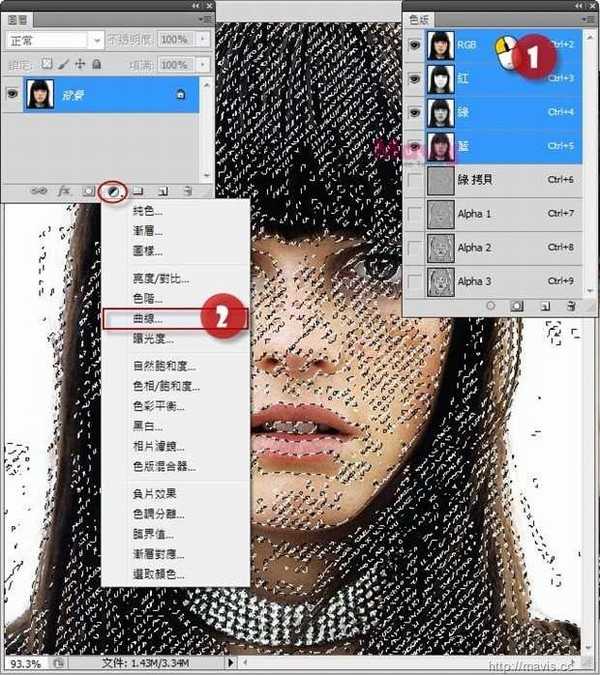
打开色版,复制绿色色版(拖曳到新增图示后放开)。

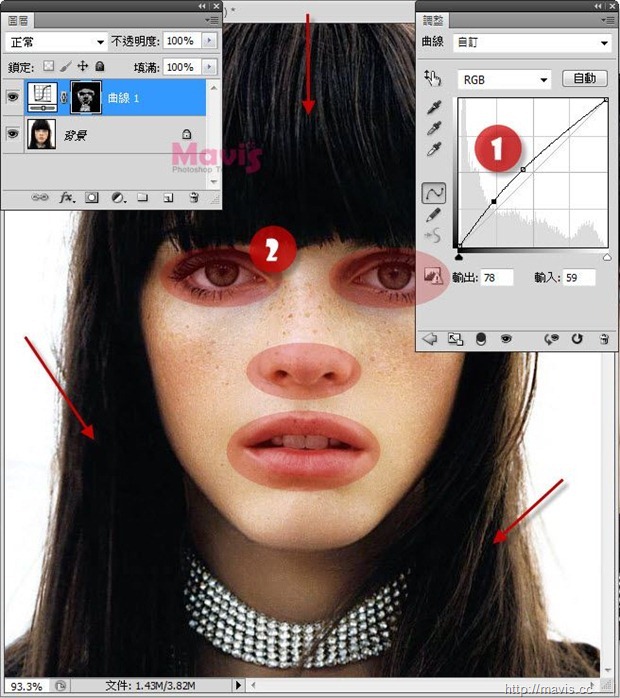
 笔刷还原五官、头发和背景等非脸部部位。
CTRL+SHIFT+ALT+E盖印图层,使用 修复笔刷工具清除剩下的雀斑,这样就完成了。

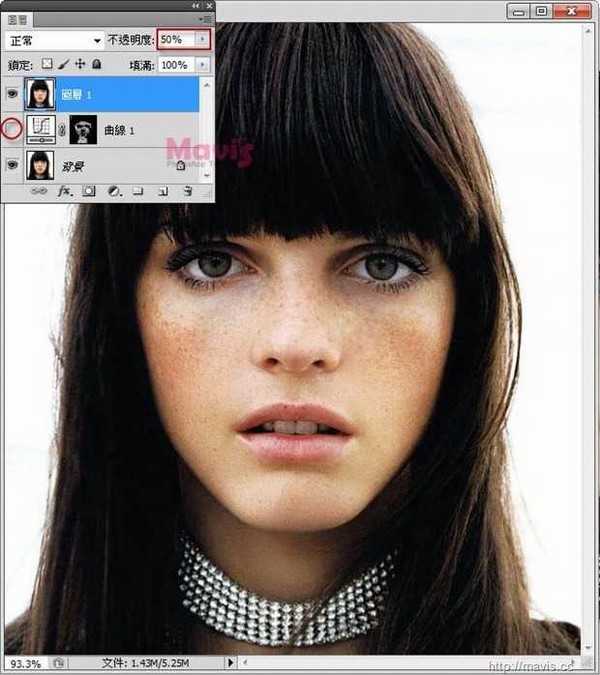
不过雀斑其实是一个人的特色,不一定要完全清除才是好看的,你可以选择淡化就好(关闭曲线眼睛,降低不透明度)。
修复笔刷工具完成,但是遇到严重的斑点问题是不是会忍不住觉得传统方法过于麻烦呢?这里教你同时处理所有雀斑问题。打开色版,复制绿色色版(拖曳到新增图示后放开)。
笔刷还原五官、头发和背景等非脸部部位。CTRL+SHIFT+ALT+E盖印图层,使用
修复笔刷工具清除剩下的雀斑,这样就完成了。 最终效果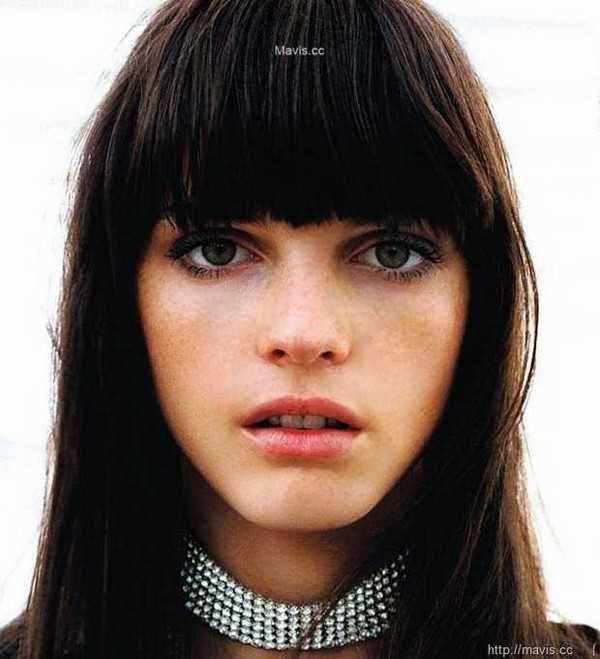
更多素材请点击 psd素材免费下载