Photoshop设计制作出精致的水晶红苹果
平面设计 发布日期:2026/4/11 浏览次数:1
正在浏览:Photoshop设计制作出精致的水晶红苹果
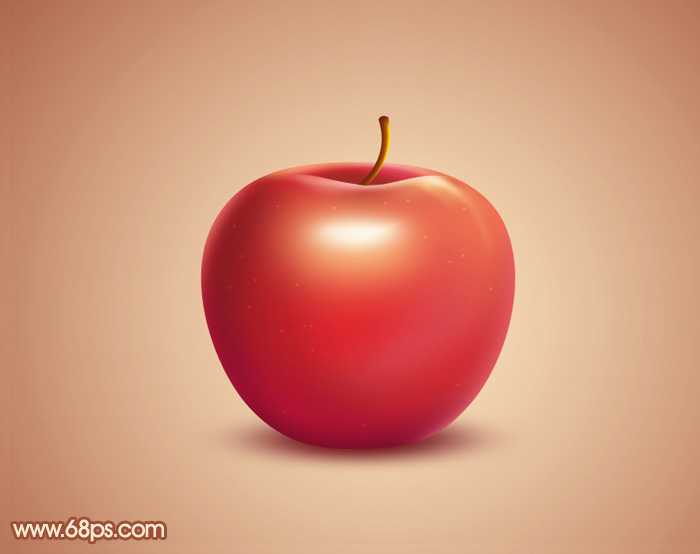
最终效果
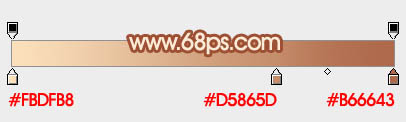
1、新建一个800 * 600像素的文件,选择渐变工具,颜色设置如图1,拉出图2所示的径向渐变作为背景。
<图1>

<图2>
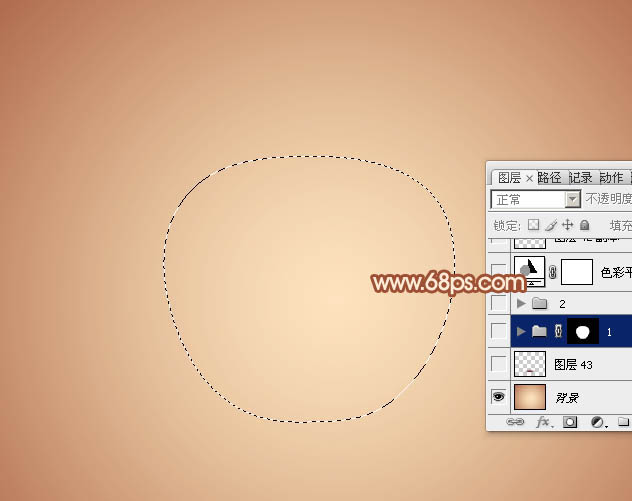
2、新建一个组,用钢笔勾出苹果的轮廓路径,转为选区后给组添加蒙版,如下图。
<图3>
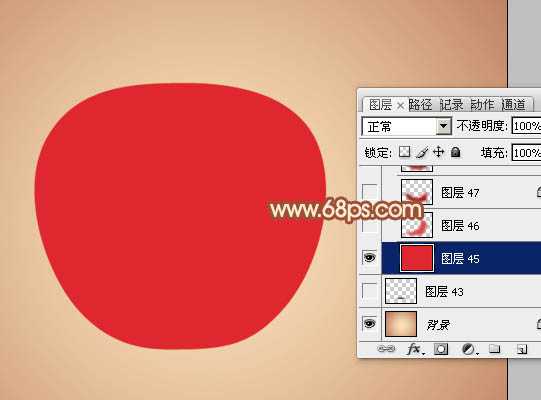
3、在组里新建一个图层,填充红色:#DF272E,如下图。
<图4>
4、新建一个图层用钢笔勾出下图所示的选区,羽化25个像素后填充红色:#DB494F,如下图。
<图5>
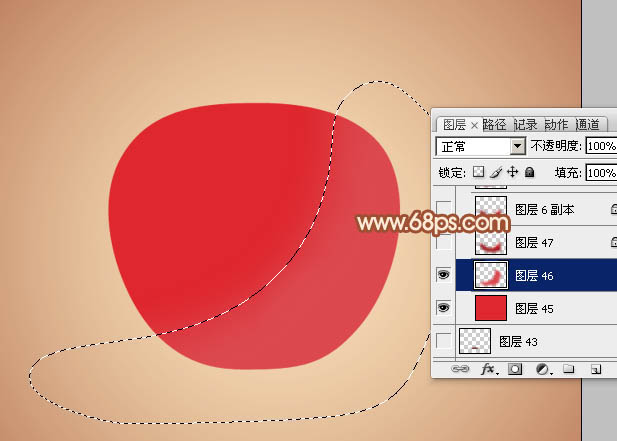
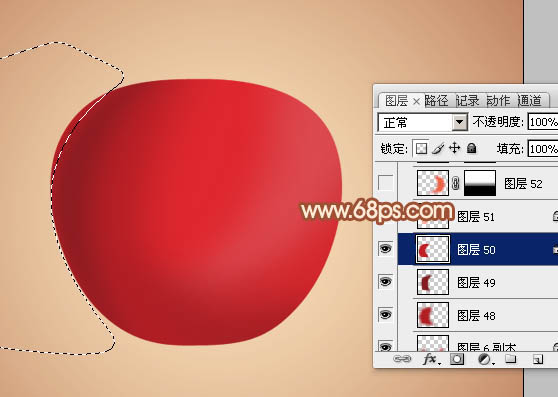
5、新建一个图层,用钢笔勾出底部暗部区域选区,羽化20个像素后填充暗红色。
<图6>
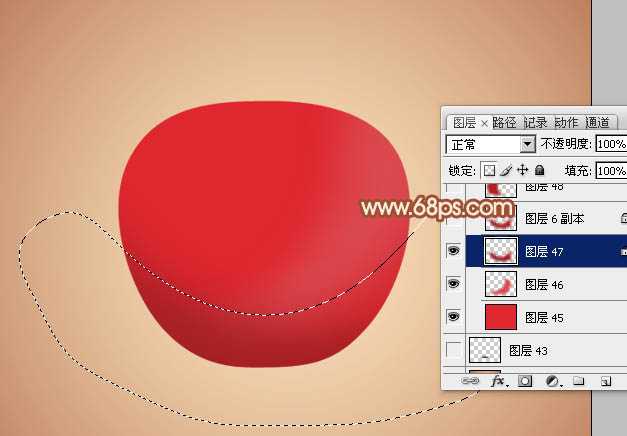
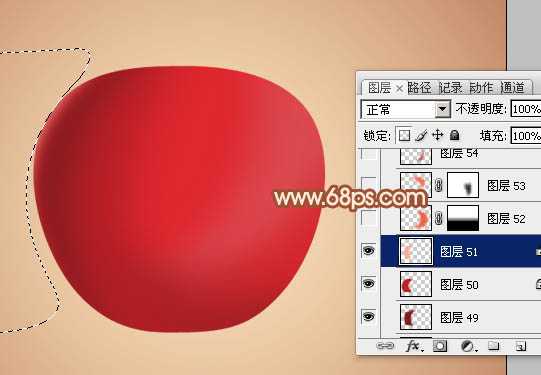
6、新建一个图层,用钢笔勾出左侧暗部选区,羽化20个像素后填充暗红色。
<图7>
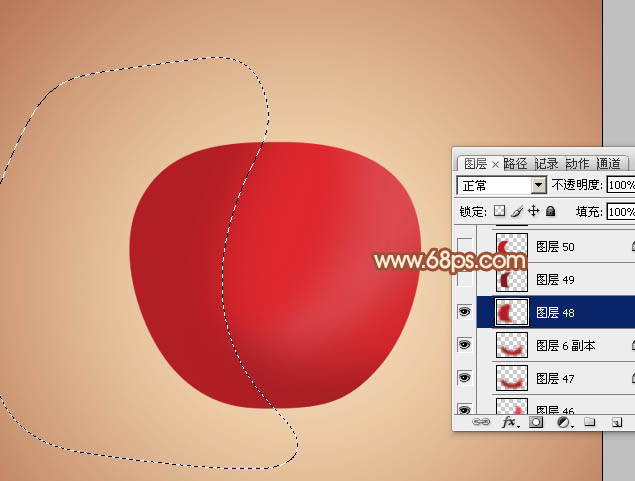
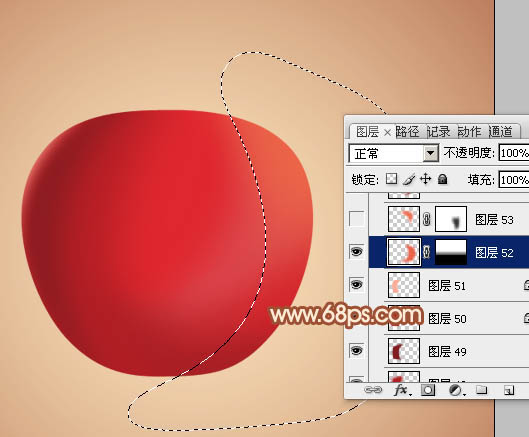
7、新建一个图层,用钢笔勾出左侧边缘部分的暗部选区,羽化15个像素后填充稍深的暗红色。
<图8>
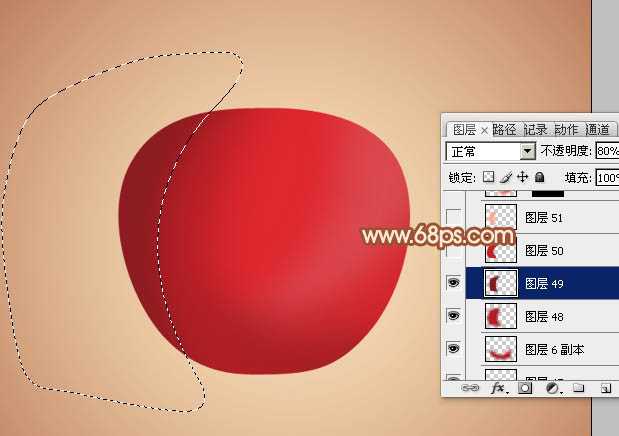
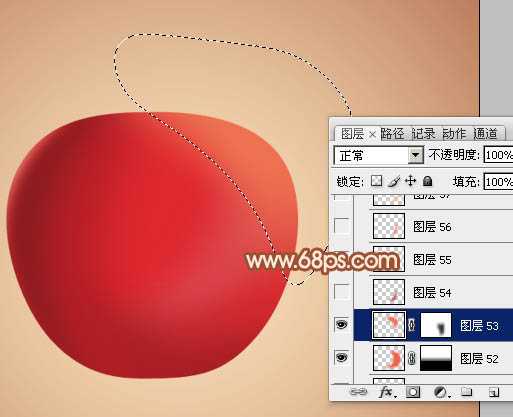
8、新建一个图层,用钢笔勾出左侧边缘的反光选区,羽化6个像素后填充橙红色。
<图9>
9、新建一个图层,同上的方法给左侧的反光部分增加一些淡红色。
<图10>
10、新建一个图层,用钢笔勾出右侧部分的高光选区,羽化20个像素后填充橙红色,取消选区后添加图层蒙版,用黑色画笔把底部过渡擦出来,如下图。
<图11>
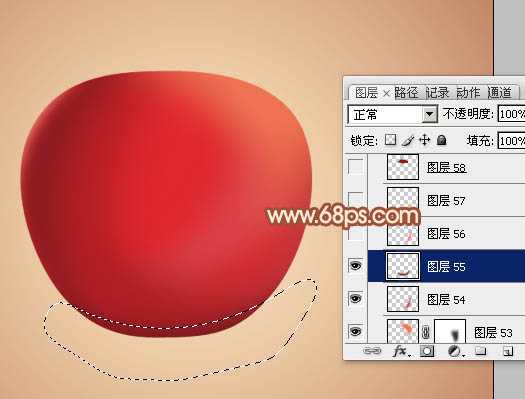
11、新建一个图层,用钢笔勾出右上部的高光选区,羽化15个像素后填充稍亮的橙红色。
<图12>
12、新建一个图层,用钢笔勾出右下角部分的暗部选区,羽化8个像素后填充暗红色。
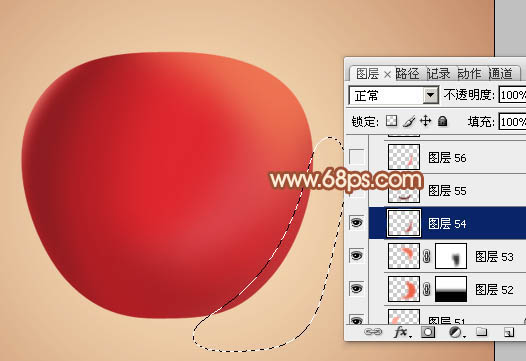
<图13>
13、新建一个图层,用钢笔勾出底部边缘的暗部选区,羽化8个像素后填充较深的暗红色。
<图14>
上一页12 下一页 阅读全文
1、新建一个800 * 600像素的文件,选择渐变工具,颜色设置如图1,拉出图2所示的径向渐变作为背景。
<图1>
<图2>
2、新建一个组,用钢笔勾出苹果的轮廓路径,转为选区后给组添加蒙版,如下图。
<图3>
3、在组里新建一个图层,填充红色:#DF272E,如下图。
<图4>
4、新建一个图层用钢笔勾出下图所示的选区,羽化25个像素后填充红色:#DB494F,如下图。
<图5>
5、新建一个图层,用钢笔勾出底部暗部区域选区,羽化20个像素后填充暗红色。
<图6>
6、新建一个图层,用钢笔勾出左侧暗部选区,羽化20个像素后填充暗红色。
<图7>
7、新建一个图层,用钢笔勾出左侧边缘部分的暗部选区,羽化15个像素后填充稍深的暗红色。
<图8>
8、新建一个图层,用钢笔勾出左侧边缘的反光选区,羽化6个像素后填充橙红色。
<图9>
9、新建一个图层,同上的方法给左侧的反光部分增加一些淡红色。
<图10>
10、新建一个图层,用钢笔勾出右侧部分的高光选区,羽化20个像素后填充橙红色,取消选区后添加图层蒙版,用黑色画笔把底部过渡擦出来,如下图。
<图11>
11、新建一个图层,用钢笔勾出右上部的高光选区,羽化15个像素后填充稍亮的橙红色。
<图12>
12、新建一个图层,用钢笔勾出右下角部分的暗部选区,羽化8个像素后填充暗红色。
<图13>
13、新建一个图层,用钢笔勾出底部边缘的暗部选区,羽化8个像素后填充较深的暗红色。
<图14>
上一页12 下一页 阅读全文