Photoshop为人物头像调制出绚丽的红色彩妆效果
平面设计 发布日期:2026/6/30 浏览次数:1
正在浏览:Photoshop为人物头像调制出绚丽的红色彩妆效果
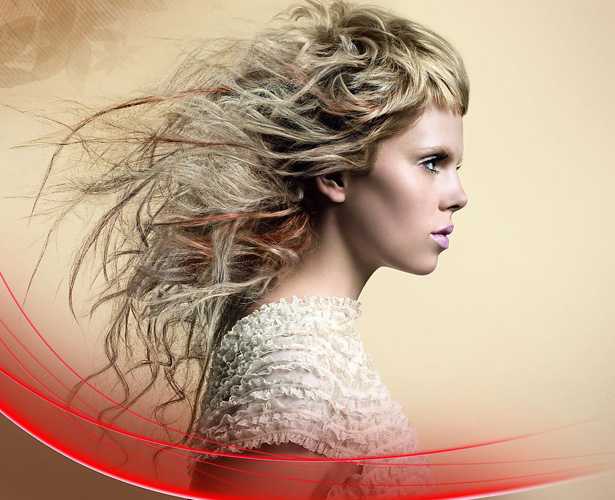
原图
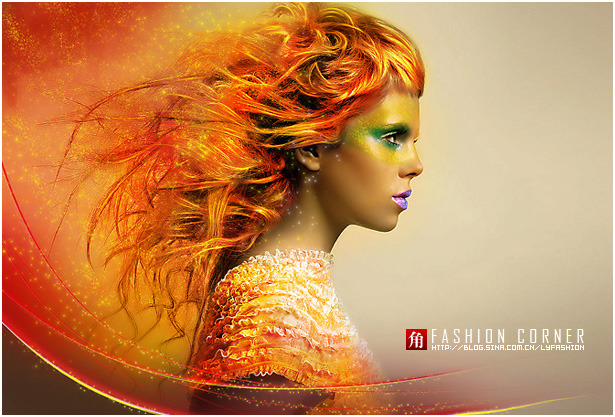
最终效果
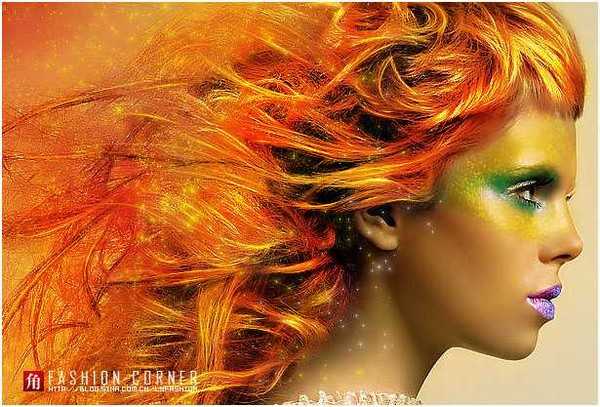
局部放大
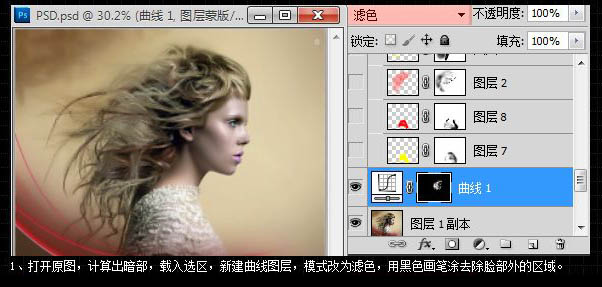
1、打开原图,计算出暗部,载入选区,新建曲线调整图层,不需要调整然后确认,把混合模式改为“滤色”,用黑色画笔涂去脸部外的区域。
2、新建一个空白图层,选择柔角画笔,用黄色在衣服部分涂出如下图区域。涂好后把图层混合模式改为“叠加”,不透明度改为:70%。
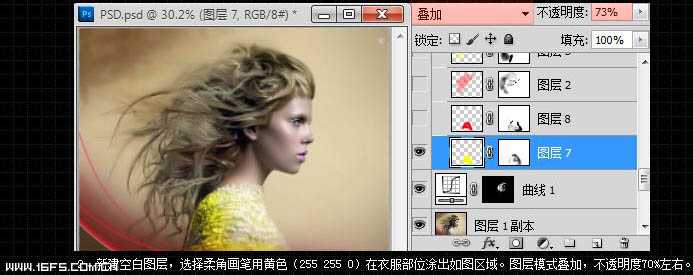
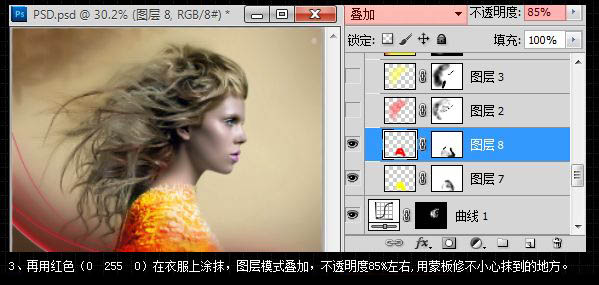
3、新建一个图层,再用红色在衣服上涂抹,图层模式改为“叠加”,不透明度改为:85%,用蒙版修不小心抹到的地方。
4、新建一个图层,用红色在头发上涂抹,注意改变画笔的不透明度,模式为“叠加”,用蒙版修补小心抹到的地方。

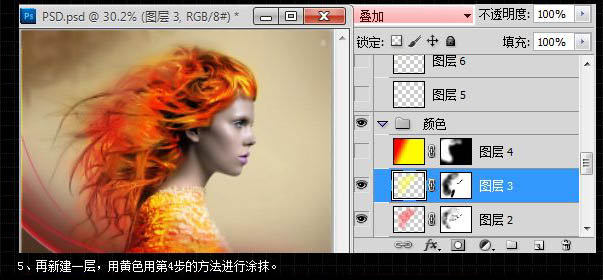
5、新建一个图层,用黄色同第四步方法进行涂抹。
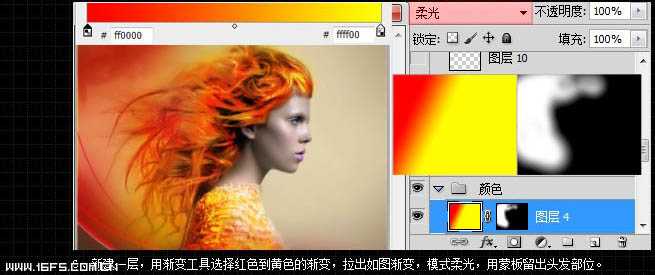
6、新建一个图层,用渐变工具选择红色到黄色的渐变,拉出如图渐变,模式为“柔光”,用蒙版留出头发部位。
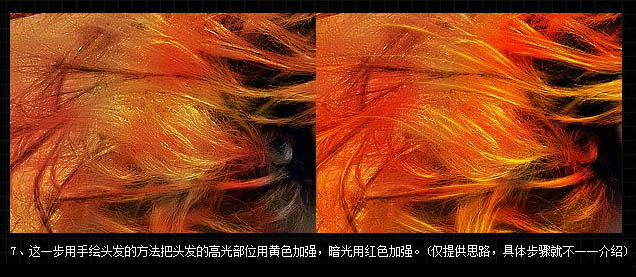
7、这一步用手绘的方法把头发的高光部分用黄色加强,暗光用红色加强。
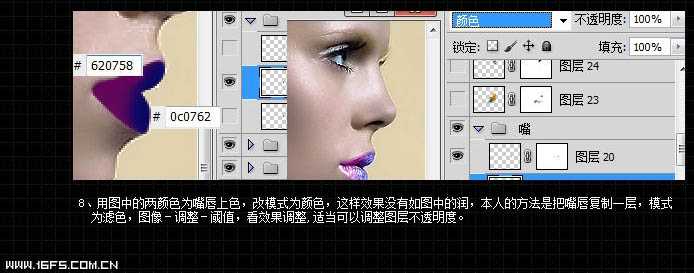
8、用图中的两颜色为嘴唇上色,改模式为“颜色”,这样效果没有如图中的润,本人的方法是把嘴唇复制一层,模式改为“滤色”,执行:图像 > 调整 > 阈值,看效果太欧洲,适当可以调整图层不透明度。
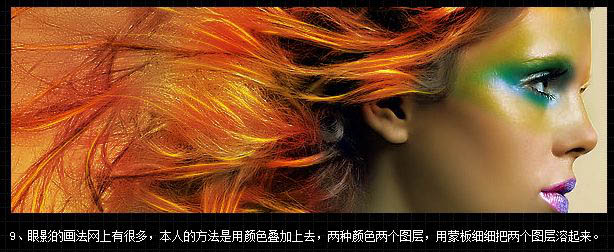
9、眼影的画法网上有很多,本人的方法是用颜色叠加上色,两种颜色两个图层,用蒙版细细把两个图层溶起来。
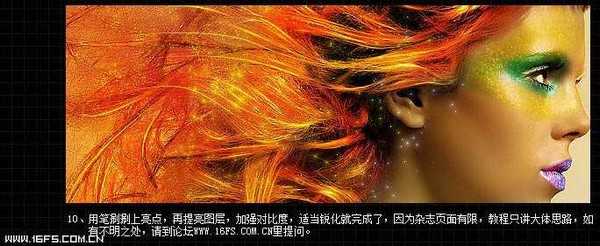
10、用笔刷刷上亮点,再提亮图层,加强对比度,适当锐化完成最终效果。
最终效果:
最终效果
局部放大
1、打开原图,计算出暗部,载入选区,新建曲线调整图层,不需要调整然后确认,把混合模式改为“滤色”,用黑色画笔涂去脸部外的区域。
2、新建一个空白图层,选择柔角画笔,用黄色在衣服部分涂出如下图区域。涂好后把图层混合模式改为“叠加”,不透明度改为:70%。
3、新建一个图层,再用红色在衣服上涂抹,图层模式改为“叠加”,不透明度改为:85%,用蒙版修不小心抹到的地方。
4、新建一个图层,用红色在头发上涂抹,注意改变画笔的不透明度,模式为“叠加”,用蒙版修补小心抹到的地方。
5、新建一个图层,用黄色同第四步方法进行涂抹。
6、新建一个图层,用渐变工具选择红色到黄色的渐变,拉出如图渐变,模式为“柔光”,用蒙版留出头发部位。
7、这一步用手绘的方法把头发的高光部分用黄色加强,暗光用红色加强。
8、用图中的两颜色为嘴唇上色,改模式为“颜色”,这样效果没有如图中的润,本人的方法是把嘴唇复制一层,模式改为“滤色”,执行:图像 > 调整 > 阈值,看效果太欧洲,适当可以调整图层不透明度。
9、眼影的画法网上有很多,本人的方法是用颜色叠加上色,两种颜色两个图层,用蒙版细细把两个图层溶起来。
10、用笔刷刷上亮点,再提亮图层,加强对比度,适当锐化完成最终效果。
最终效果: