Photoshop为人物头像加上中性淡黄色质感肤色
平面设计 发布日期:2026/5/20 浏览次数:1
正在浏览:Photoshop为人物头像加上中性淡黄色质感肤色
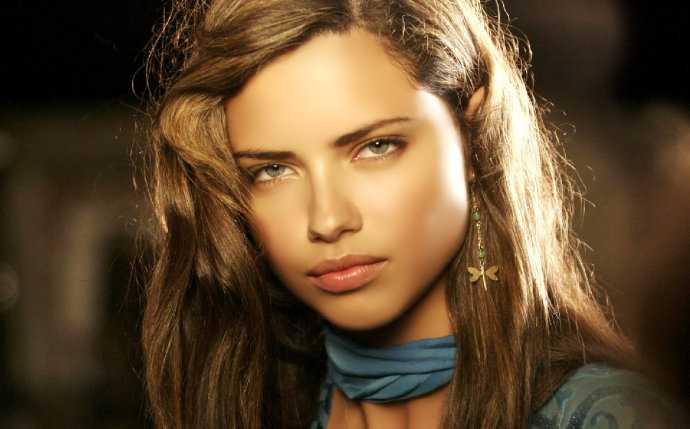
原图
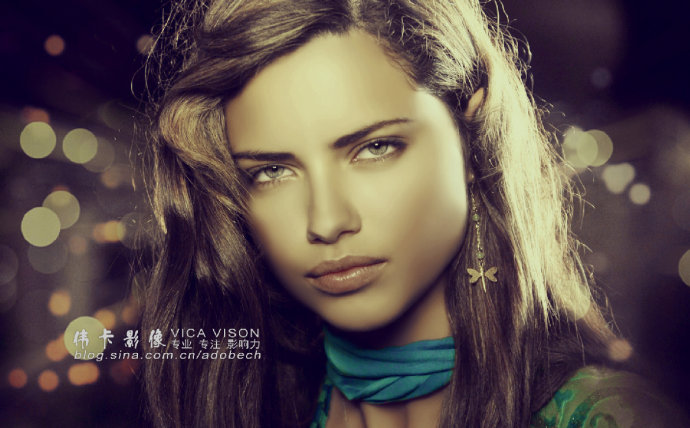
最终效果
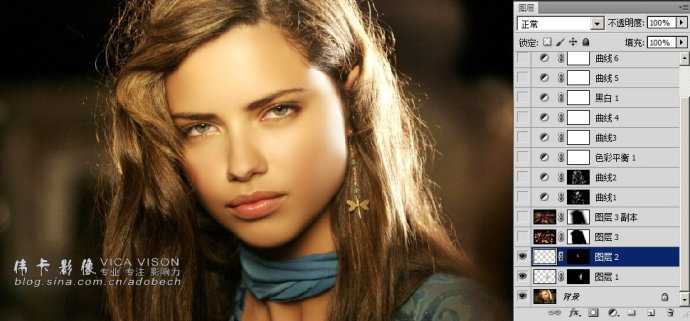
1、打开照片,将右脸和鼻子分别拷贝,得到图层1.2层,分别使用“滤镜/模糊/高斯模糊”处理后,添加黑蒙板,使用白色画笔擦出,如下图所示。
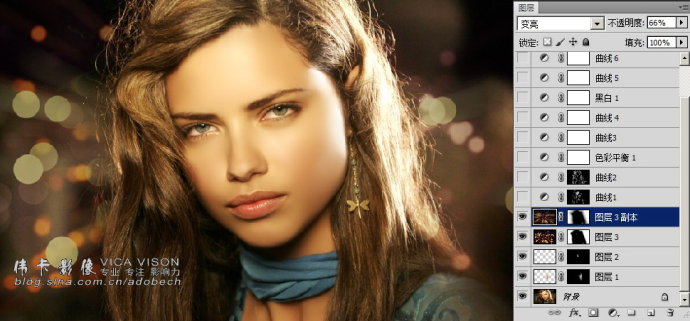
2、打开背景图片,拖至本文档且拷贝一份,得到图层3和图层3副本,对图层3副本图层,执行“滤镜/模糊/径向模糊”,选择缩放,设置图层混合模式为变亮,适当降低不透明度,这里为66%,如下图所示。

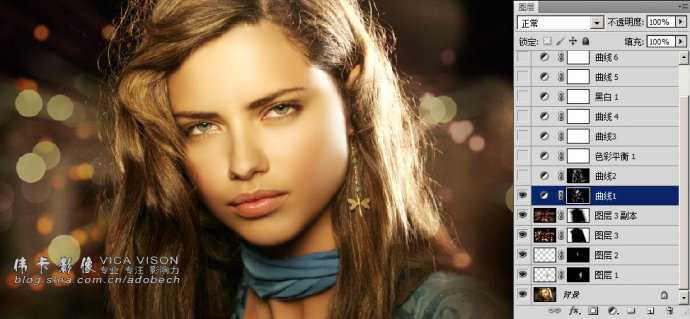
3、创建“曲线”调节层,即曲线1图层,此图层为提亮,添加黑蒙板,使用白色画笔涂抹画面需要提亮的区域,如下图所示。
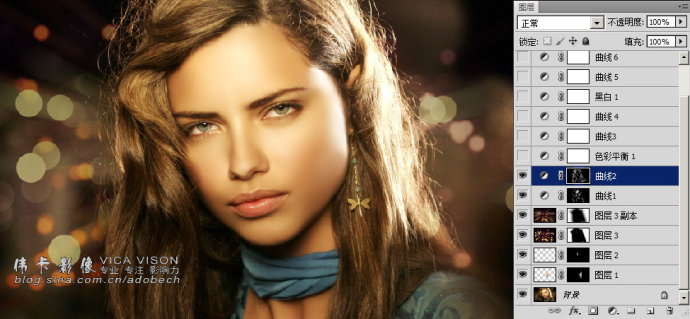
4、创建“曲线”调节层,即曲线2图层,此图层为压暗,添加黑蒙板,使用白色画笔涂抹画面需要压暗的区域,如下图所示。
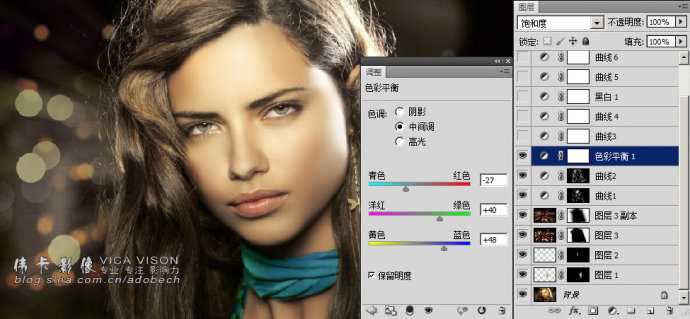
5、经过二步曲线调节层的处理,人像的立体感得到了很好的塑造,再创建“色彩平衡”图层,参数调节及图层模式设置如下图所示。
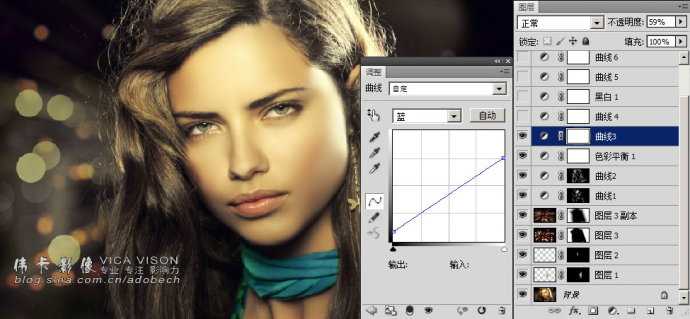
6、创建“曲线”调节层,其目的改变整个画面的色彩,使之驱于暖色,如下图所示。


7、创建“曲线”调节层,继续改变色彩,如下图所示。


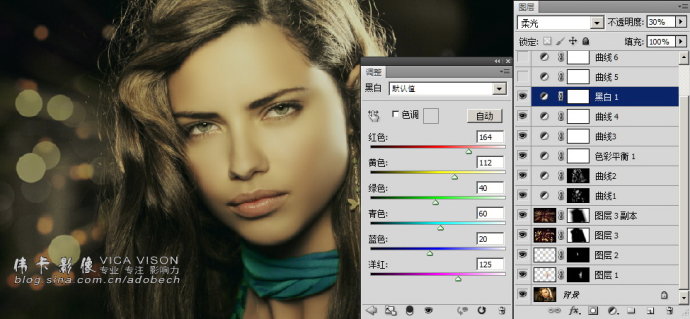
8、创建“黑白”调节层,改变画面暖色的色彩变化,如下图所示。
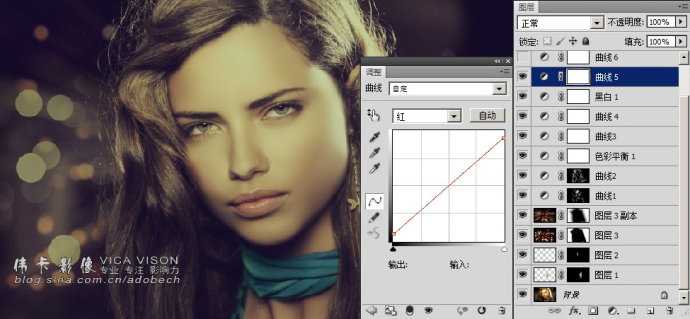
9、创建“曲线”调节层,改变画面色彩,使其有商业的味道,如下图所示。
10、创建“曲线”调节层,提亮画面,如下图所示。

11、创建“亮度/对比度”调节层,控制画面反差。

最终效果:
最终效果
1、打开照片,将右脸和鼻子分别拷贝,得到图层1.2层,分别使用“滤镜/模糊/高斯模糊”处理后,添加黑蒙板,使用白色画笔擦出,如下图所示。
2、打开背景图片,拖至本文档且拷贝一份,得到图层3和图层3副本,对图层3副本图层,执行“滤镜/模糊/径向模糊”,选择缩放,设置图层混合模式为变亮,适当降低不透明度,这里为66%,如下图所示。
3、创建“曲线”调节层,即曲线1图层,此图层为提亮,添加黑蒙板,使用白色画笔涂抹画面需要提亮的区域,如下图所示。
4、创建“曲线”调节层,即曲线2图层,此图层为压暗,添加黑蒙板,使用白色画笔涂抹画面需要压暗的区域,如下图所示。
5、经过二步曲线调节层的处理,人像的立体感得到了很好的塑造,再创建“色彩平衡”图层,参数调节及图层模式设置如下图所示。
6、创建“曲线”调节层,其目的改变整个画面的色彩,使之驱于暖色,如下图所示。
7、创建“曲线”调节层,继续改变色彩,如下图所示。
8、创建“黑白”调节层,改变画面暖色的色彩变化,如下图所示。
9、创建“曲线”调节层,改变画面色彩,使其有商业的味道,如下图所示。
10、创建“曲线”调节层,提亮画面,如下图所示。
11、创建“亮度/对比度”调节层,控制画面反差。
最终效果: