Photoshop将旷野美女图片调出淡黄的古典色
平面设计 发布日期:2026/5/19 浏览次数:1
正在浏览:Photoshop将旷野美女图片调出淡黄的古典色
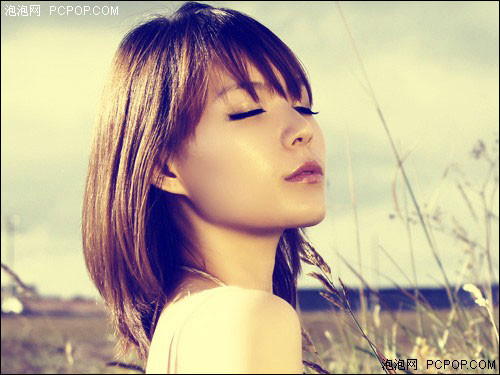
原图

最终效果
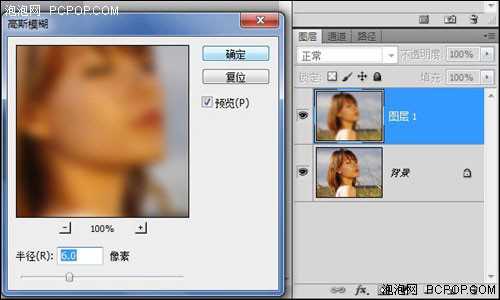
1、Photoshop滤镜+蒙版磨皮:
打开需要磨皮的图片,复制图层,选择滤镜-模糊-高斯模糊,半径为6.0像素(最好不要超过8.0像素,否则磨出来的效果会非常假),如下图。
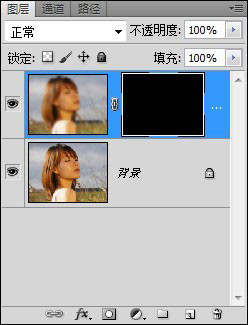
2、为高斯模糊的图层添加图层蒙版,注意一定要按住Alt键再点击图层蒙版,如下图。
3、设置背景色为黑色,前景色为白色,选择画笔工具(设置为半透明笔刷)开始磨皮,最终效果如下图。

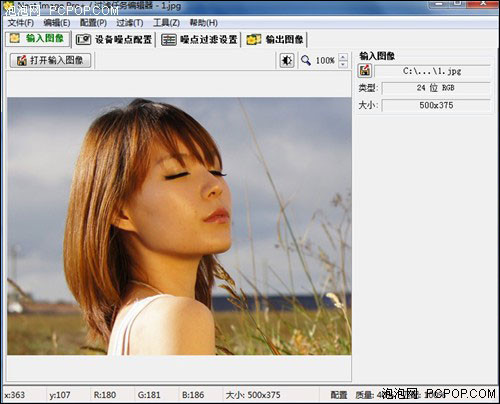
4、Neat Image Pro磨皮:
Neat Image Pro是一款非常容易上手的磨皮软件,简单到近乎傻瓜式操作。启动Neat Image Pro后打开需要修改的图像。
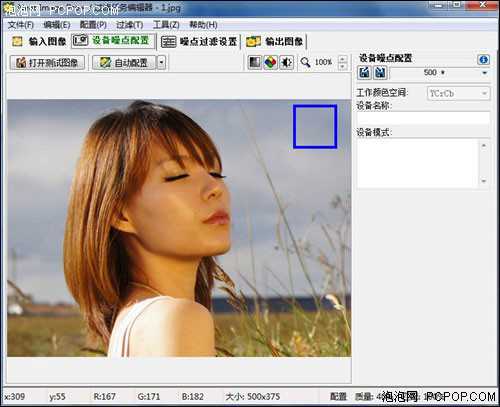
5、选择设备噪点配置并点击自动配置。
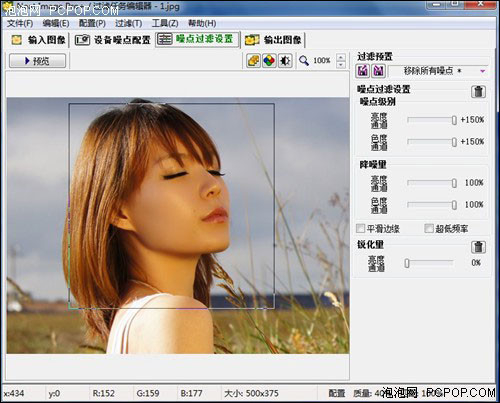
6、选择噪点过滤设置,自行根据当前图片来设置合适的参数,我设置的参数如下。
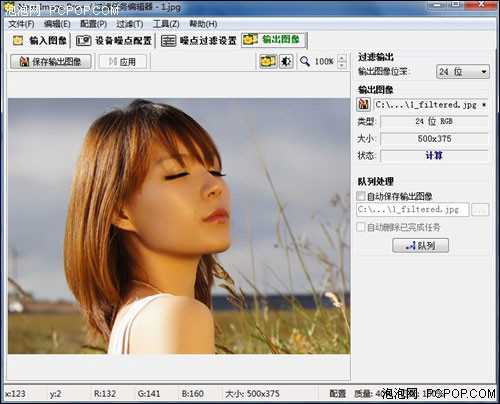
7、选择输出图像并点击应用,保存输出图像。
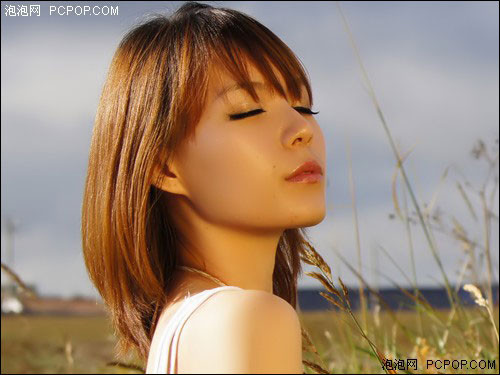
8、磨皮后的效果如图。
9、用Neat Image Pro磨皮后是无法消除皮肤上如黑痣等比较明显的瑕疵的,这里我们需要用到Photoshop的修补工具或仿制图章来进行一些简单的处理,最终效果如下图。

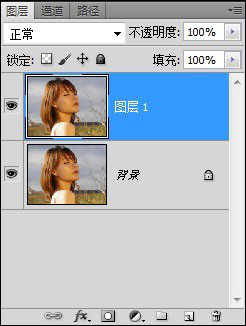
10、给图片调色: 个人非常喜欢那种复古的色调。这里介绍一种很简单的调出复古色调的方法。打开图片并复制图层。
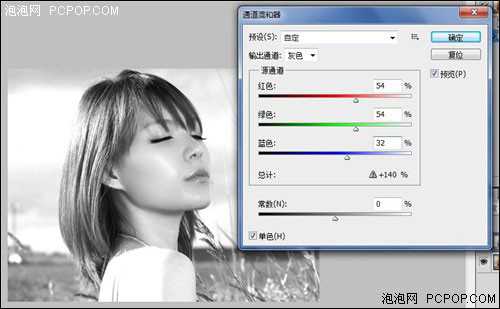
11、选择图像-调整-通道混合器,参数设置如下图。
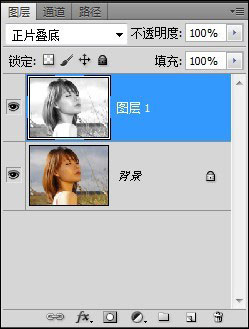
12、选择正片叠底并向下合并图层。
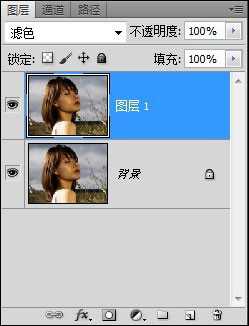
13、复制图层,选择滤色,不透明度因图而异,如果亮度不够可重复复制图层+滤色操作,然后向下合并图层。
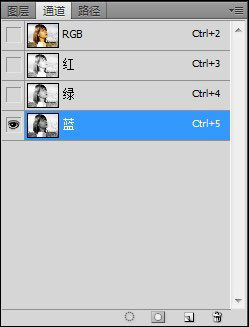
14、复制图层,选择新图层的蓝色通道,按Ctrl+I反相。
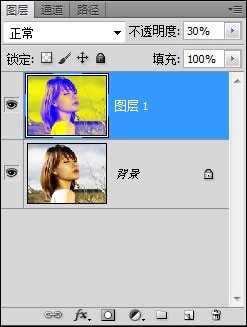
15、回到图层界面,将图层一的不透明度设置为30%,合并图层。
最终效果:
最终效果
1、Photoshop滤镜+蒙版磨皮:
打开需要磨皮的图片,复制图层,选择滤镜-模糊-高斯模糊,半径为6.0像素(最好不要超过8.0像素,否则磨出来的效果会非常假),如下图。
2、为高斯模糊的图层添加图层蒙版,注意一定要按住Alt键再点击图层蒙版,如下图。
3、设置背景色为黑色,前景色为白色,选择画笔工具(设置为半透明笔刷)开始磨皮,最终效果如下图。
4、Neat Image Pro磨皮:
Neat Image Pro是一款非常容易上手的磨皮软件,简单到近乎傻瓜式操作。启动Neat Image Pro后打开需要修改的图像。
5、选择设备噪点配置并点击自动配置。
6、选择噪点过滤设置,自行根据当前图片来设置合适的参数,我设置的参数如下。
7、选择输出图像并点击应用,保存输出图像。
8、磨皮后的效果如图。
9、用Neat Image Pro磨皮后是无法消除皮肤上如黑痣等比较明显的瑕疵的,这里我们需要用到Photoshop的修补工具或仿制图章来进行一些简单的处理,最终效果如下图。
10、给图片调色: 个人非常喜欢那种复古的色调。这里介绍一种很简单的调出复古色调的方法。打开图片并复制图层。
11、选择图像-调整-通道混合器,参数设置如下图。
12、选择正片叠底并向下合并图层。
13、复制图层,选择滤色,不透明度因图而异,如果亮度不够可重复复制图层+滤色操作,然后向下合并图层。
14、复制图层,选择新图层的蓝色通道,按Ctrl+I反相。
15、回到图层界面,将图层一的不透明度设置为30%,合并图层。
最终效果: