Photoshop将打造出一款华丽红色的中国风古典卷轴
平面设计 发布日期:2026/4/6 浏览次数:1
正在浏览:Photoshop将打造出一款华丽红色的中国风古典卷轴
最终效果

1、新建一个1024 * 768像素的文档,背景填充暗红色:#620300,如下图。

<图1>
2、现在来制作轴部分,因为是对称图形,我们先要做出轴顶部的装饰部分,如下图。注意好比例。

<图2>
3、新建一个组,在组里新建一个图层,用椭圆选框工具拉出图3所示的正圆选区,然后拉上图4所示的径向渐变。

<图3>
<图4>
4、选择减淡及加深工具,把左边的反光及右下角的暗调部分涂出来。中间可以增加一些高光,过程如图5 - 7。

<图5>

<图6>

<图7>
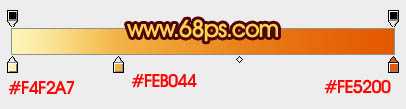
5、新建一个图层,用矩形选框工具拉出图8所示的矩形选区,然后拉上图9所示的线性渐变,做出表面的金属质感。

<图8>

<图9>
6、用矩形选框工具拉出一条较窄的矩形选区如图10,按Ctrl + J 把选区部分的图形复制到新的图层,混合模式改为“正片叠底”。
按Ctrl + J 把当前图层复制一层,适当把图形向下移动几个像素,把图层混合模式改为“滤色”,效果如图11。

<图10>

<图11>
7、同上的方法再制作一组高光和暗调,做出中间的纹路,效果如下图。

<图12>
8、下面来制作带纹理的球体,需要完成的效果如下图。

<图13>
9、在组的最下面新建一个图层,用钢笔勾出球体的选区如图14,拉上图15所示的线性渐变。

<图14>

<图15>
10、新建一个图层,按Ctrl + Alt + G 创建剪切图层。先用钢笔勾出左边的纹路选区,加上渐变色后用加深,减淡工具涂出质感。
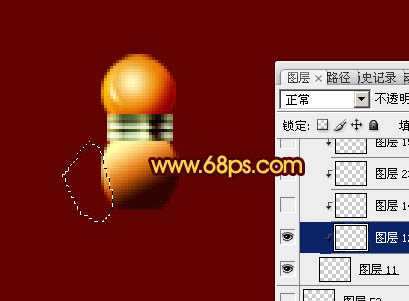
<图16>
11、其它纹路的制作方法同上,过程如图17 - 19,注意好光的变化。

<图17>
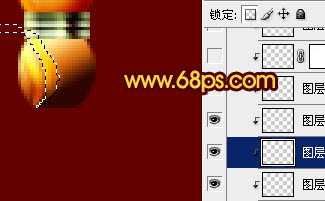
<图18>
上一页12 下一页 阅读全文
1、新建一个1024 * 768像素的文档,背景填充暗红色:#620300,如下图。
<图1>
2、现在来制作轴部分,因为是对称图形,我们先要做出轴顶部的装饰部分,如下图。注意好比例。
<图2>
3、新建一个组,在组里新建一个图层,用椭圆选框工具拉出图3所示的正圆选区,然后拉上图4所示的径向渐变。
<图3>
<图4>
4、选择减淡及加深工具,把左边的反光及右下角的暗调部分涂出来。中间可以增加一些高光,过程如图5 - 7。
<图5>
<图6>
<图7>
5、新建一个图层,用矩形选框工具拉出图8所示的矩形选区,然后拉上图9所示的线性渐变,做出表面的金属质感。
<图8>
<图9>
6、用矩形选框工具拉出一条较窄的矩形选区如图10,按Ctrl + J 把选区部分的图形复制到新的图层,混合模式改为“正片叠底”。
按Ctrl + J 把当前图层复制一层,适当把图形向下移动几个像素,把图层混合模式改为“滤色”,效果如图11。
<图10>
<图11>
7、同上的方法再制作一组高光和暗调,做出中间的纹路,效果如下图。
<图12>
8、下面来制作带纹理的球体,需要完成的效果如下图。
<图13>
9、在组的最下面新建一个图层,用钢笔勾出球体的选区如图14,拉上图15所示的线性渐变。
<图14>
<图15>
10、新建一个图层,按Ctrl + Alt + G 创建剪切图层。先用钢笔勾出左边的纹路选区,加上渐变色后用加深,减淡工具涂出质感。
<图16>
11、其它纹路的制作方法同上,过程如图17 - 19,注意好光的变化。
<图17>
<图18>
上一页12 下一页 阅读全文