PS将鼠绘出唯美的蝴蝶公主插画
平面设计 发布日期:2026/5/25 浏览次数:1
正在浏览:PS将鼠绘出唯美的蝴蝶公主插画
最终效果


1、打开ComicStudio软件,新建页面,绘出草图,用钢笔工具的G笔和圆笔勾线。勾线要注意配合压感笔的力度变化。具体步骤请看之前发布的ComicStudio勾线教程。
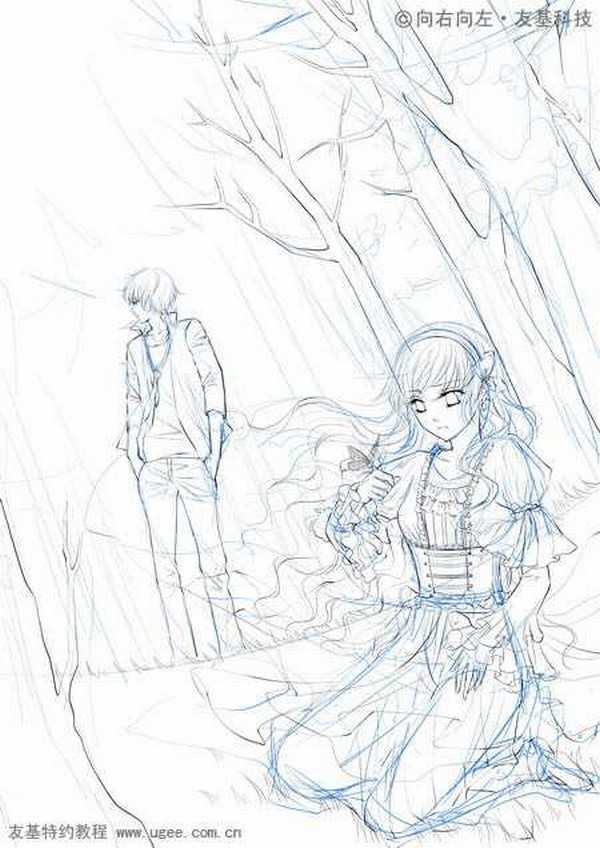
2、勾线时要仔细,背景也要勾出来,为了方便上色,背景和人物分开勾线。勾线结束后导出PSD分层文件。
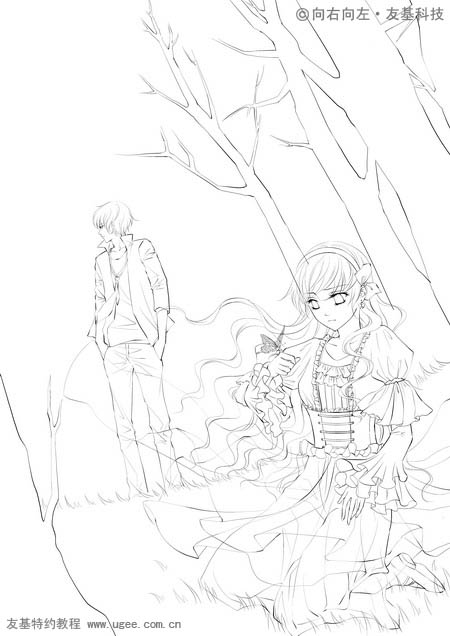
3、填色块的目的是为了方便后面上色,我习惯用多边形套索工具填色块。由于我的电脑容不下Painter11,所以色块部分还是得从Photoshop中填。
如果电脑能用Painter11的朋友,完全可以用Painter11的多边形套索工具来填色块,更加方便。在Photoshop中用多边形套索工具分别填色块,依然是人物和背景分开,相邻色块分开图层来填。这里我还把整个线稿的颜色改成了棕色。

4、在Painter中打开PSD文件,另存为RIF格式的文件。开始上色,我习惯用油性蜡笔来上色,还是从浅色到深色,最后提亮的顺序来画。嘴唇上的高光是用漂白橡皮擦出来的。
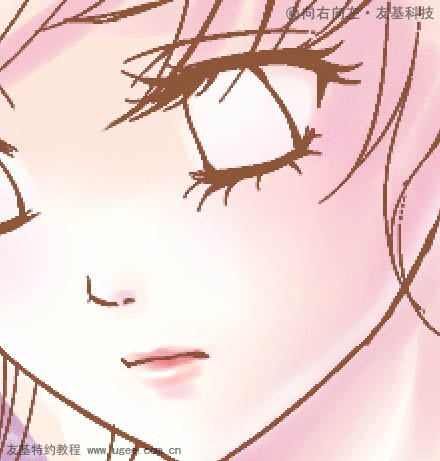
5、依次再给头发衣服上色,我个人很喜欢使用PT,再配合友基压感笔1024的压感级数,画出来的笔触感很漂亮。人物上色基本上都是在PT里完成的。


6、画上眼睛,此时会发现线稿的颜色比眼睛的颜色浅,眼睛显得不够深邃。

上一页12 下一页 阅读全文
1、打开ComicStudio软件,新建页面,绘出草图,用钢笔工具的G笔和圆笔勾线。勾线要注意配合压感笔的力度变化。具体步骤请看之前发布的ComicStudio勾线教程。
2、勾线时要仔细,背景也要勾出来,为了方便上色,背景和人物分开勾线。勾线结束后导出PSD分层文件。
3、填色块的目的是为了方便后面上色,我习惯用多边形套索工具填色块。由于我的电脑容不下Painter11,所以色块部分还是得从Photoshop中填。
如果电脑能用Painter11的朋友,完全可以用Painter11的多边形套索工具来填色块,更加方便。在Photoshop中用多边形套索工具分别填色块,依然是人物和背景分开,相邻色块分开图层来填。这里我还把整个线稿的颜色改成了棕色。
4、在Painter中打开PSD文件,另存为RIF格式的文件。开始上色,我习惯用油性蜡笔来上色,还是从浅色到深色,最后提亮的顺序来画。嘴唇上的高光是用漂白橡皮擦出来的。
5、依次再给头发衣服上色,我个人很喜欢使用PT,再配合友基压感笔1024的压感级数,画出来的笔触感很漂亮。人物上色基本上都是在PT里完成的。
6、画上眼睛,此时会发现线稿的颜色比眼睛的颜色浅,眼睛显得不够深邃。
上一页12 下一页 阅读全文