Photoshop将人物图片调成怀旧的暗调橙蓝色
平面设计 发布日期:2025/12/30 浏览次数:1
正在浏览:Photoshop将人物图片调成怀旧的暗调橙蓝色
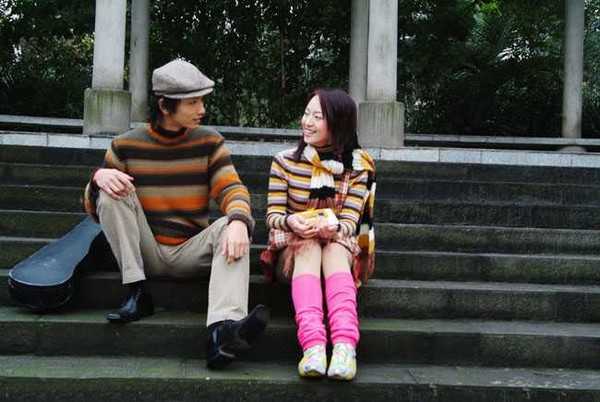
原图
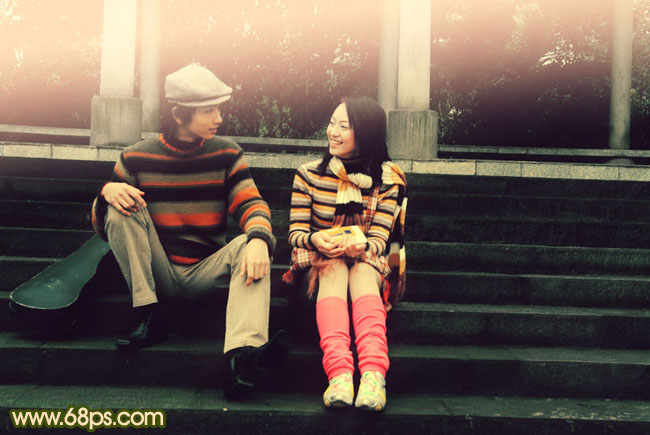
最终效果
1、打开原图素材,创建曲线调整图层,对红,蓝进行调整,参数设置如图1,效果如图2。
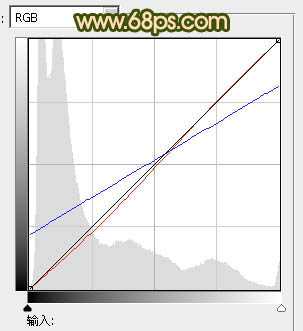
<图1>
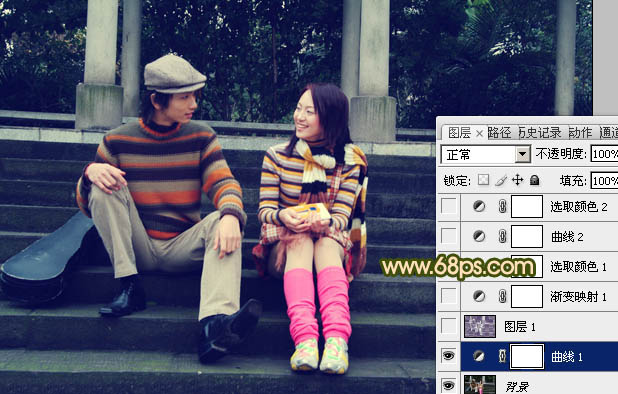
<图2>
2、按Ctrl + Alt + ~ 调出高光选区,按Ctrl + Shift + I 反选,新建一个图层填充颜色:#401762,混合模式改为“变亮”,不透明度改为:60%,效果如下图。

<图3>
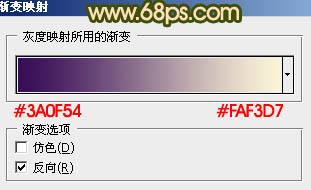
3、创建渐变映射调整图层,颜色设置如图4,确定后把图层混合模式改为“变亮”,不透明度改为:50%,效果如图5。
<图4>

<图5>
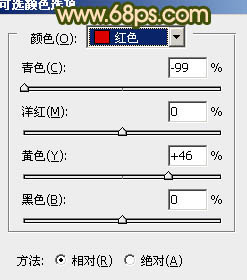
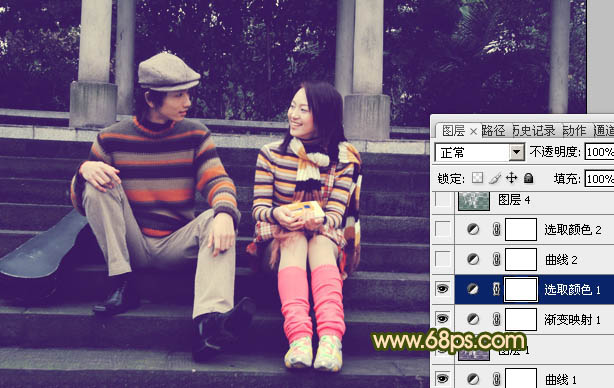
4、创建可选颜色调整图层,对红,黄进行调整,参数设置如图6,7,效果如图8。
<图6>

<图7>
<图8>
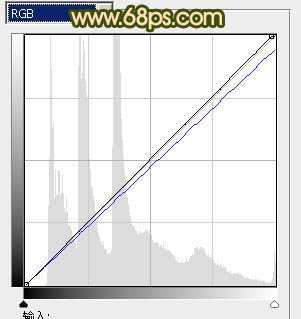
5、创建曲线调整图层,对RGB及蓝色进行调整,参数设置如图9,效果如图10。
<图9>
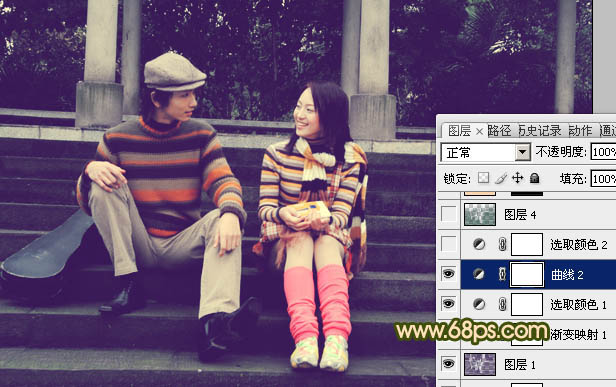
<图10>
上一页12 下一页 阅读全文

最终效果

1、打开原图素材,创建曲线调整图层,对红,蓝进行调整,参数设置如图1,效果如图2。

<图1>

<图2>
2、按Ctrl + Alt + ~ 调出高光选区,按Ctrl + Shift + I 反选,新建一个图层填充颜色:#401762,混合模式改为“变亮”,不透明度改为:60%,效果如下图。

<图3>
3、创建渐变映射调整图层,颜色设置如图4,确定后把图层混合模式改为“变亮”,不透明度改为:50%,效果如图5。

<图4>

<图5>
4、创建可选颜色调整图层,对红,黄进行调整,参数设置如图6,7,效果如图8。

<图6>

<图7>

<图8>
5、创建曲线调整图层,对RGB及蓝色进行调整,参数设置如图9,效果如图10。

<图9>

<图10>
上一页12 下一页 阅读全文