Photoshop将偏暗的外景婚片调成梦幻的淡蓝色
平面设计 发布日期:2025/12/25 浏览次数:1
正在浏览:Photoshop将偏暗的外景婚片调成梦幻的淡蓝色
原图

最终效果

1、打开原图素材,新建一个图层填充颜色:#FFAB8C,图层混合模式改为“柔光”,不透明度改为:80%,效果如下图。

<图1>
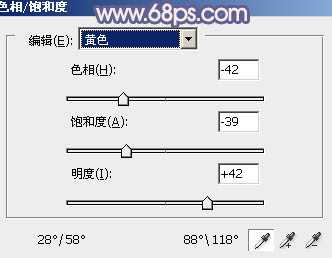
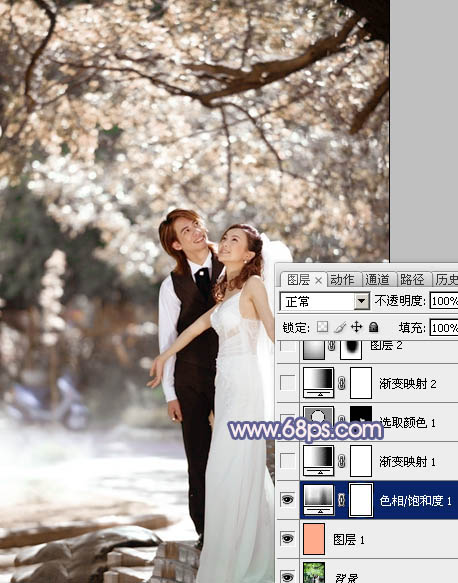
2、创建色相/饱和度调整图层,选择黄色,用吸管吸取树叶颜色再调整,参数设置如图2,效果如图3。
<图2>
<图3>
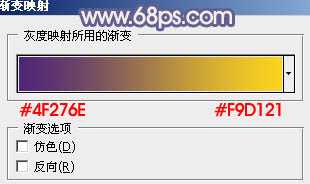
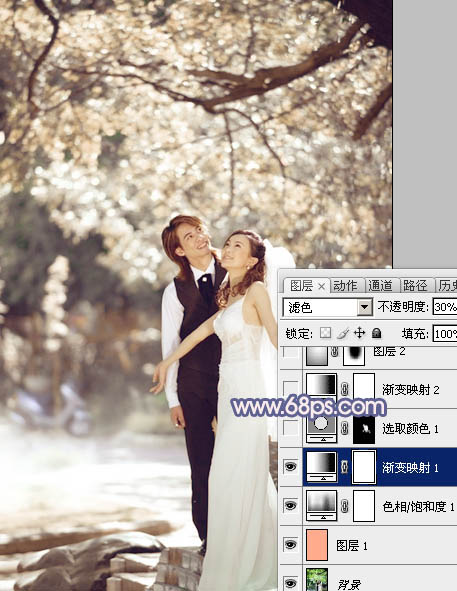
3、创建渐变映射调整图层,颜色设置如图4,确定后把图层混合模式改为“滤色”,不透明度改为:30%,效果如图5。
<图4>
<图5>
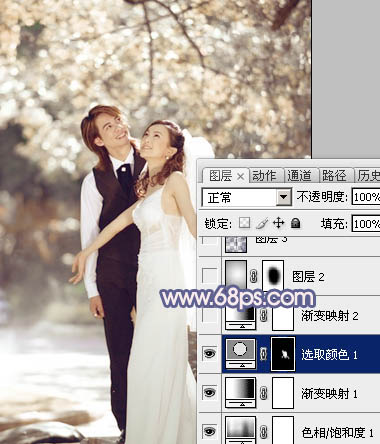
4、创建可选颜色调整图层,对黄色进行调整,参数设置如图6,确定后把蒙版填充黑色,用白色画笔把人物脸部擦出来,效果如图7。

<图6>
<图7>
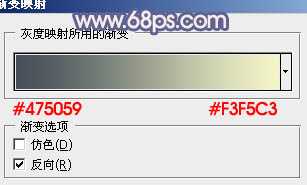
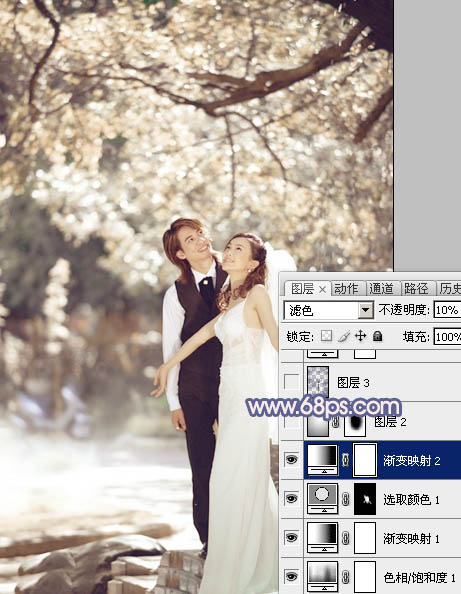
5、创建渐变映射调整图层,颜色设置如图8,确定后把图层混合模式改为“滤色”,不透明度改为:10%,效果如图9。
<图8>
<图9>
6、新建一个图层,简单给图片加上暗角,方法任选。

<图10>
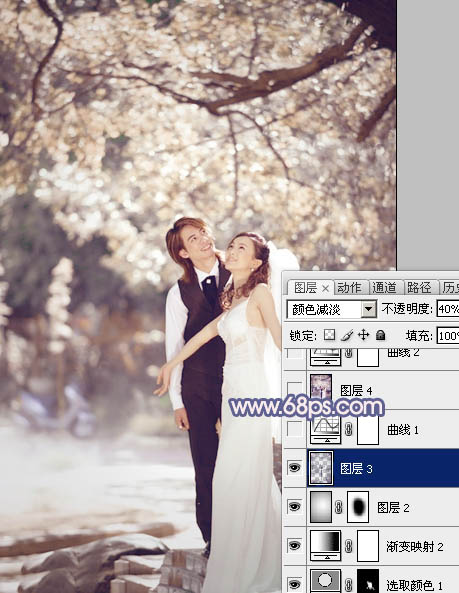
7、按Ctrl + Alt + ~ 调出高光选区,按Ctrl + Shift + I 反选,新建一个图层填充颜色:#31075B,图层混合模式改为“颜色减淡”,不透明度改为:40%,效果如下图。
<图11>
8、创建曲线调整图层,对蓝色进行调整,参数设置如图12,确定后把图层不透明度改为:80%,效果如图13。

<图12>
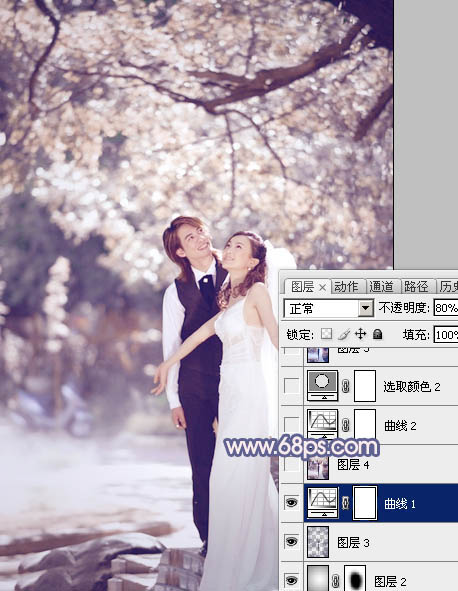
<图13>
上一页12 下一页 阅读全文

最终效果

1、打开原图素材,新建一个图层填充颜色:#FFAB8C,图层混合模式改为“柔光”,不透明度改为:80%,效果如下图。

<图1>
2、创建色相/饱和度调整图层,选择黄色,用吸管吸取树叶颜色再调整,参数设置如图2,效果如图3。

<图2>

<图3>
3、创建渐变映射调整图层,颜色设置如图4,确定后把图层混合模式改为“滤色”,不透明度改为:30%,效果如图5。

<图4>

<图5>
4、创建可选颜色调整图层,对黄色进行调整,参数设置如图6,确定后把蒙版填充黑色,用白色画笔把人物脸部擦出来,效果如图7。

<图6>

<图7>
5、创建渐变映射调整图层,颜色设置如图8,确定后把图层混合模式改为“滤色”,不透明度改为:10%,效果如图9。

<图8>

<图9>
6、新建一个图层,简单给图片加上暗角,方法任选。

<图10>
7、按Ctrl + Alt + ~ 调出高光选区,按Ctrl + Shift + I 反选,新建一个图层填充颜色:#31075B,图层混合模式改为“颜色减淡”,不透明度改为:40%,效果如下图。

<图11>
8、创建曲线调整图层,对蓝色进行调整,参数设置如图12,确定后把图层不透明度改为:80%,效果如图13。

<图12>

<图13>
上一页12 下一页 阅读全文