Photoshop将竹林人物图片调成柔和的蓝紫色
平面设计 发布日期:2025/11/7 浏览次数:1
正在浏览:Photoshop将竹林人物图片调成柔和的蓝紫色
原图

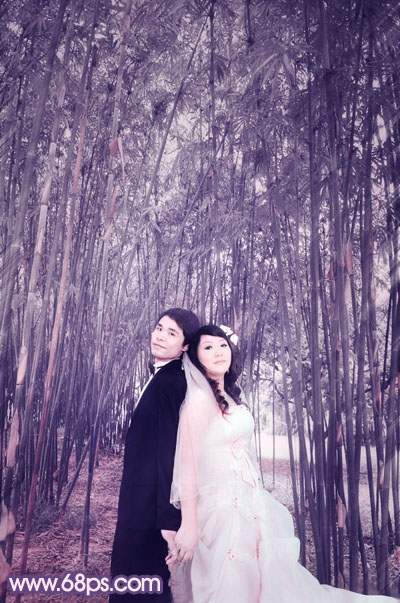
最终效果
1、打开原图素材,创建渐变映射调整图层,颜色设置为黑白如图1,确定后把图层混合模式改为“变亮”,不透明度改为:30%,效果如图2。

<图1>
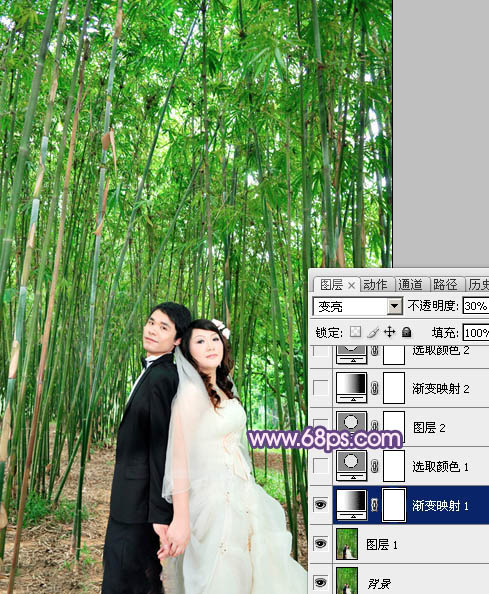
<图2>
2、创建可选颜色调整图层,对黄,绿进行调整,参数设置如图3,4,确定后按Ctrl + J 把当前可选颜色调整图层复制一层,不透明度改为:20%,效果如图5。

<图3>
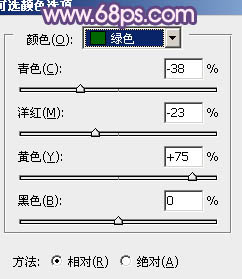
<图4>
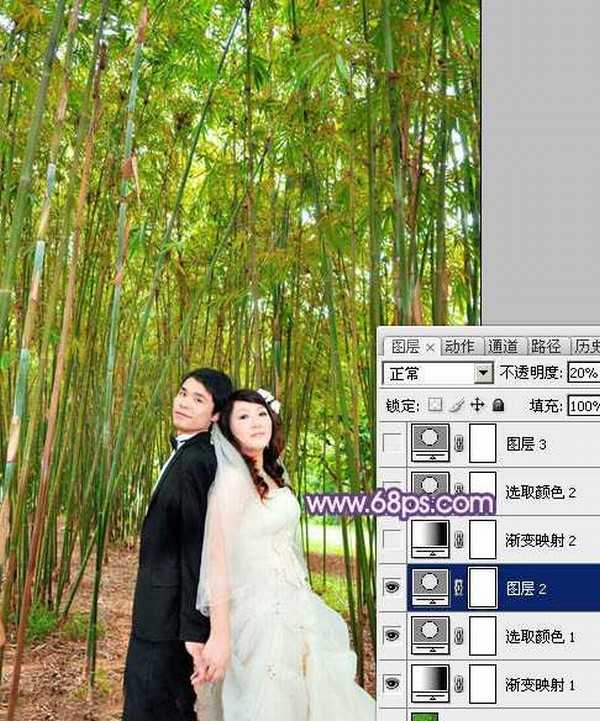
<图5>
3、创建渐变映射调整图层,颜色设置如图6,确定后把图层混合模式改为“变亮”,效果如图7。
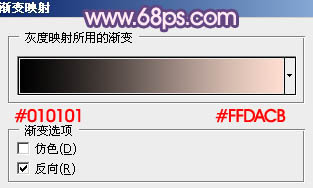
<图6>
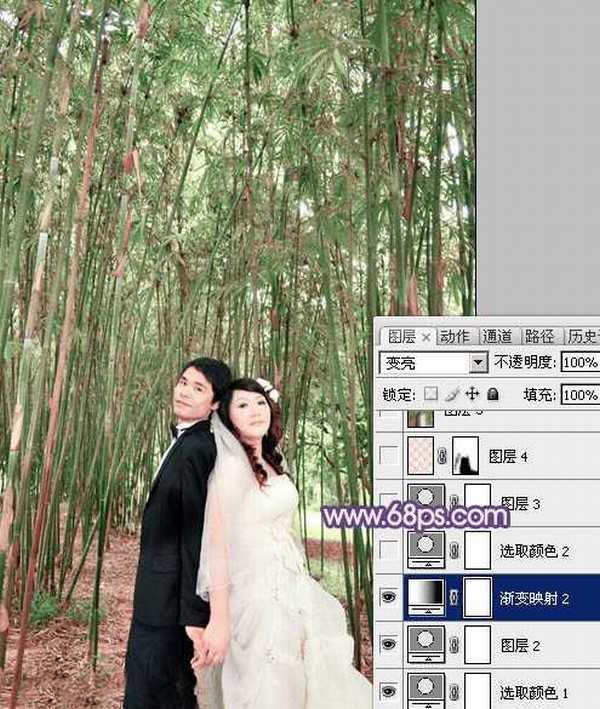
<图7>
4、创建可选颜色调整图层,对红,绿进行调整,参数设置如图8,9,效果如图10。
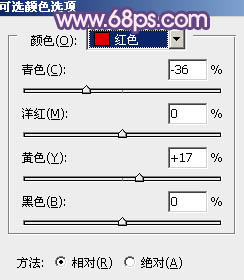
<图8>

<图9>
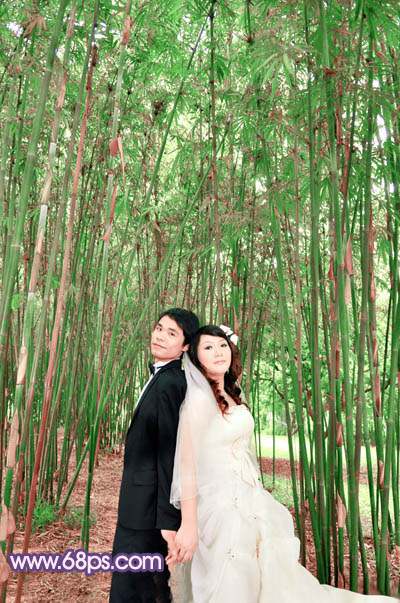
<图10>
5、按Ctrl + Alt + ~ 调出高光选区,新建一个图层填充颜色:#FDDED0,图层混合模式改为“正片叠底”,不透明度改为:40%,加上图层蒙版,用黑色画笔把人物部分擦出来,效果如下图。
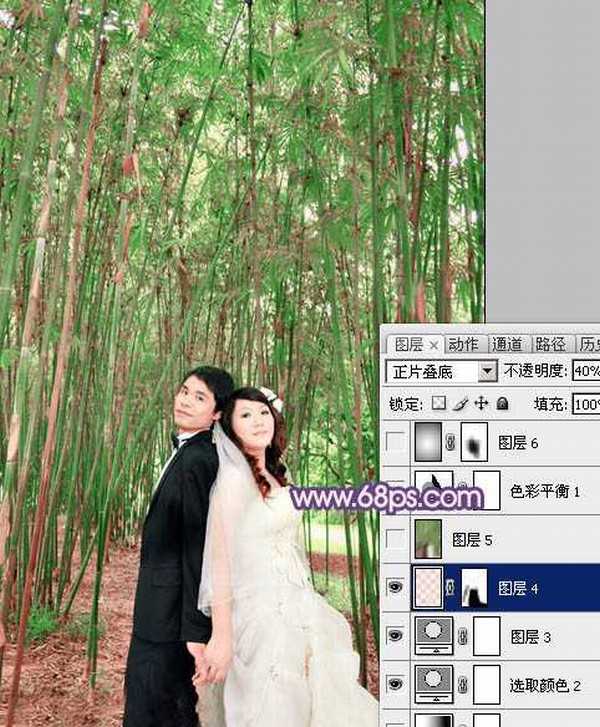
<图11>
6、新建一个图层,按Ctrl + Alt + Shift + E 盖印图层。执行:滤镜 > 模糊 > 动感模糊,参数设置如图12,确定后把图层混合模式改为“柔光”,效果如图13。
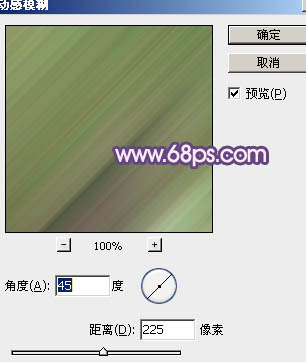
<图12>

<图13>
7、新建一个图层,简单给图片加上暗角,大致效果如下图。
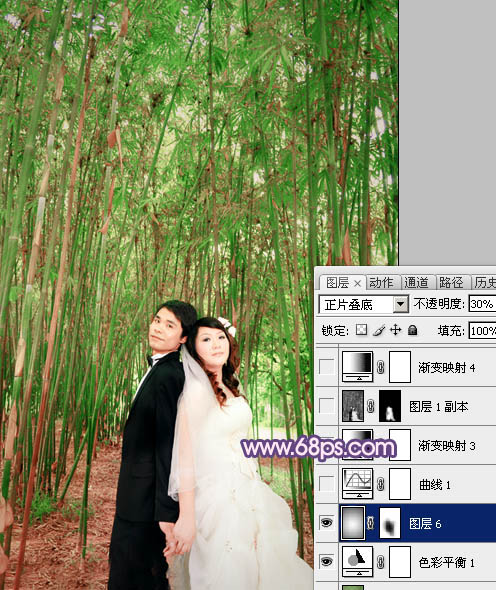
<图14>
8、创建曲线调整图层,对红,蓝进行调整,参数设置如图15,效果如图16。
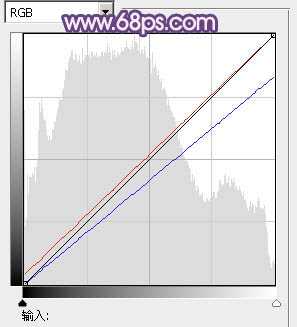
<图15>
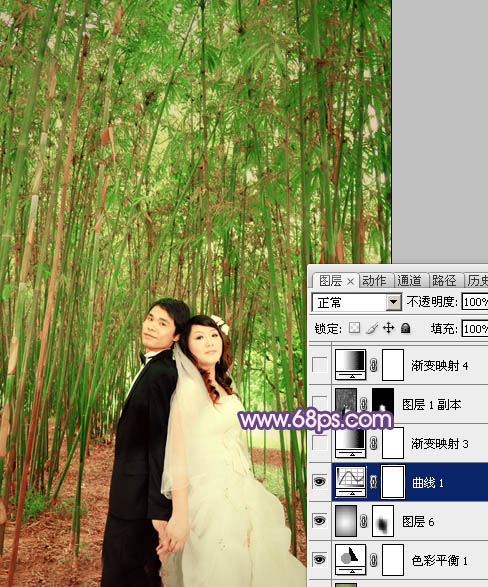
<图16>
9、创建渐变映射调整图层,颜色设置如图17,确定后把图层混合模式改为“变亮”,效果如图18。
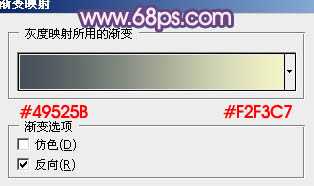
<图17>
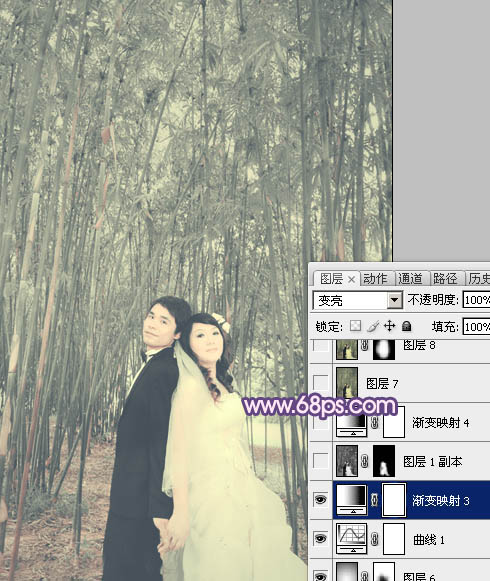
<图18>
上一页12 下一页 阅读全文

最终效果

1、打开原图素材,创建渐变映射调整图层,颜色设置为黑白如图1,确定后把图层混合模式改为“变亮”,不透明度改为:30%,效果如图2。

<图1>

<图2>
2、创建可选颜色调整图层,对黄,绿进行调整,参数设置如图3,4,确定后按Ctrl + J 把当前可选颜色调整图层复制一层,不透明度改为:20%,效果如图5。

<图3>

<图4>

<图5>
3、创建渐变映射调整图层,颜色设置如图6,确定后把图层混合模式改为“变亮”,效果如图7。

<图6>

<图7>
4、创建可选颜色调整图层,对红,绿进行调整,参数设置如图8,9,效果如图10。

<图8>

<图9>

<图10>
5、按Ctrl + Alt + ~ 调出高光选区,新建一个图层填充颜色:#FDDED0,图层混合模式改为“正片叠底”,不透明度改为:40%,加上图层蒙版,用黑色画笔把人物部分擦出来,效果如下图。

<图11>
6、新建一个图层,按Ctrl + Alt + Shift + E 盖印图层。执行:滤镜 > 模糊 > 动感模糊,参数设置如图12,确定后把图层混合模式改为“柔光”,效果如图13。

<图12>

<图13>
7、新建一个图层,简单给图片加上暗角,大致效果如下图。

<图14>
8、创建曲线调整图层,对红,蓝进行调整,参数设置如图15,效果如图16。

<图15>

<图16>
9、创建渐变映射调整图层,颜色设置如图17,确定后把图层混合模式改为“变亮”,效果如图18。

<图17>

<图18>
上一页12 下一页 阅读全文