ps利用通道混合器快速调出图片个性的青红色
平面设计 发布日期:2026/6/19 浏览次数:1
正在浏览:ps利用通道混合器快速调出图片个性的青红色
原图

最终效果

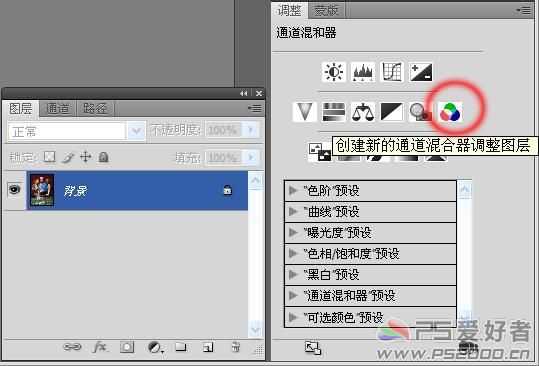
1、打开原图素材,选择菜单:菜单栏——窗口——调整。将调整工具栏调出,单击“通道混合器调整图层”。
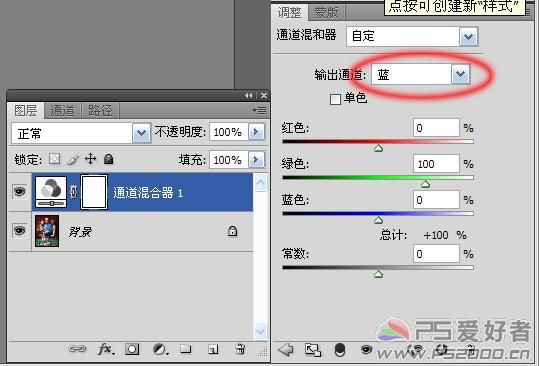
2、进入“蓝”通道,将红色和蓝色设为0,绿色设为100。
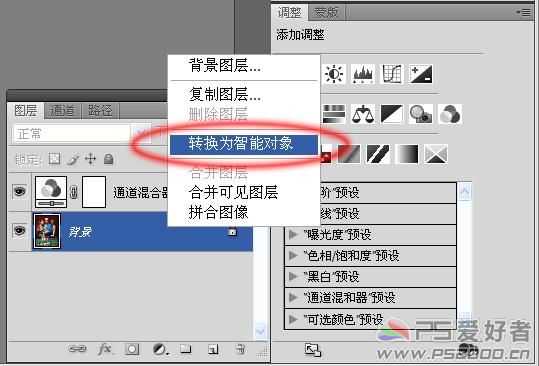
3、鼠标右击背景图层,转换为智能对象。
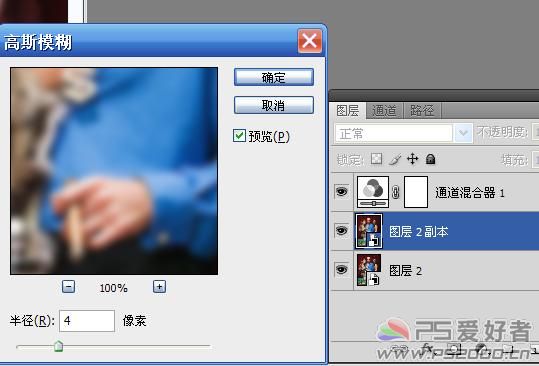
4、Ctrl+J复制图层,高斯模糊4像素。
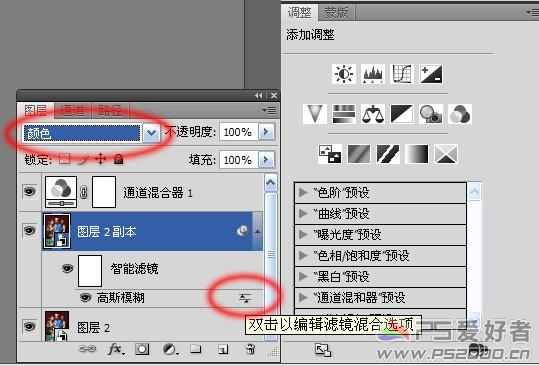
5、图层模式设为“颜色”,我们只对颜色进行混合。双击滤镜混合选项图标(下图右下红圈处)。
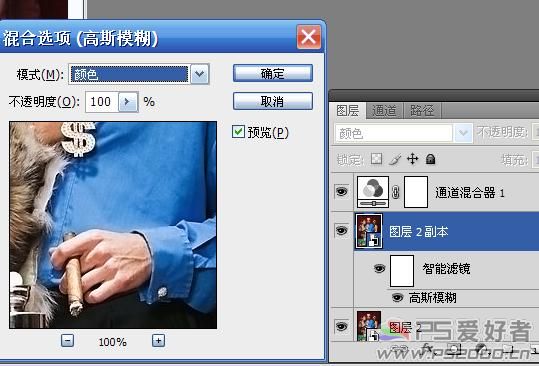
6、模式也设为“颜色”。同样是对颜色进行混合处理。
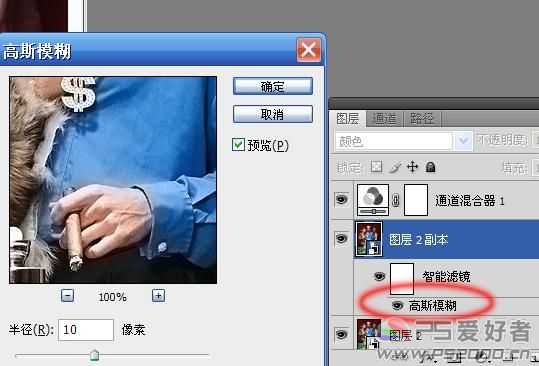
7、为什么要转换为智能对象呢?双击下图中的“高斯模糊”,这时候我们发现可以重新设定高斯模糊的值。
在CS4中,转换为智能对象之后,滤镜的数值可以任意调整,不影响图层本身的内容。
最终效果:
最终效果
1、打开原图素材,选择菜单:菜单栏——窗口——调整。将调整工具栏调出,单击“通道混合器调整图层”。
2、进入“蓝”通道,将红色和蓝色设为0,绿色设为100。
3、鼠标右击背景图层,转换为智能对象。
4、Ctrl+J复制图层,高斯模糊4像素。
5、图层模式设为“颜色”,我们只对颜色进行混合。双击滤镜混合选项图标(下图右下红圈处)。
6、模式也设为“颜色”。同样是对颜色进行混合处理。
7、为什么要转换为智能对象呢?双击下图中的“高斯模糊”,这时候我们发现可以重新设定高斯模糊的值。
在CS4中,转换为智能对象之后,滤镜的数值可以任意调整,不影响图层本身的内容。
最终效果: