Photoshop调出模特照片大气强对比的黄褐色
平面设计 发布日期:2026/4/5 浏览次数:1
正在浏览:Photoshop调出模特照片大气强对比的黄褐色
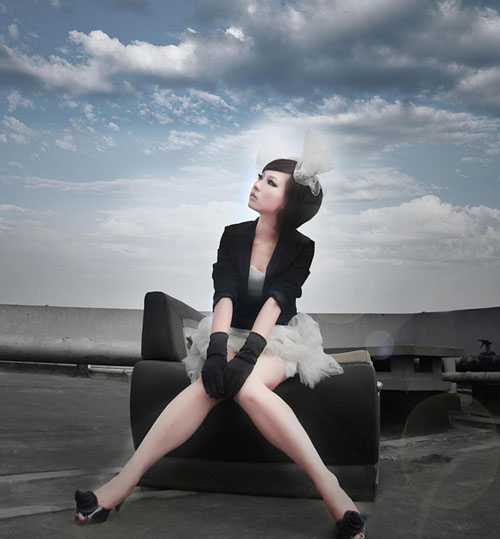
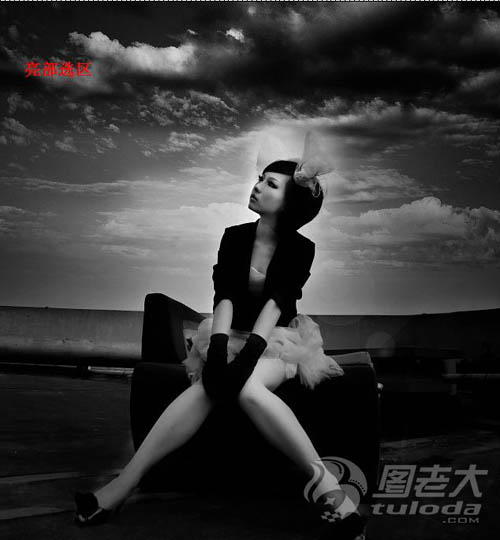
原图
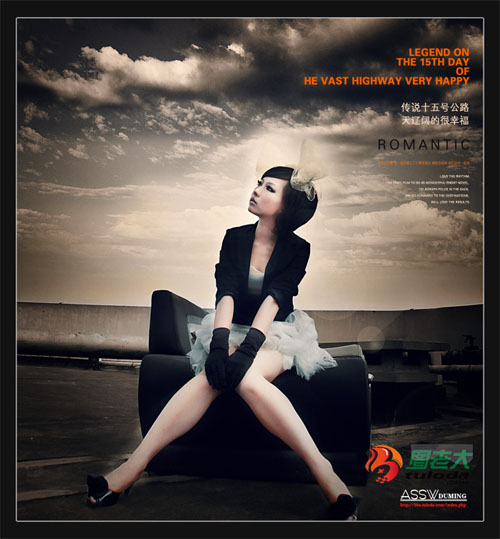
最终效果
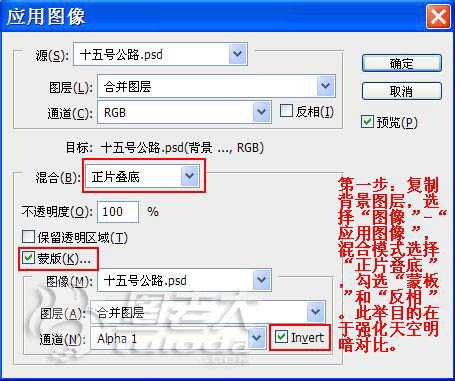
1、打开原图素材,把背景图层复制一层,执行:图像 > 应用图像,参数设置如下图。这一步操作目的是强化天空明暗对比。
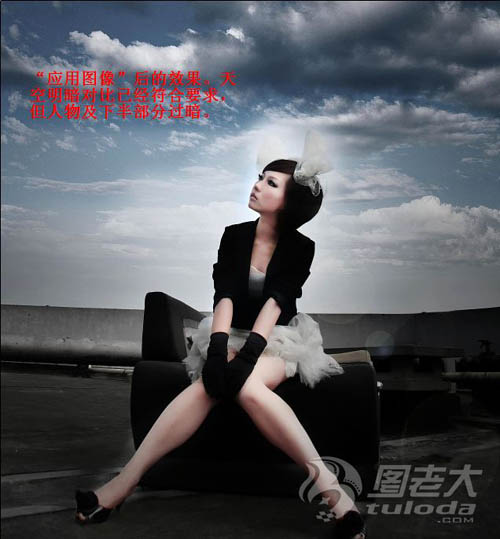
应用图像后的效果如下图,天空明暗对比已经符合要求,淡人物及地面部分过暗。
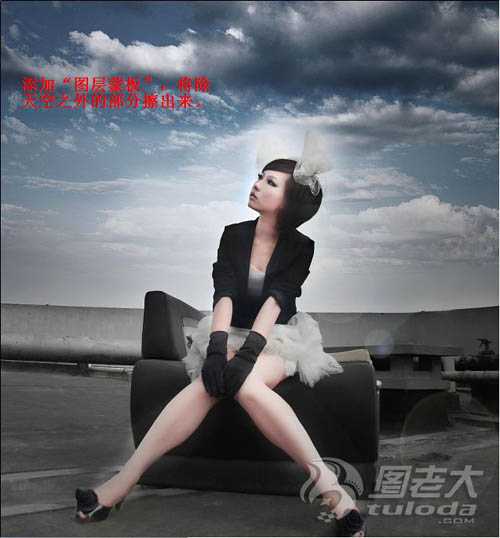
添加图层蒙版,将天空之外的部分擦出来。
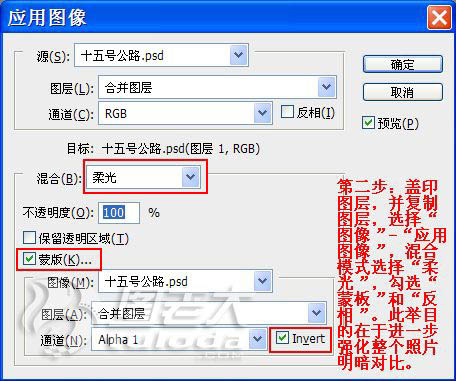
2、新建一个图层,按Ctrl + Alt + Shift + E 盖印图层,并复制图层。执行:图像 > 应用图像,参数设置如下图。这一步目的是进一步强化整个图片明暗对比。
应用图像后,照片整体进一步拉大了明暗对比,但人物部分过暗,需要添加图层蒙版进行处理。

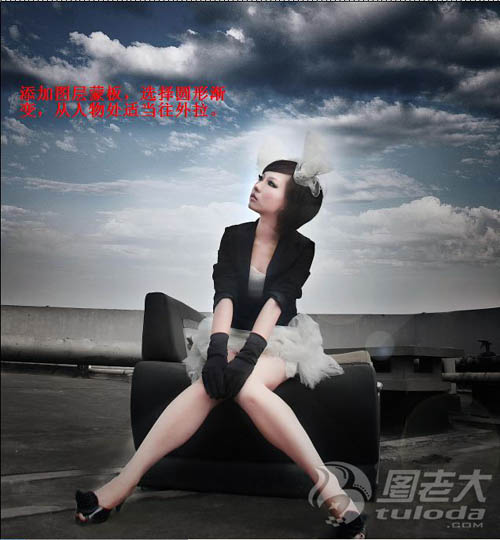
添加图层蒙版,选择圆形渐变从人物处适当往外拉。
3、新建一个图层,盖印图层。选择菜单:图像 > 计算,分别计算亮部,中间调和暗部选区。目的是为下步调色做准备。这是计算的亮部选区,参数设置如下图。
效果如下图。
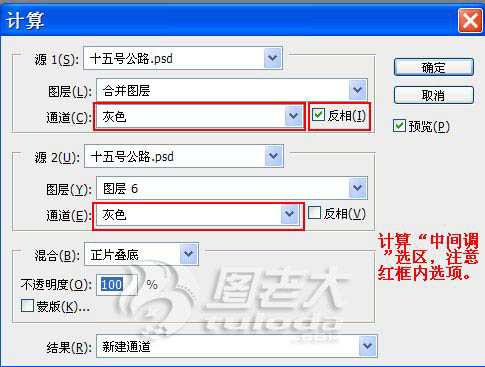
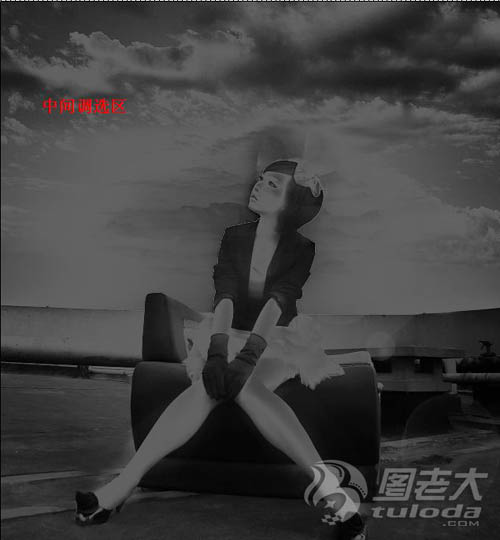
执行:图像 > 计算,计算中间调选区,参数及效果如下图。
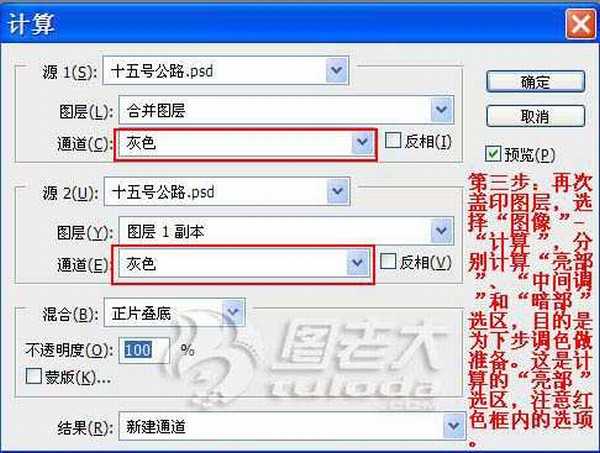
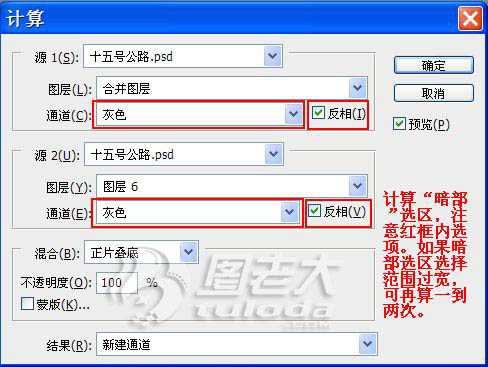
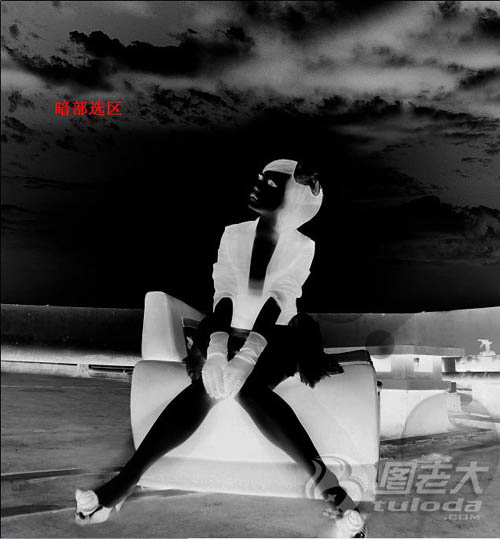
执行:图像 > 计算,计算暗部调选区,参数及效果如下图。
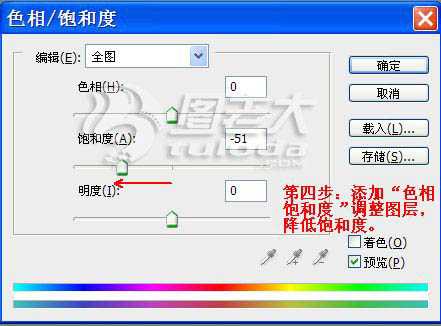
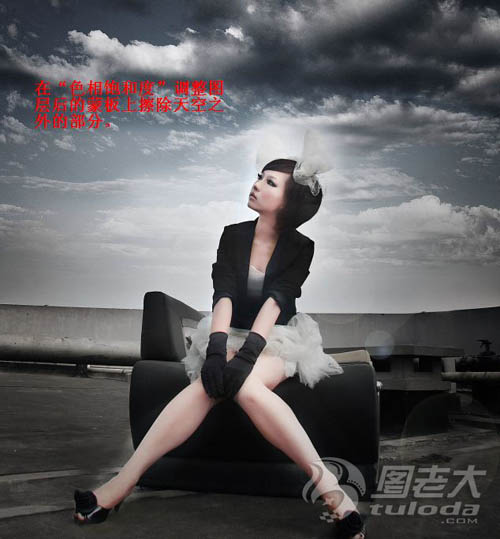
4、创建色相/饱和度调整图层,适当降低全图饱和度,参数设置如下图。确定后用把天空以外的部分擦出来。
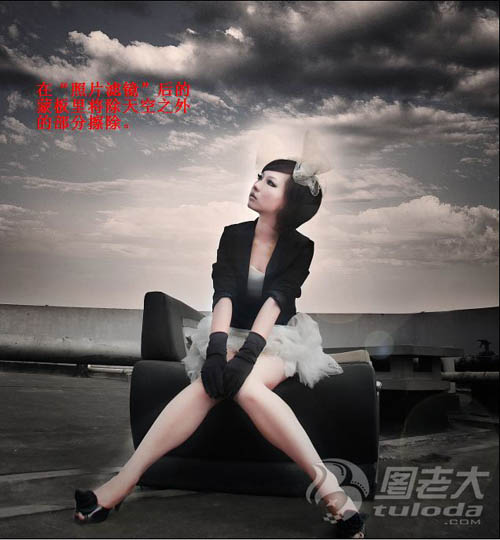
5、创建照片滤镜调整图层,把浓度适当提高,确定后用黑色画笔把天空以外的部分擦出来。

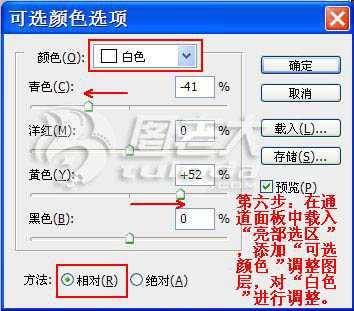
6、在通道面板中载入高光选区,创建可选颜色调整图层,对白色进行调整,参数设置如下图。确定后用黑色画笔把天空以外的部分擦出来。
上一页12 下一页 阅读全文
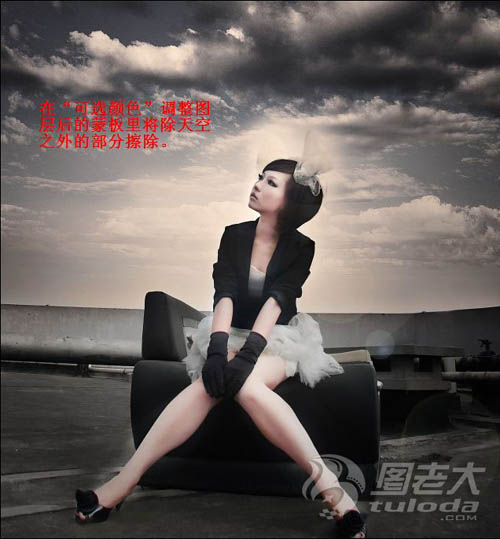
最终效果
1、打开原图素材,把背景图层复制一层,执行:图像 > 应用图像,参数设置如下图。这一步操作目的是强化天空明暗对比。
应用图像后的效果如下图,天空明暗对比已经符合要求,淡人物及地面部分过暗。
添加图层蒙版,将天空之外的部分擦出来。
2、新建一个图层,按Ctrl + Alt + Shift + E 盖印图层,并复制图层。执行:图像 > 应用图像,参数设置如下图。这一步目的是进一步强化整个图片明暗对比。
应用图像后,照片整体进一步拉大了明暗对比,但人物部分过暗,需要添加图层蒙版进行处理。
添加图层蒙版,选择圆形渐变从人物处适当往外拉。
3、新建一个图层,盖印图层。选择菜单:图像 > 计算,分别计算亮部,中间调和暗部选区。目的是为下步调色做准备。这是计算的亮部选区,参数设置如下图。
效果如下图。
执行:图像 > 计算,计算中间调选区,参数及效果如下图。
执行:图像 > 计算,计算暗部调选区,参数及效果如下图。
4、创建色相/饱和度调整图层,适当降低全图饱和度,参数设置如下图。确定后用把天空以外的部分擦出来。
5、创建照片滤镜调整图层,把浓度适当提高,确定后用黑色画笔把天空以外的部分擦出来。
6、在通道面板中载入高光选区,创建可选颜色调整图层,对白色进行调整,参数设置如下图。确定后用黑色画笔把天空以外的部分擦出来。
上一页12 下一页 阅读全文