Photoshop将花朵图片调成强对比的暗黄色
平面设计 发布日期:2025/12/30 浏览次数:1
正在浏览:Photoshop将花朵图片调成强对比的暗黄色
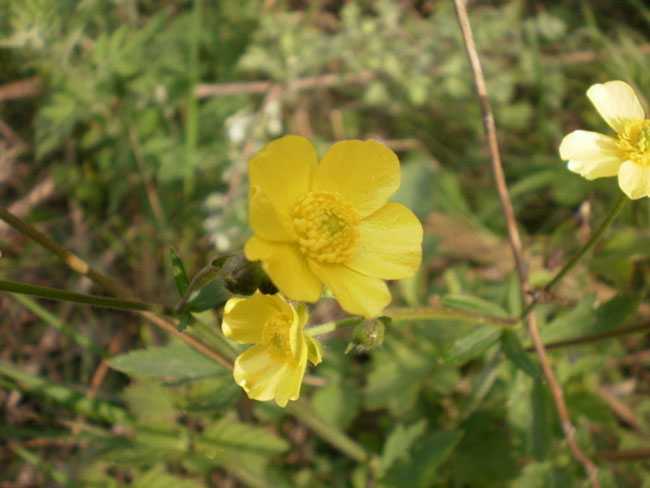
原图
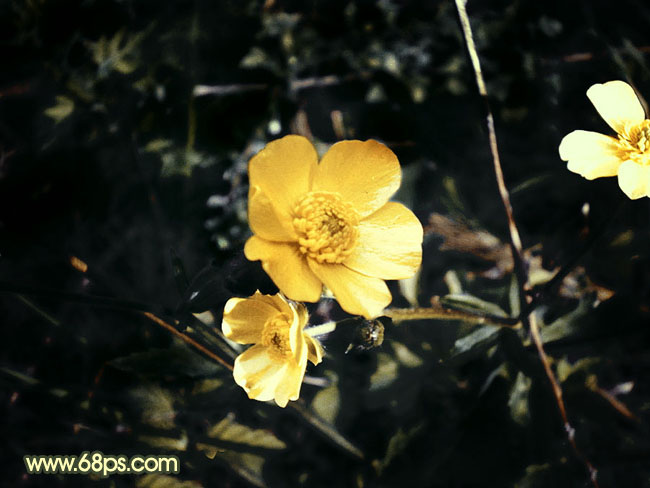
最终效果
1、打开原图素材,按Ctrl + Alt + ~ 调出高光选区,新建一个图层填充颜色:#9E8B61,图层混合模式改为“色相”,效果如下图。
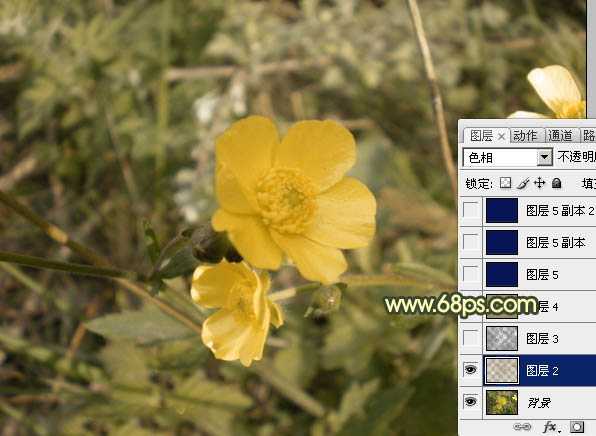
<图1>
2、按Ctrl + Alt + ~ 调出高光选区,按Ctrl + Shift + I 反选,新建一个图层填充颜色:#616161,图层混合模式改为“叠加”,效果如下图。
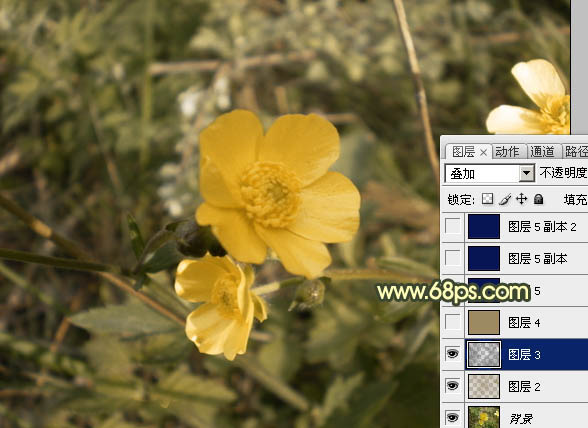
<图2>
3、新建一个图层填充颜色:#9D8A60,图层混合模式改为“叠加”,不透明度改为:30%,效果如下图。
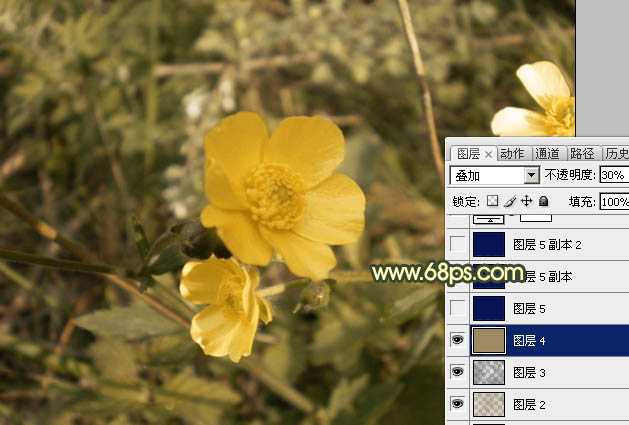
<图3>
4、新建一个图层填充颜色:#071456,图层混合模式改为“排除”,不透明度改为:60%,效果如下图。
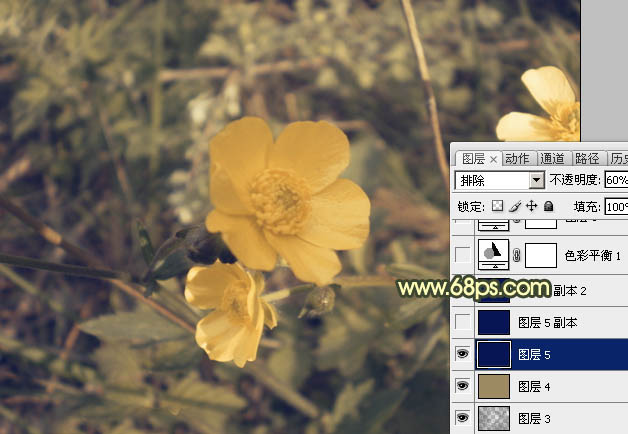
<图4>
5、新建一个图层填充颜色:#071456,图层混合模式改为“颜色减淡”,效果如下图。
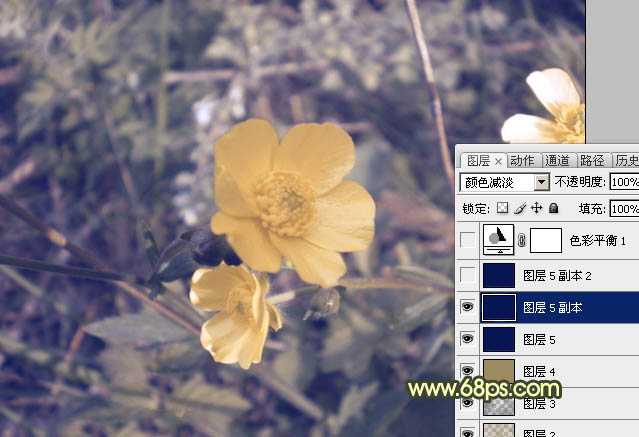
<图5>
6、按Ctrl + J 把当前图层复制一层,图层不透明度改为:30%,效果如下图。
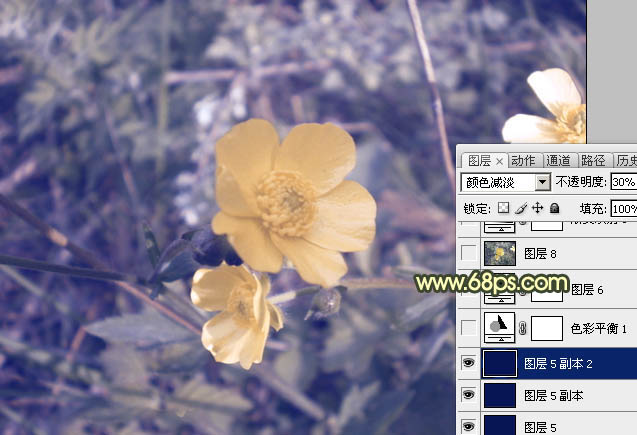
<图6>
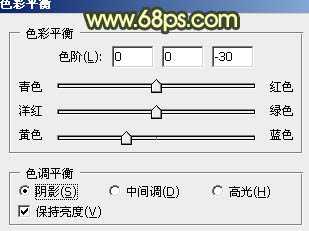
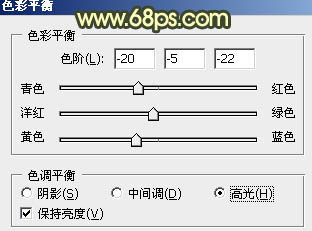
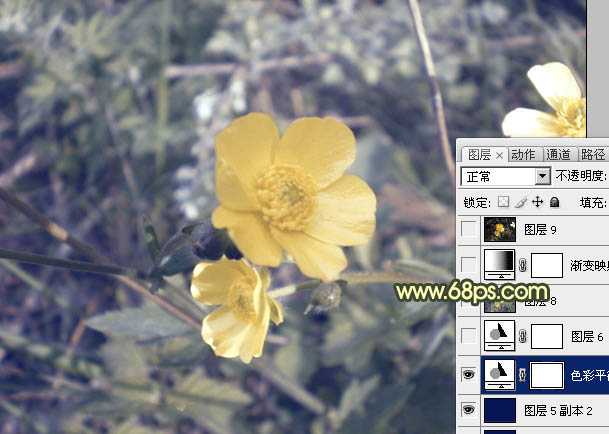
7、创建色彩平衡调整图层,对阴影,高光进行调整,参数设置如图7,8,效果如图9。
<图7>
<图8>
<图9>
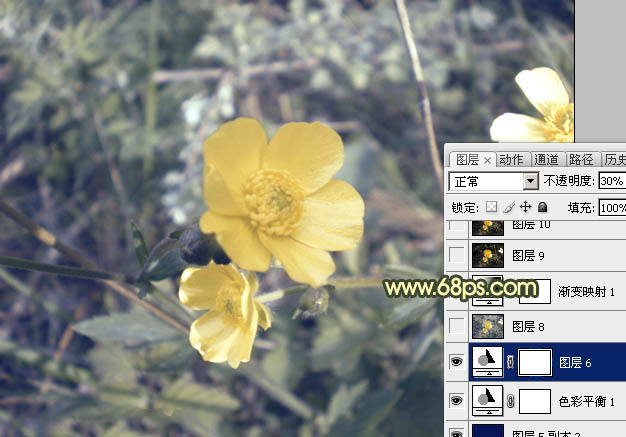
8、按Ctrl + J 把当前色彩平衡调整图层复制一层,图层不透明度改为:30%,效果如下图。
<图10>
9、新建一个图层,按Ctrl + Alt + Shift + E 盖印图层,图层混合模式改为“颜色减淡”,不透明度改为:60%,效果如下图。
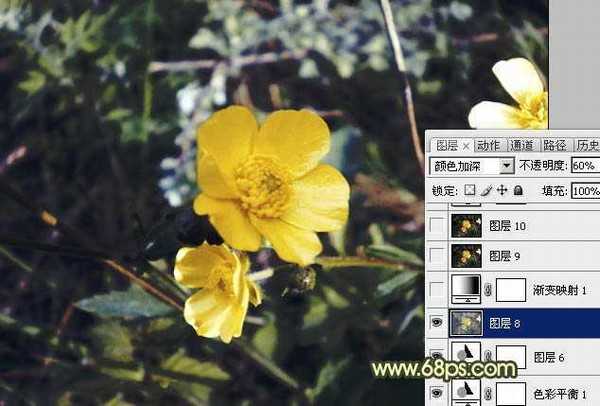
<图11>
10、创建渐变映射调整图层,颜色设置如图12,确定后把图层混合模式改为“色相”,不透明度改为:50%,效果如下图。
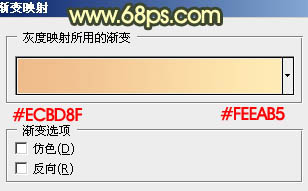
<图12>
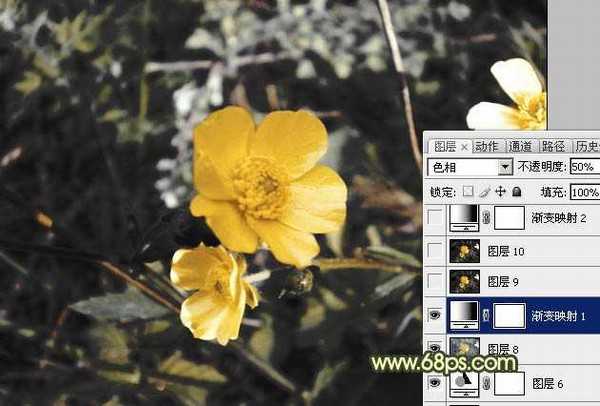
<图13>
上一页12 下一页 阅读全文

最终效果

1、打开原图素材,按Ctrl + Alt + ~ 调出高光选区,新建一个图层填充颜色:#9E8B61,图层混合模式改为“色相”,效果如下图。

<图1>
2、按Ctrl + Alt + ~ 调出高光选区,按Ctrl + Shift + I 反选,新建一个图层填充颜色:#616161,图层混合模式改为“叠加”,效果如下图。

<图2>
3、新建一个图层填充颜色:#9D8A60,图层混合模式改为“叠加”,不透明度改为:30%,效果如下图。

<图3>
4、新建一个图层填充颜色:#071456,图层混合模式改为“排除”,不透明度改为:60%,效果如下图。

<图4>
5、新建一个图层填充颜色:#071456,图层混合模式改为“颜色减淡”,效果如下图。

<图5>
6、按Ctrl + J 把当前图层复制一层,图层不透明度改为:30%,效果如下图。

<图6>
7、创建色彩平衡调整图层,对阴影,高光进行调整,参数设置如图7,8,效果如图9。

<图7>

<图8>

<图9>
8、按Ctrl + J 把当前色彩平衡调整图层复制一层,图层不透明度改为:30%,效果如下图。

<图10>
9、新建一个图层,按Ctrl + Alt + Shift + E 盖印图层,图层混合模式改为“颜色减淡”,不透明度改为:60%,效果如下图。

<图11>
10、创建渐变映射调整图层,颜色设置如图12,确定后把图层混合模式改为“色相”,不透明度改为:50%,效果如下图。

<图12>

<图13>
上一页12 下一页 阅读全文