photoshop超详细的双曲线精细磨皮教程
平面设计 发布日期:2026/6/30 浏览次数:1
正在浏览:photoshop超详细的双曲线精细磨皮教程
大致过程:首先需要选择精度好一点的素材图片,再磨皮之前需要创建两个曲线调整图层,分别把图片调亮和变暗,然后把曲线蒙版都填充黑色。为了便于观察还可以添加两个观察图层,都填充黑色,适当更改图层混合模式。处理的时候只需要用白色画笔变亮的曲线蒙版上把较暗的部分涂亮,在变暗的曲线蒙版上把较亮的部分涂暗即可。
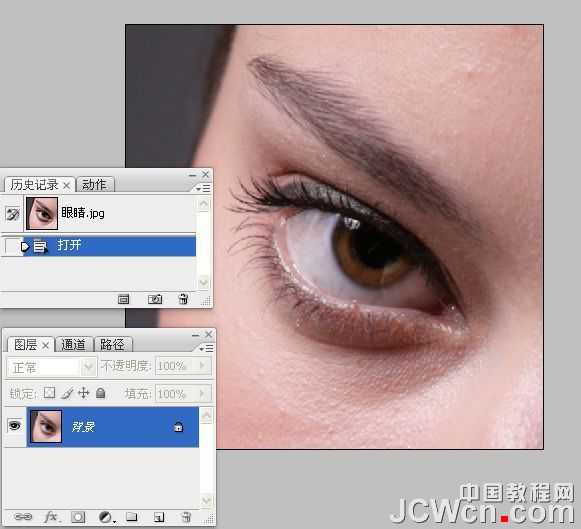
原图

最终效果

1、大原图素材,建立“观察器”。
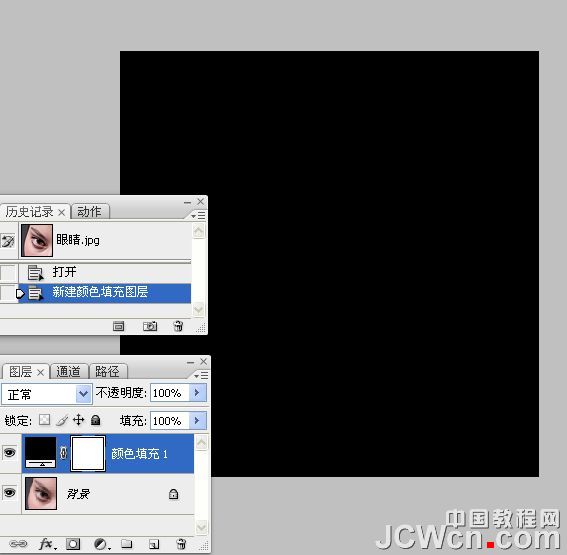
2、创建纯色填充图层,选择黑色,效果如下图。
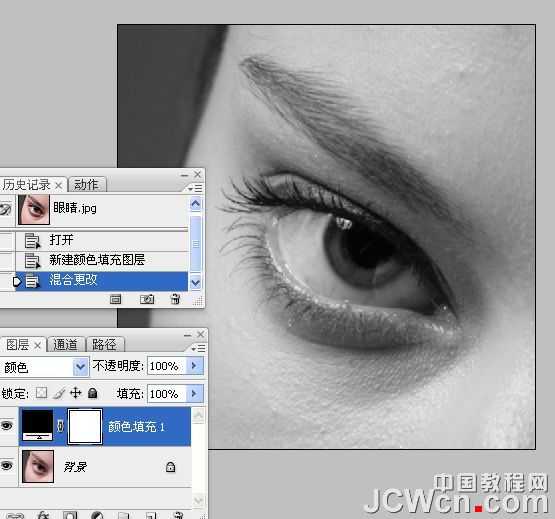
3、把图层混合模式改为“颜色”。
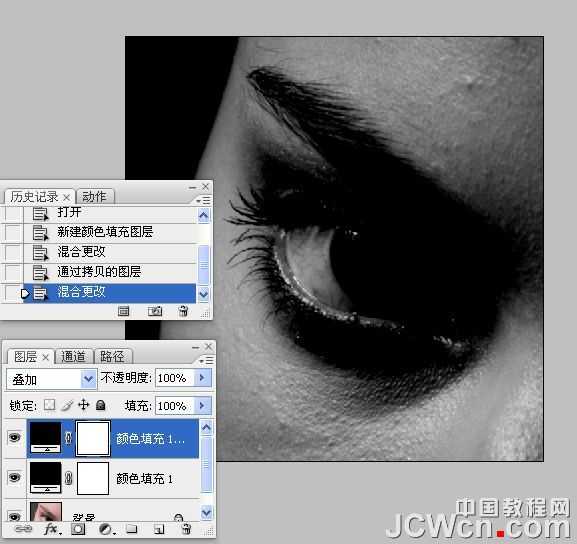
4、把当前颜色填充图层复制一层,如下图。
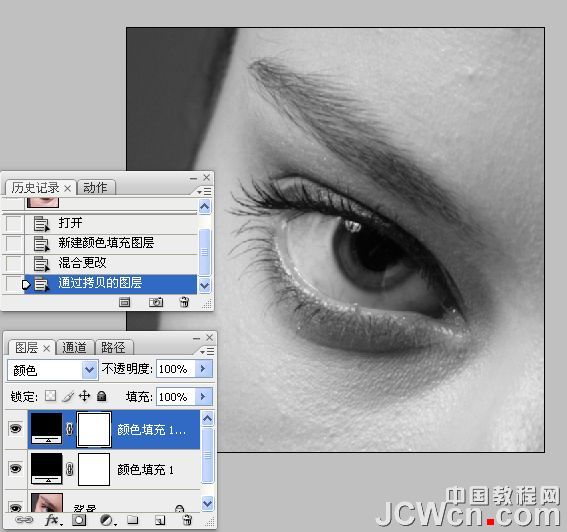
5、把颜色填充图层副本图层混合模式改为“叠加”。
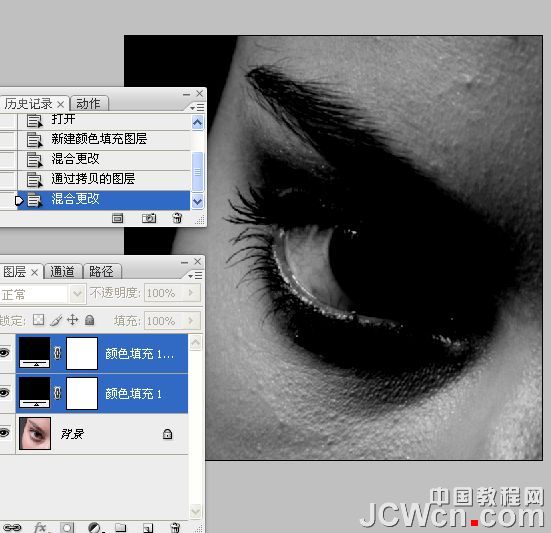
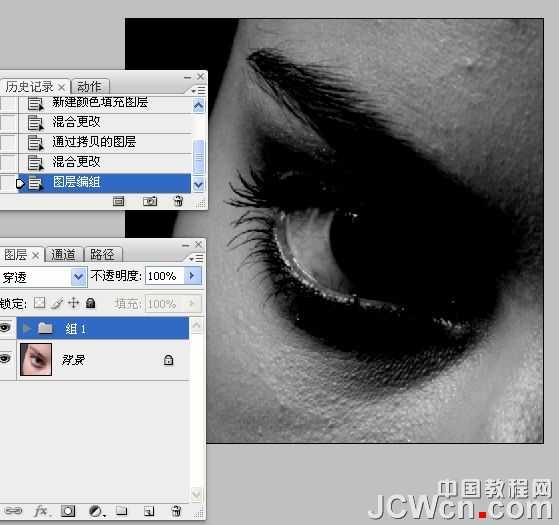
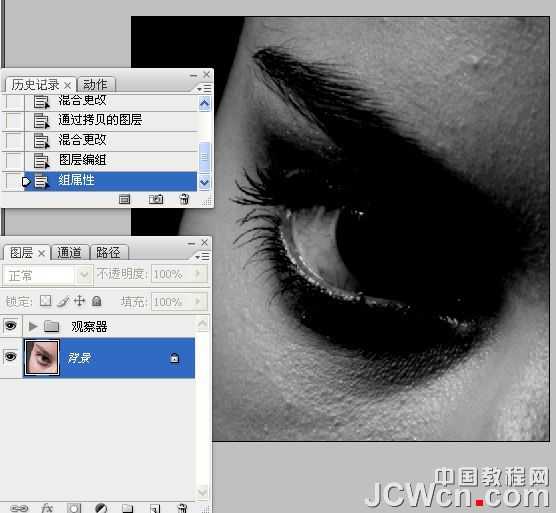
6、新建一个组,把两个颜色填充调整图层放入新建的组中,把组命名为“观察器”。

7、建立“暗调与高光”层。
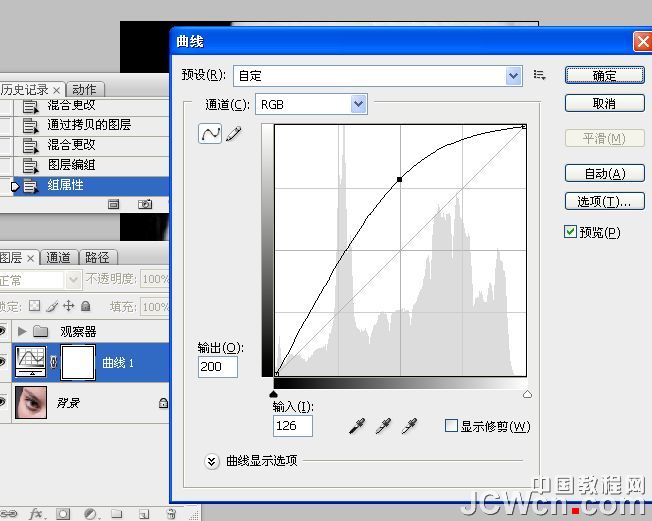
8、在“观察器”组下面创建曲线调整图层,适当把图片调亮一点,如下图。
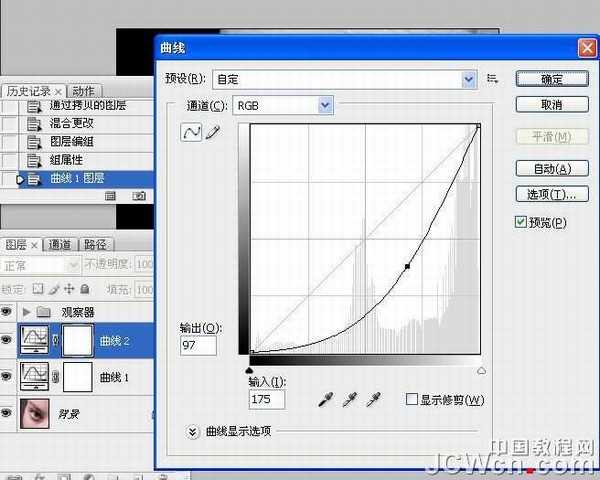
9、再创建曲线调整图层,稍微把图片调暗一点,参数设置如下图。
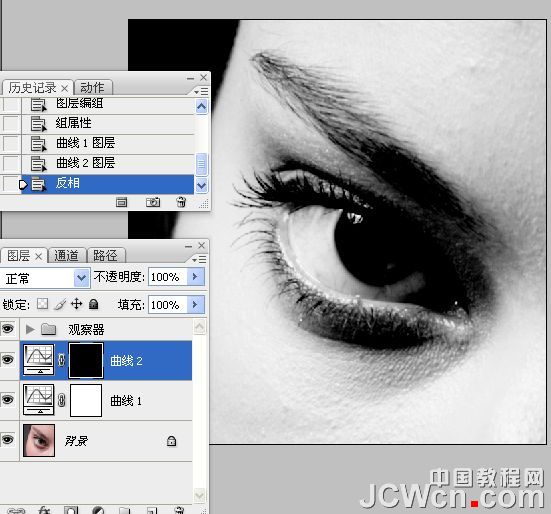
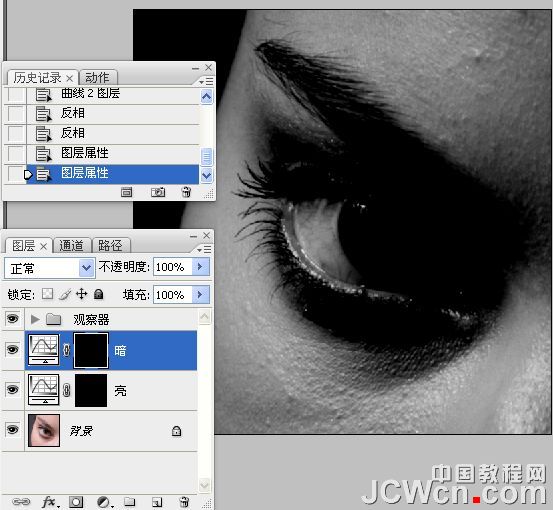
10、把两个曲线调整图层蒙版都填充黑色,效果如下图。
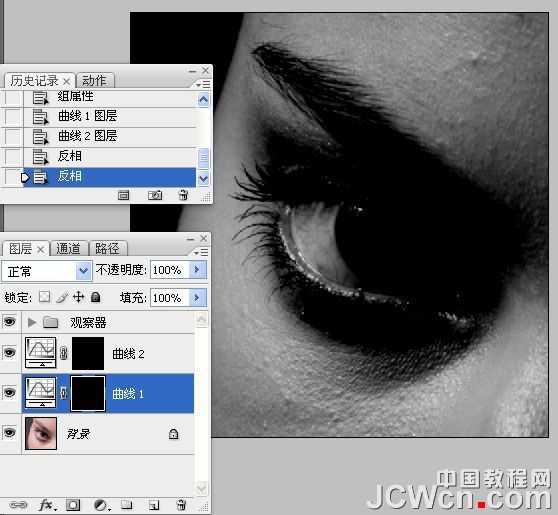
11、分别给曲线调整图层命名,上面的命名为“暗”,下面的命名为“亮”,如下图。
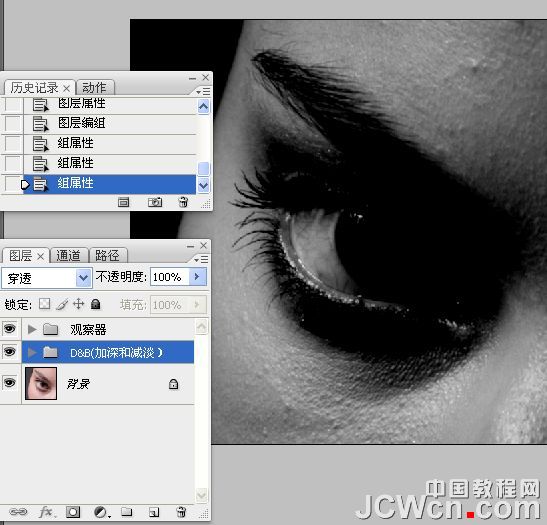
12、同上的方法把两个曲线调整图层放入新建的组里面。
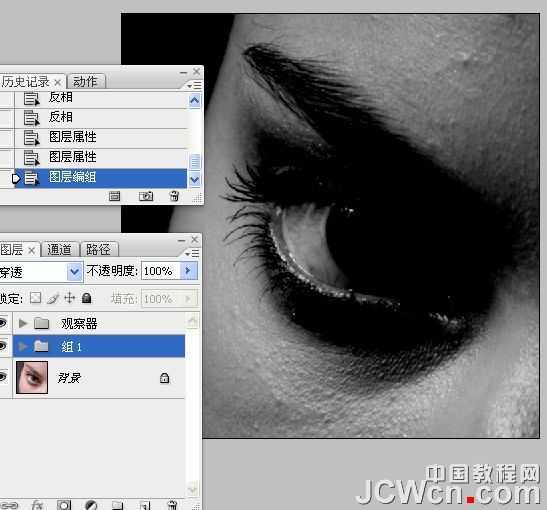
13、把组命名为“加深和减淡”,如下图。
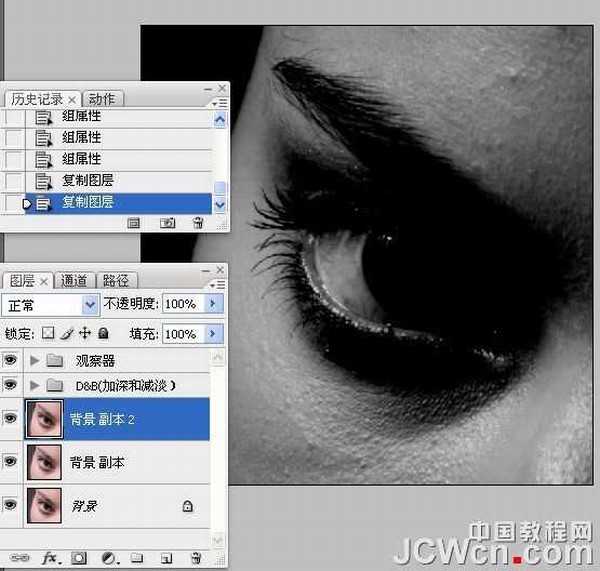
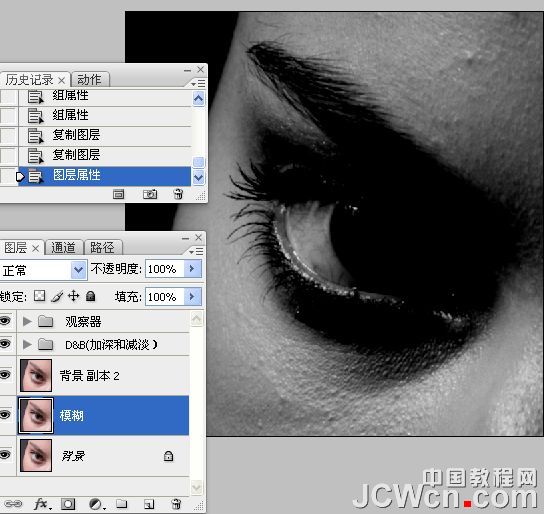
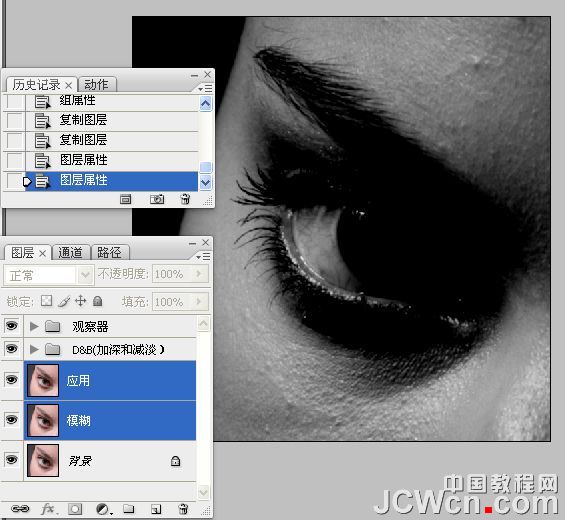
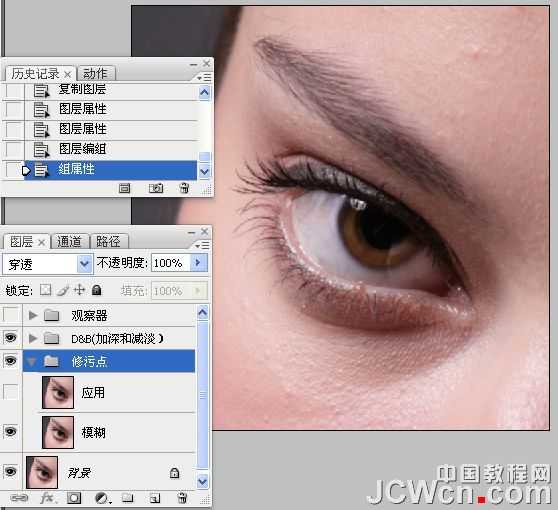
14、把背景图层复制两层,分别命名为“模糊”和“应用”如下图。
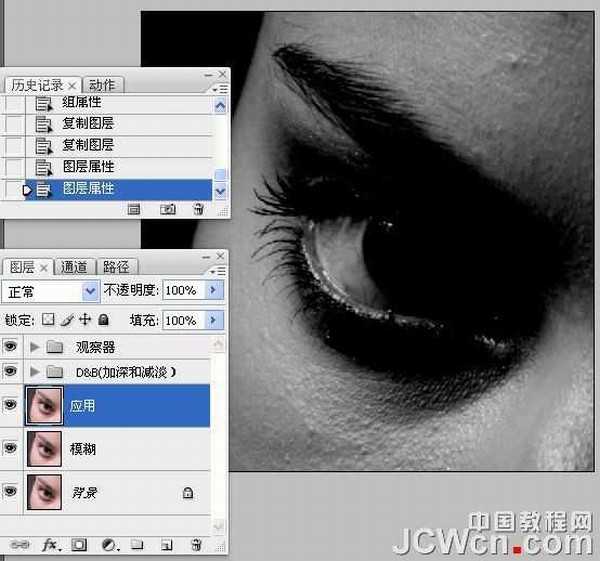
15、同上的方法编组和命名为“修污点”。
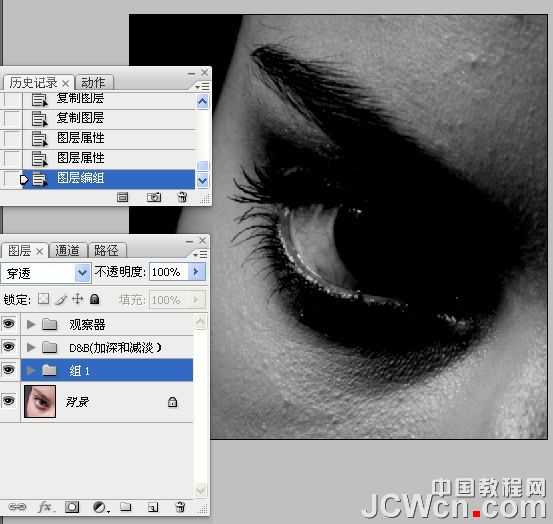
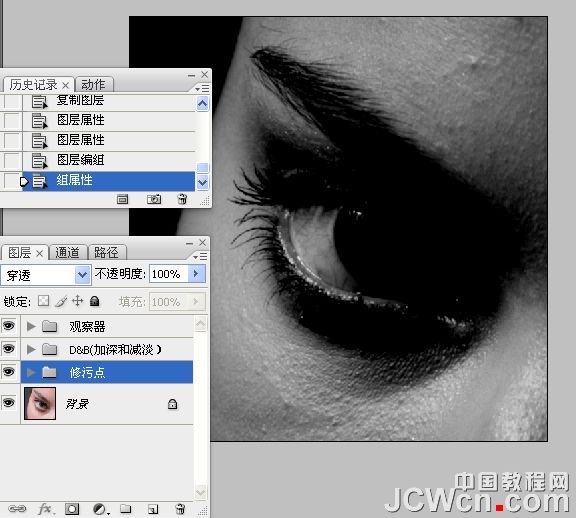
16、关闭“观察器”图层的眼睛。
上一页12 3 下一页 阅读全文
原图
最终效果
1、大原图素材,建立“观察器”。
2、创建纯色填充图层,选择黑色,效果如下图。
3、把图层混合模式改为“颜色”。
4、把当前颜色填充图层复制一层,如下图。
5、把颜色填充图层副本图层混合模式改为“叠加”。
6、新建一个组,把两个颜色填充调整图层放入新建的组中,把组命名为“观察器”。
7、建立“暗调与高光”层。
8、在“观察器”组下面创建曲线调整图层,适当把图片调亮一点,如下图。
9、再创建曲线调整图层,稍微把图片调暗一点,参数设置如下图。
10、把两个曲线调整图层蒙版都填充黑色,效果如下图。
11、分别给曲线调整图层命名,上面的命名为“暗”,下面的命名为“亮”,如下图。
12、同上的方法把两个曲线调整图层放入新建的组里面。
13、把组命名为“加深和减淡”,如下图。
14、把背景图层复制两层,分别命名为“模糊”和“应用”如下图。
15、同上的方法编组和命名为“修污点”。
16、关闭“观察器”图层的眼睛。
上一页12 3 下一页 阅读全文
下一篇:ps非常实用的保细节去斑方法