Photoshop将外景人物图片调成柔美的暖调青绿色
平面设计 发布日期:2025/12/29 浏览次数:1
正在浏览:Photoshop将外景人物图片调成柔美的暖调青绿色
原图

最终效果

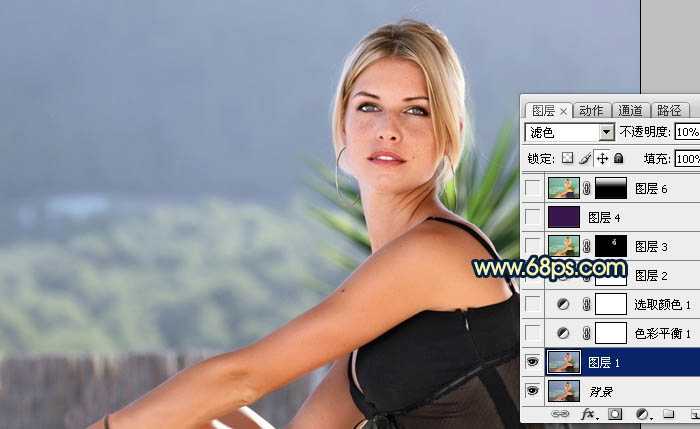
1、打开原图素材,按Ctrl + J 把背景图层复制一层,图层混合模式改为“滤色”,不透明度改为:10%,如下图。
<图1>
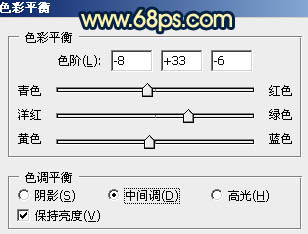
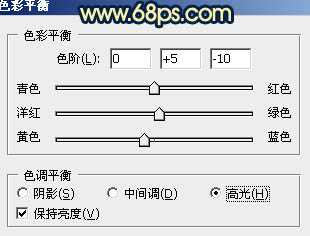
2、创建色彩平衡调整图层,对中间调及高光进行调整,参数设置如图2,3,效果如图4。
<图2>
<图3>

<图4>
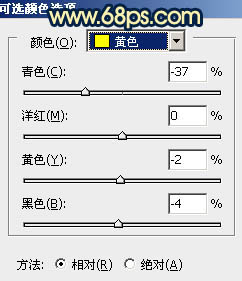
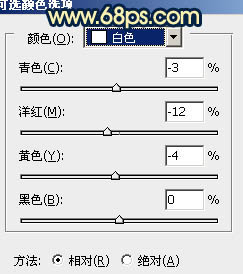
3、创建可选颜色调整图层,对红,黄,青,白进行调整,参数设置如图5 - 8,效果如图9。

<图5>
<图6>

<图7>
<图8>

<图9>
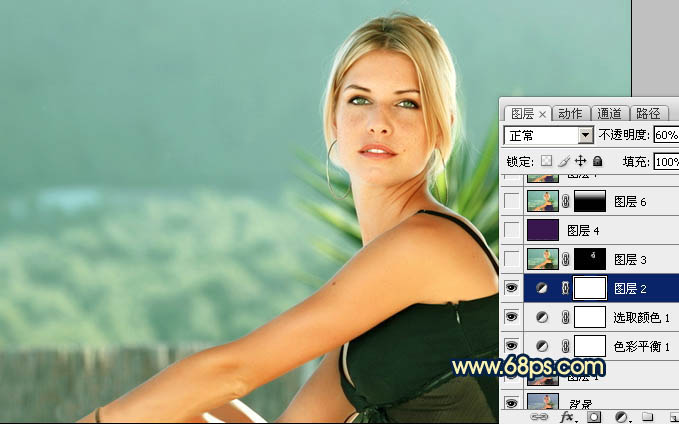
4、按Ctrl + J 把当前可选颜色调整图层复制一层,图层不透明度改为:60%,效果如下图。
<图10>
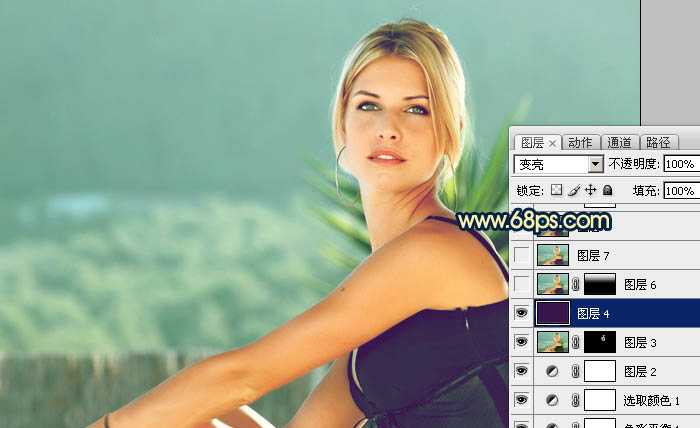
5、新建一个图层,填充颜色:#39164D,图层混合模式改为“变亮”,效果如下图。
<图11>
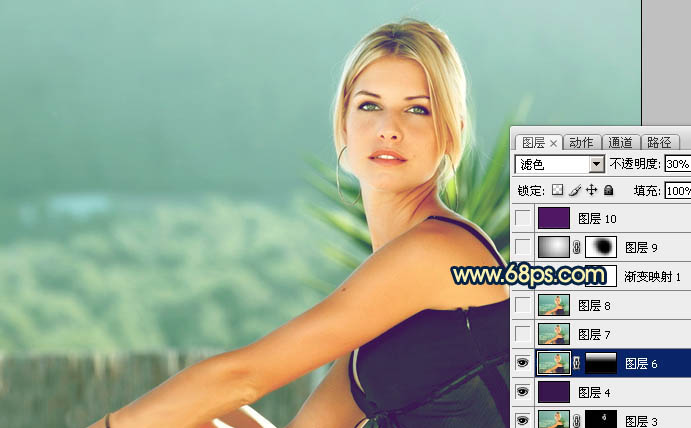
6、新建一个图层,按Ctrl + Alt + Shift + E 盖印图层,图层混合模式改为“滤色”,不透明度改为:30%。加上图层蒙版,用黑白渐变由上至下拉出白色至黑色线性渐变,效果如下图。
<图12>
上一页12 下一页 阅读全文

最终效果

1、打开原图素材,按Ctrl + J 把背景图层复制一层,图层混合模式改为“滤色”,不透明度改为:10%,如下图。

<图1>
2、创建色彩平衡调整图层,对中间调及高光进行调整,参数设置如图2,3,效果如图4。

<图2>

<图3>

<图4>
3、创建可选颜色调整图层,对红,黄,青,白进行调整,参数设置如图5 - 8,效果如图9。

<图5>

<图6>

<图7>

<图8>

<图9>
4、按Ctrl + J 把当前可选颜色调整图层复制一层,图层不透明度改为:60%,效果如下图。

<图10>
5、新建一个图层,填充颜色:#39164D,图层混合模式改为“变亮”,效果如下图。

<图11>
6、新建一个图层,按Ctrl + Alt + Shift + E 盖印图层,图层混合模式改为“滤色”,不透明度改为:30%。加上图层蒙版,用黑白渐变由上至下拉出白色至黑色线性渐变,效果如下图。

<图12>
上一页12 下一页 阅读全文