Photoshop将手机照片转为柔和的淡蓝色仿手绘效果
平面设计 发布日期:2026/6/20 浏览次数:1
正在浏览:Photoshop将手机照片转为柔和的淡蓝色仿手绘效果
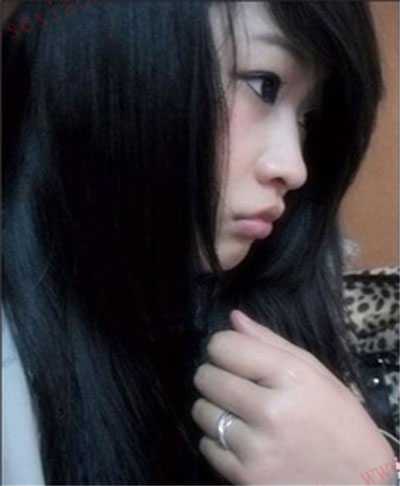
原图
最终效果

1、打开原图素材,把背景图层复制一层。
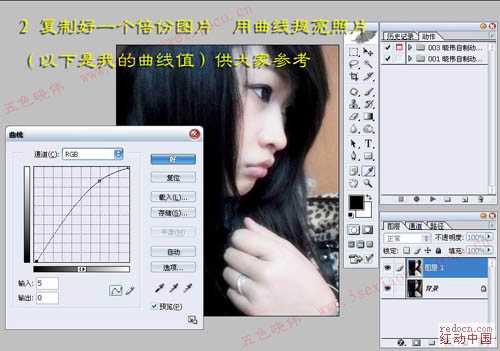
2、按Ctrl + M 调整曲线,对RGB进行调整,稍微调亮一点,参数及效果如下图。
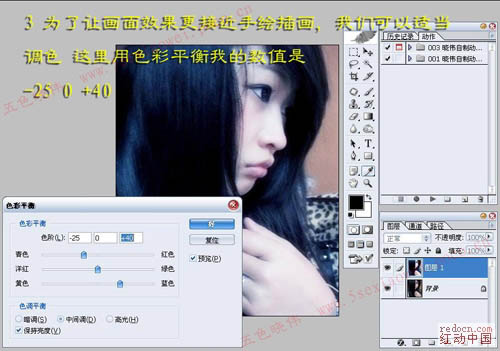
3、按Ctrl + B 调整色彩平衡,参数设置如下图。目的是让画面效果更接近手绘效果。
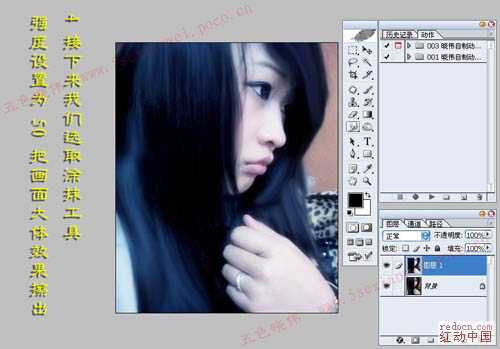
4、选择涂抹工具强度设置为:50%,把画面大体效果涂出来。目的是人物脸部及头发部分涂抹均匀,消除一些噪点。
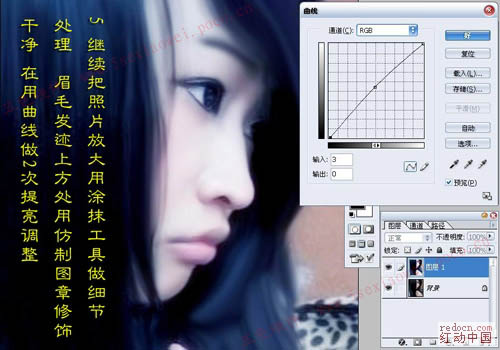
5、继续把照片放到,用涂抹工具做细节处理。眉毛,发迹上方用仿制图章工具修饰干净。再用曲线稍微调亮。
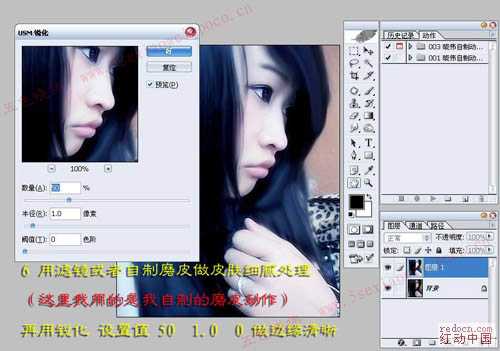
6、用外挂滤镜把人物皮肤处理细腻。再执行:滤镜 > 锐化 > USM锐化,参数设置如下图。
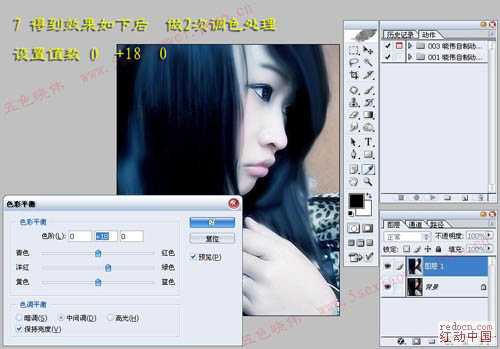
7、现在大致效果如下图,按Ctrl + B 调整色彩平衡,参数:0/18/0,如下图。
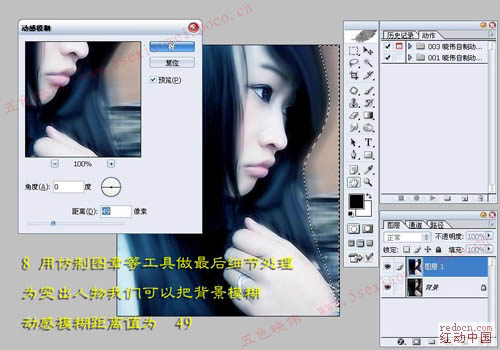
8、用仿制图章等工具做最后细节处理,为突出人物我们可以把背景模糊处理,用钢笔勾出背景部分选区,执行:滤镜 > 模糊 > 动感模糊,角度为0,距离为49。
最后调整一下细节,完成最终效果。
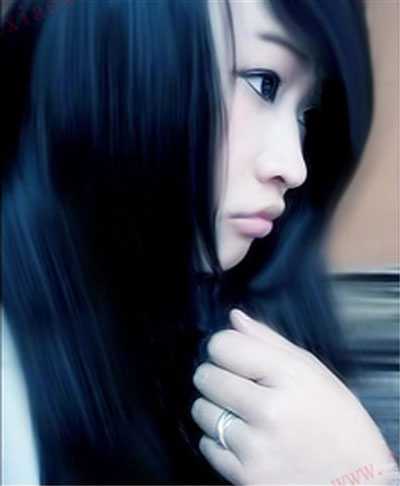
最终效果
1、打开原图素材,把背景图层复制一层。
2、按Ctrl + M 调整曲线,对RGB进行调整,稍微调亮一点,参数及效果如下图。
3、按Ctrl + B 调整色彩平衡,参数设置如下图。目的是让画面效果更接近手绘效果。
4、选择涂抹工具强度设置为:50%,把画面大体效果涂出来。目的是人物脸部及头发部分涂抹均匀,消除一些噪点。
5、继续把照片放到,用涂抹工具做细节处理。眉毛,发迹上方用仿制图章工具修饰干净。再用曲线稍微调亮。
6、用外挂滤镜把人物皮肤处理细腻。再执行:滤镜 > 锐化 > USM锐化,参数设置如下图。
7、现在大致效果如下图,按Ctrl + B 调整色彩平衡,参数:0/18/0,如下图。
8、用仿制图章等工具做最后细节处理,为突出人物我们可以把背景模糊处理,用钢笔勾出背景部分选区,执行:滤镜 > 模糊 > 动感模糊,角度为0,距离为49。
最后调整一下细节,完成最终效果。