Photoshop为美女照片加上绚丽的彩色光束
平面设计 发布日期:2026/4/6 浏览次数:1
正在浏览:Photoshop为美女照片加上绚丽的彩色光束
光束素材需要跟人完美的结合起来,局部需要用色彩渲染一些过渡高光,这样出来的效果才完美。
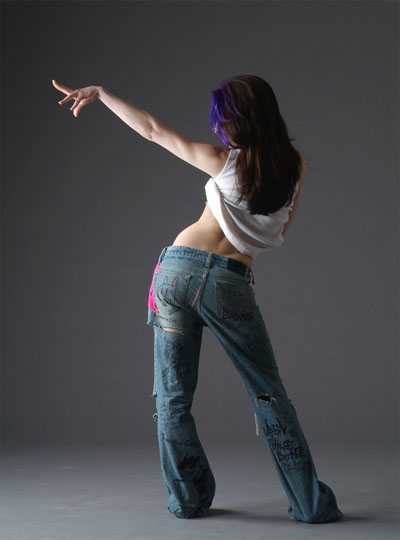
原图
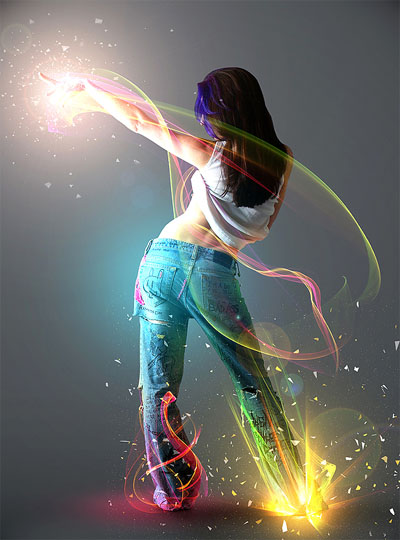
最终效果
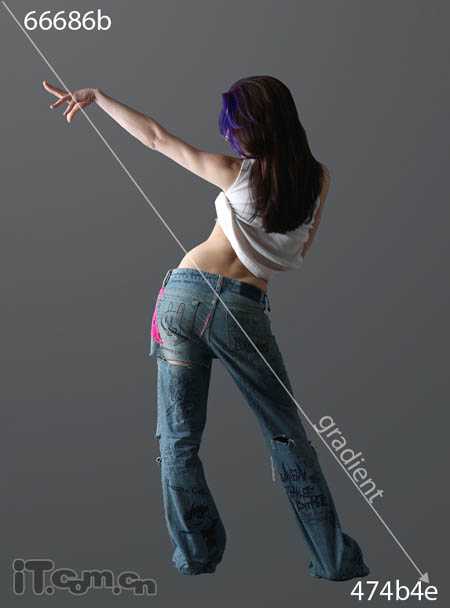
1、首先运行你的photoshop打开原图素材,然后使用钢笔工具创建美女的路径(在创建路径时为了更准确,建议把图片放大)。创建路径后按下Ctrl+Enter把路径变为选区,接着创建一个1500px*2026px大小的新文档,并把美女复制到新文档中。然后在美女图层下面创建一个新图层,使用渐变工具从左上方面右下方填充一个线性渐变效果,如图所示。
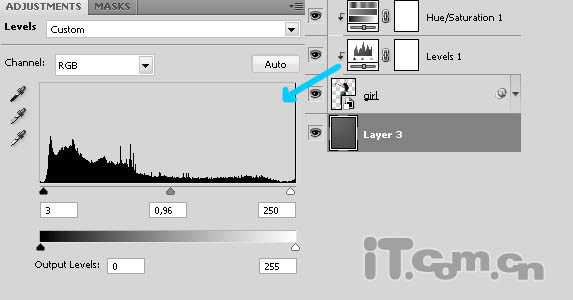
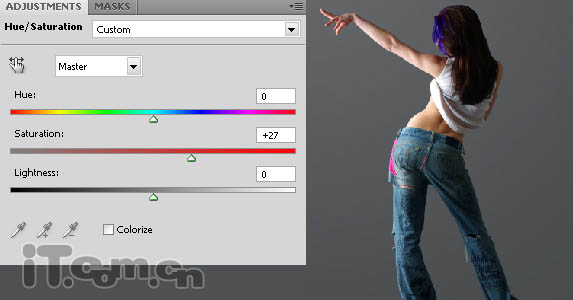
2、接下来我们调整一下美女的颜色和对比度,并添加一些阴影。单击图层面板下的“创建新的填充或调整图层”按钮,分别选择“色阶”和“色相/饱和度”,设置参考下图所示。
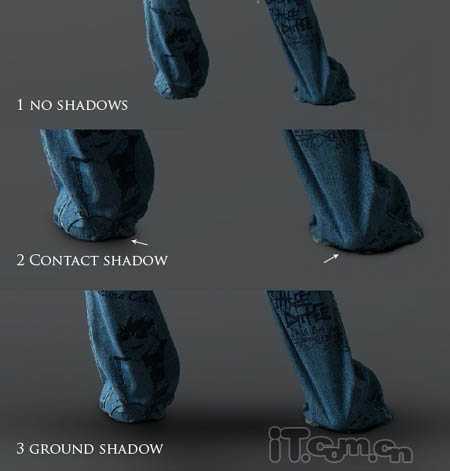
3、在美女脚下添加一些阴影,否则美女就变得好像浮在空中了。在美女图层下创建一个新图层,然后使用不同大小、不同硬度、不同透明度的画笔工具在美女脚下涂抹出阴影,参考下图所示。
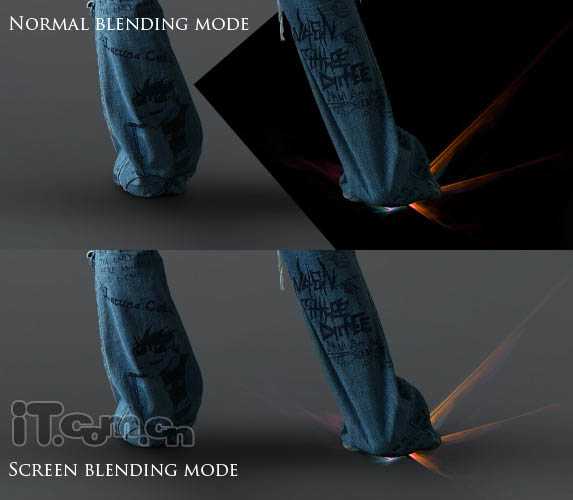
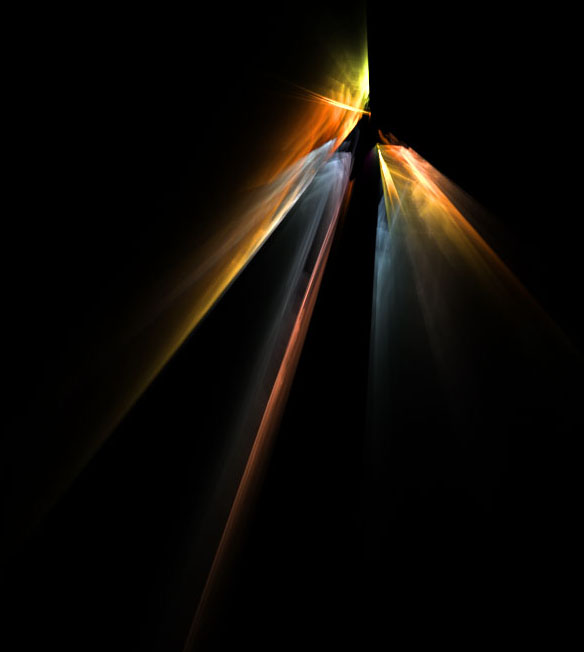
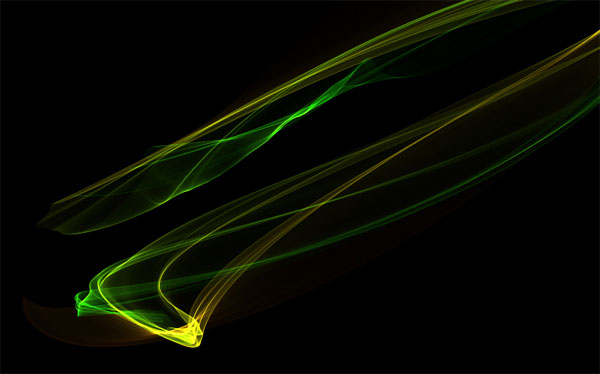
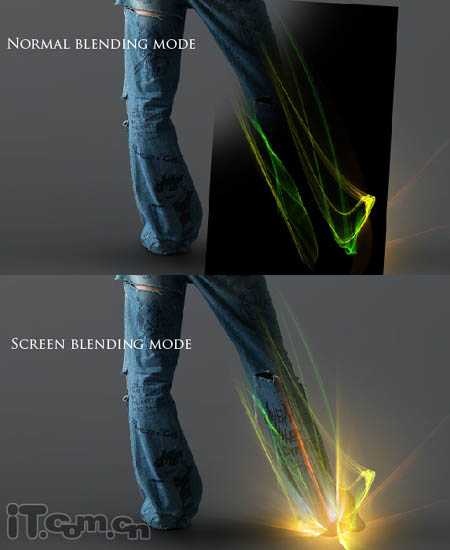
4、打开光影素材如下图,把它使用到美女的叫下,并设置图层混合模式为“滤色”如图所示。为了使色彩更显示,大家可以调整一下饱和度。
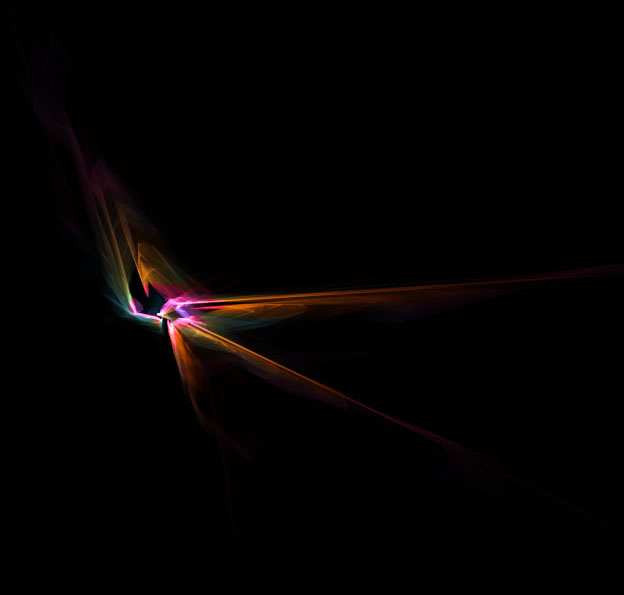
5、打开下图所示光影素材复制到图片中美女图层的上面,设置混合模式为“滤色”,效果如图所示。
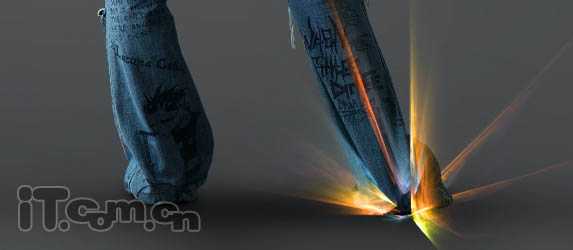
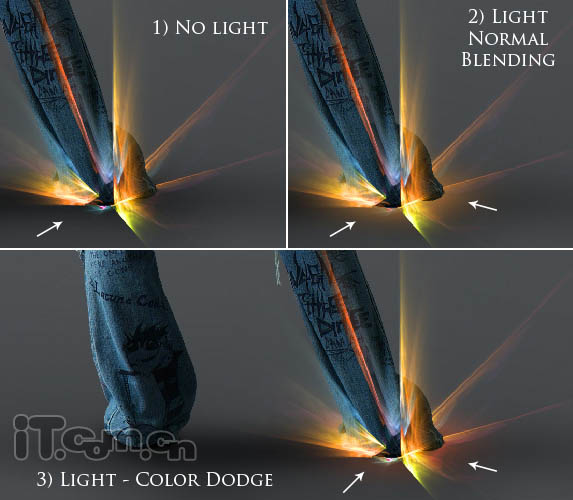
6、在美女图层下添加一个图层,混合模式为颜色减淡,使用不透明度为75%~85%的圆形柔角画笔在美女脚下画出一些灯光效果,颜色为#BC7A39,如图所示。
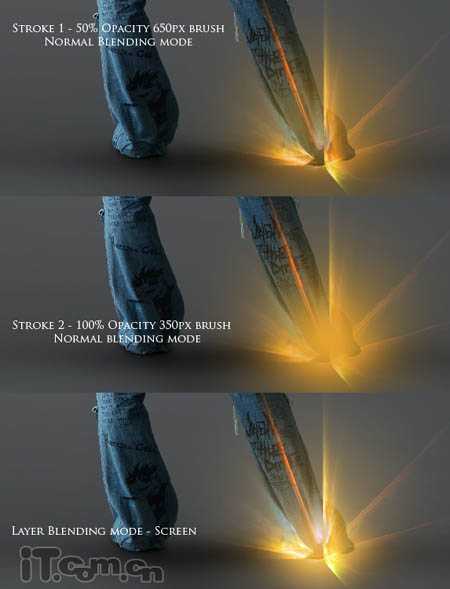
7、在美女图层上面创建一个新图层,使用画笔工具(不透明度:50%、大小:650px、),美女的脚上添加灯光效果。再创建一个新图层,混合模式为滤色,使用画笔工具(不透明度:100%、大小:350px)在美女的脚上再添加一个灯光效果,如图所示。
8、打开下图所示绿光素材。打开绿光素材复制到美女的脚上,然后使用橡皮擦工具涂抹绿光的右上角,对其进行柔化,然后设置图层的混合模式为“滤色”,如图所示。
上一页12 下一页 阅读全文
原图
最终效果
1、首先运行你的photoshop打开原图素材,然后使用钢笔工具创建美女的路径(在创建路径时为了更准确,建议把图片放大)。创建路径后按下Ctrl+Enter把路径变为选区,接着创建一个1500px*2026px大小的新文档,并把美女复制到新文档中。然后在美女图层下面创建一个新图层,使用渐变工具从左上方面右下方填充一个线性渐变效果,如图所示。
2、接下来我们调整一下美女的颜色和对比度,并添加一些阴影。单击图层面板下的“创建新的填充或调整图层”按钮,分别选择“色阶”和“色相/饱和度”,设置参考下图所示。
3、在美女脚下添加一些阴影,否则美女就变得好像浮在空中了。在美女图层下创建一个新图层,然后使用不同大小、不同硬度、不同透明度的画笔工具在美女脚下涂抹出阴影,参考下图所示。
4、打开光影素材如下图,把它使用到美女的叫下,并设置图层混合模式为“滤色”如图所示。为了使色彩更显示,大家可以调整一下饱和度。
5、打开下图所示光影素材复制到图片中美女图层的上面,设置混合模式为“滤色”,效果如图所示。
6、在美女图层下添加一个图层,混合模式为颜色减淡,使用不透明度为75%~85%的圆形柔角画笔在美女脚下画出一些灯光效果,颜色为#BC7A39,如图所示。
7、在美女图层上面创建一个新图层,使用画笔工具(不透明度:50%、大小:650px、),美女的脚上添加灯光效果。再创建一个新图层,混合模式为滤色,使用画笔工具(不透明度:100%、大小:350px)在美女的脚上再添加一个灯光效果,如图所示。
8、打开下图所示绿光素材。打开绿光素材复制到美女的脚上,然后使用橡皮擦工具涂抹绿光的右上角,对其进行柔化,然后设置图层的混合模式为“滤色”,如图所示。
上一页12 下一页 阅读全文