Photoshop快速打造曲线魔幻特效背景
平面设计 发布日期:2026/4/6 浏览次数:1
正在浏览:Photoshop快速打造曲线魔幻特效背景
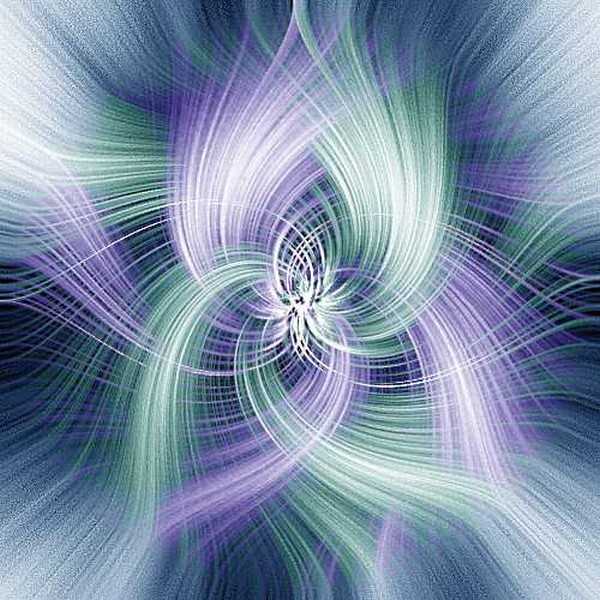
效果
1、新建文件500*500像素 分辨率72其它不变。
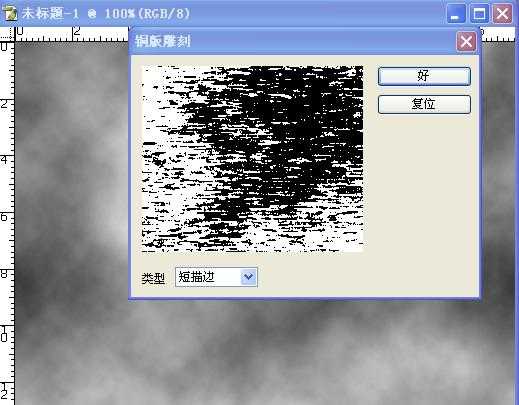
2、前景与背景黑白、持行滤镜----渲染——云彩
滤镜——像素化——铜版雕刻——短描边
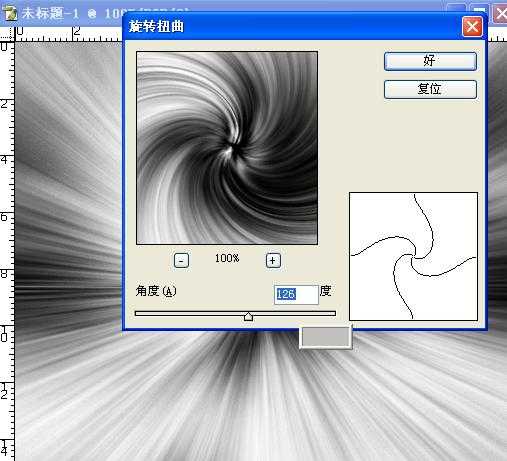
3、滤镜——模糊——径向模糊(数量100、模糊方法“缩放”品质“好”)
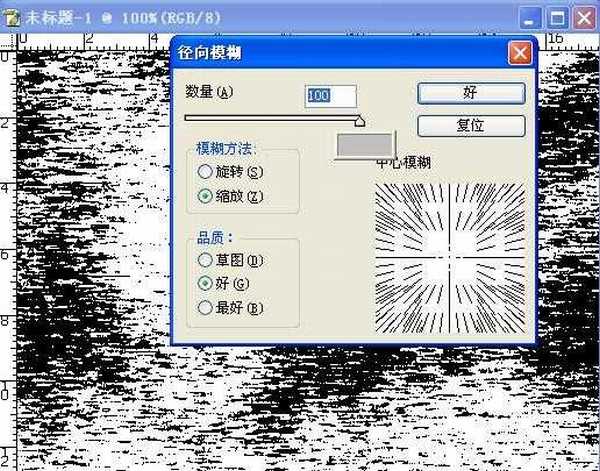
按CTRL+F重复一次、持行滤镜——旋转扭曲“126”(可自己设制)
4、滤镜——锐化——USM锐化(500、1、1)

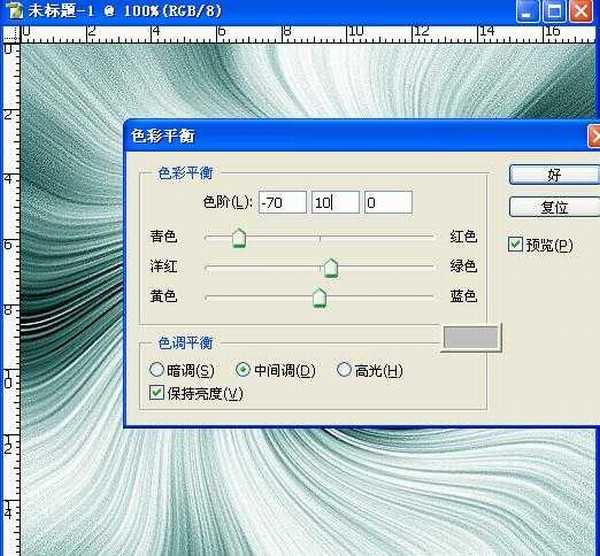
5、CTRL+B色彩平衡(-70、10、0)再复制背景图层
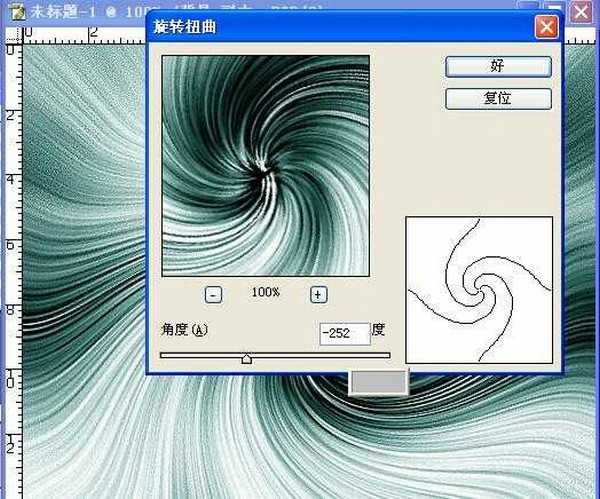
6、对背景副本,进行\滤镜——旋转扭曲“-252”、
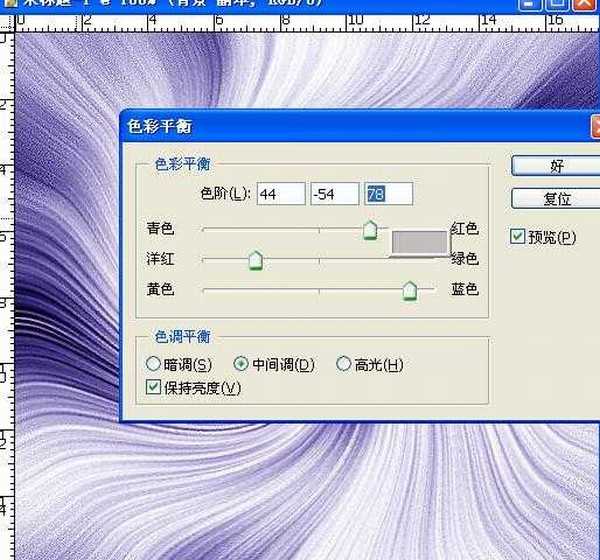
CTRL+B色彩平衡(44、-54、78)%
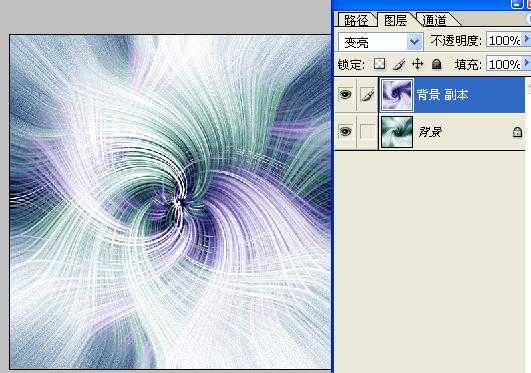
7、将图层的混合模式改为“变亮”#
1、新建文件500*500像素 分辨率72其它不变。
2、前景与背景黑白、持行滤镜----渲染——云彩
滤镜——像素化——铜版雕刻——短描边
3、滤镜——模糊——径向模糊(数量100、模糊方法“缩放”品质“好”)
按CTRL+F重复一次、持行滤镜——旋转扭曲“126”(可自己设制)
4、滤镜——锐化——USM锐化(500、1、1)
5、CTRL+B色彩平衡(-70、10、0)再复制背景图层
6、对背景副本,进行\滤镜——旋转扭曲“-252”、
CTRL+B色彩平衡(44、-54、78)%
7、将图层的混合模式改为“变亮”#