Photoshop下严重偏灰的风景图片修复方法
平面设计 发布日期:2026/7/3 浏览次数:1
正在浏览:Photoshop下严重偏灰的风景图片修复方法
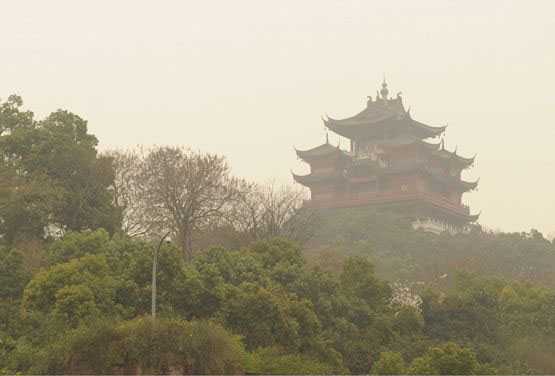
原图
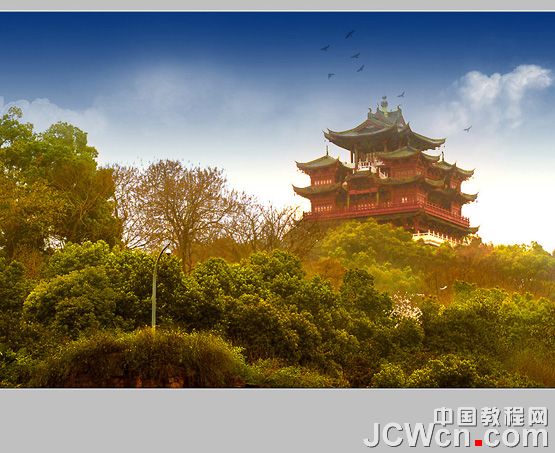
最终效果
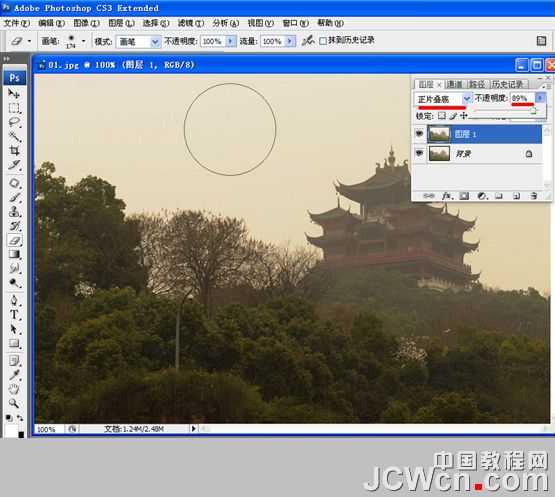
1、打开原图,把背景图层复制一层(ctrl+j),图层混合模式改为“正片叠底”,不透明度89%:
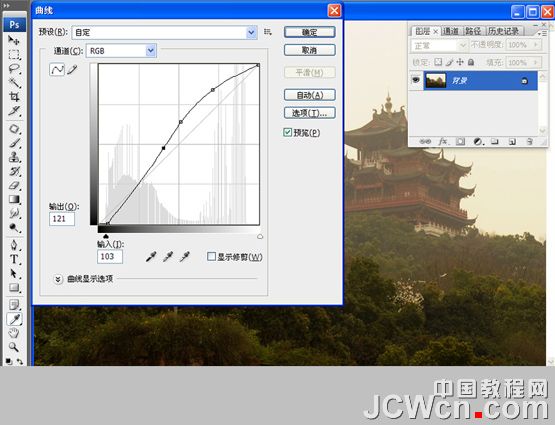
2、合并图层(ctrl+e),曲线(ctrl+m)提亮增加反差:
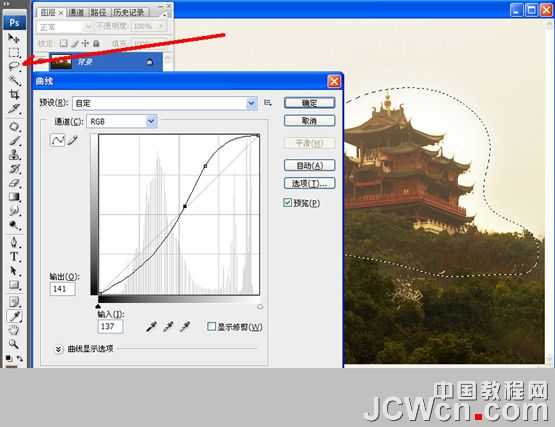
3、套索工具选取仍然发灰的建筑区域,再次曲线提亮增加反差:
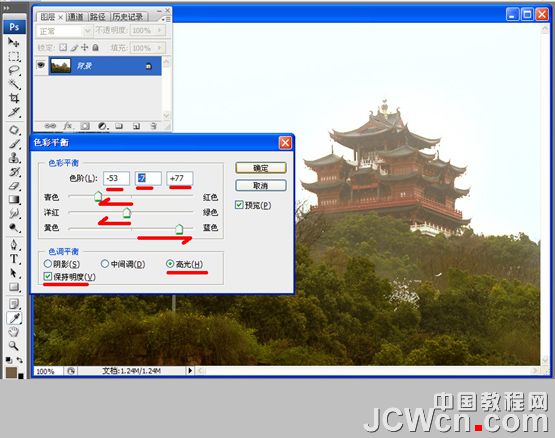
4、色彩平衡(ctrl+b)选中高光与保持明度,增加蓝色、黄色和青色。
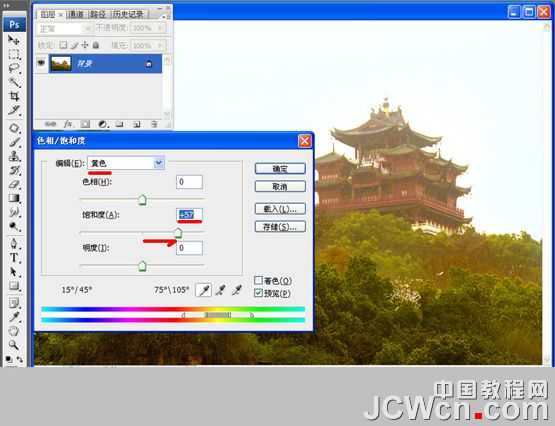
5、色相饱和度(ctrl+u),编辑黄色,饱和度:+57。
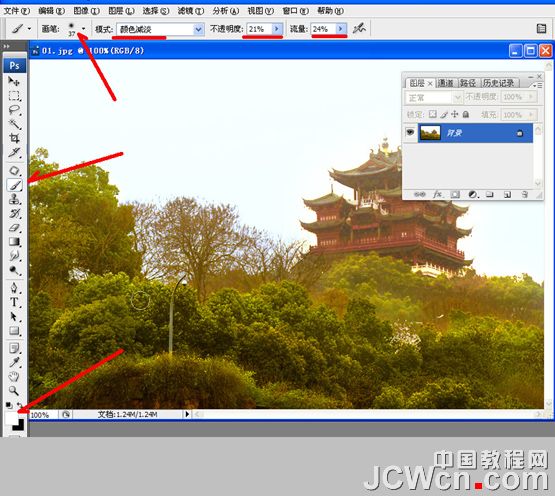
6、选白色画笔,大小37,模式:颜色减淡,不透明度:21%,流量:24%, 灌木丛的亮部边缘刷出层次。
7、新建一空白层,拉出一个蓝白渐变。
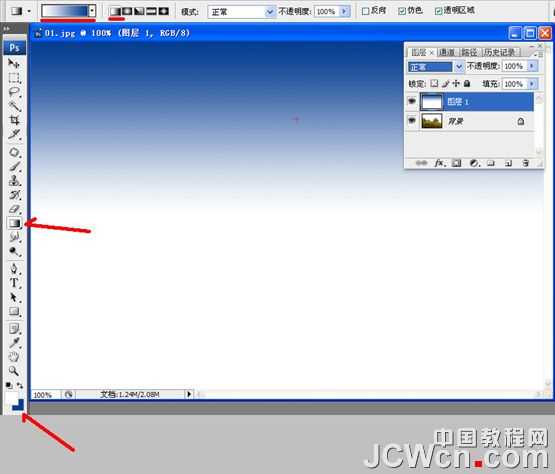
8、图层混合模式改为“正片叠底”,加天空色调。

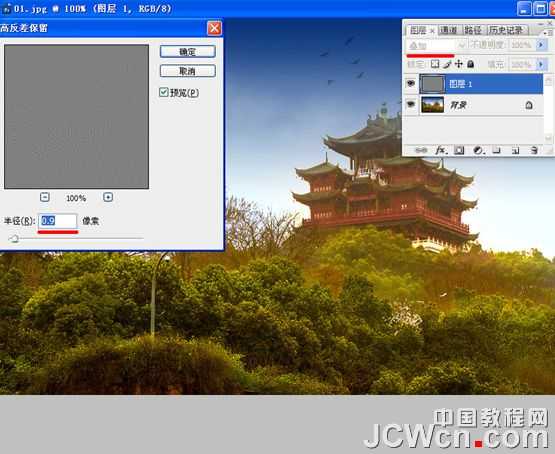
9、增加清晰度,合并所有图层,复制一层(ctrl+j),执行滤镜-其他-高反差,保留半径0.9,图层模式叠加,合并图层。
10、在天空中任意添加云彩和飞鸟素材,使图片更丰富多彩。完成效果图:
最终效果
1、打开原图,把背景图层复制一层(ctrl+j),图层混合模式改为“正片叠底”,不透明度89%:
2、合并图层(ctrl+e),曲线(ctrl+m)提亮增加反差:
3、套索工具选取仍然发灰的建筑区域,再次曲线提亮增加反差:
4、色彩平衡(ctrl+b)选中高光与保持明度,增加蓝色、黄色和青色。
5、色相饱和度(ctrl+u),编辑黄色,饱和度:+57。
6、选白色画笔,大小37,模式:颜色减淡,不透明度:21%,流量:24%, 灌木丛的亮部边缘刷出层次。
7、新建一空白层,拉出一个蓝白渐变。
8、图层混合模式改为“正片叠底”,加天空色调。
9、增加清晰度,合并所有图层,复制一层(ctrl+j),执行滤镜-其他-高反差,保留半径0.9,图层模式叠加,合并图层。
10、在天空中任意添加云彩和飞鸟素材,使图片更丰富多彩。完成效果图: