Photoshop 人体激光电流效果
平面设计 发布日期:2026/4/8 浏览次数:1
正在浏览:Photoshop 人体激光电流效果

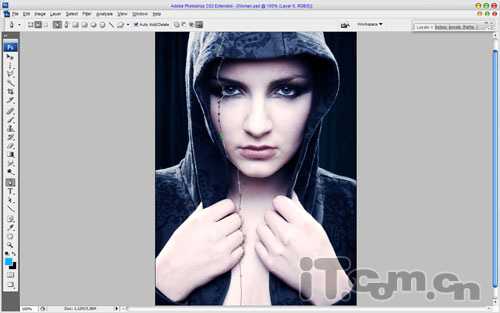
开始制作前先在网上找一张合适的照片。
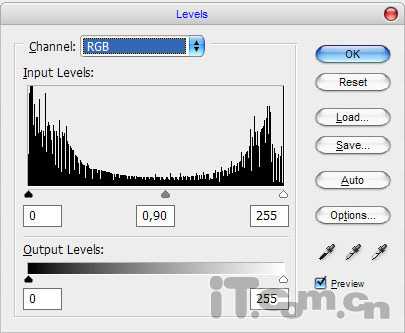
1、首先打开素材照片,调整一个照片的色调,使照片变成蓝色的冷色调。选择“图像—调整—色阶”。
调整RGB通道:
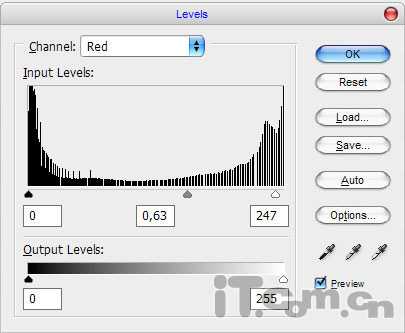
调整红通道:
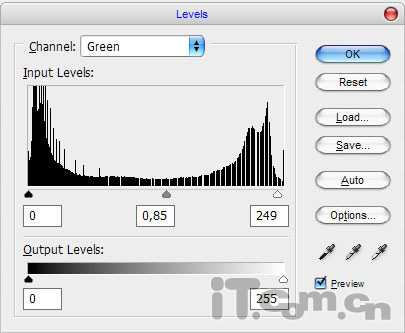
调整绿通道:
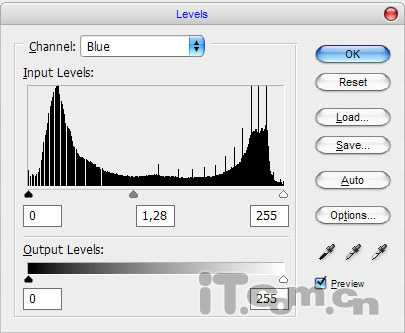
调整蓝通道:
效果如图所示:

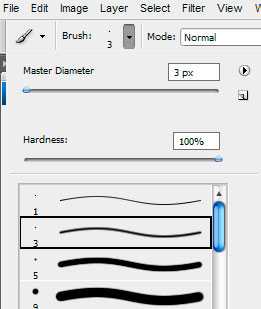
2、接着制作第一道激光电流。选择“画笔工具”并设置前景色“#00ccff”。然后选择“钢笔工具”(确保属性样中选择的是“路径”按钮,而不是“形状图层”),在人物的面上创建路径,如图所示。
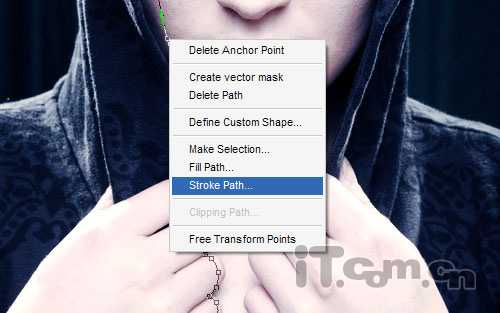
创建路径后,创建一个新图层并单击右键,选择“描边路径”,如图所示。
在弹出的对话框中取消“模拟压力”,选择“画笔(Brush)”,单击确定,如图所示。

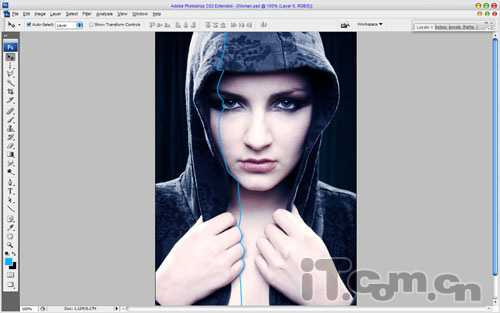
描边后删除路径,效果如图所示。
3、设置激光电流的图层样式:“图层—图层样式—外发光”
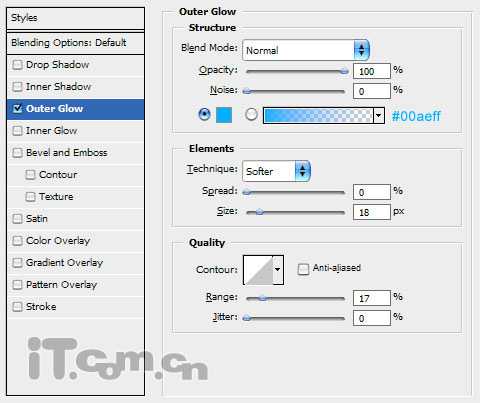
效果如图所示:
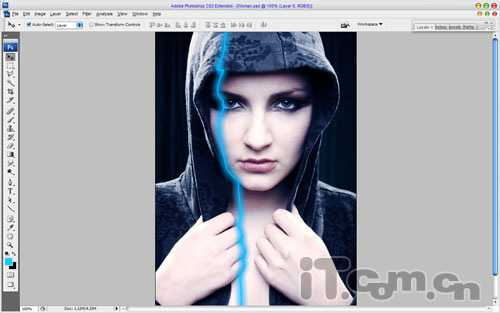
4、选择“橡皮擦工具”,设置柔角画笔,擦除激光电流在面部折断的位置,效果如图所示。
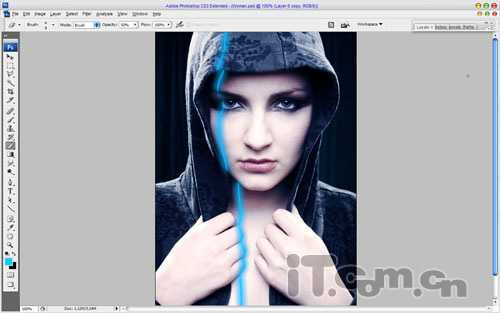
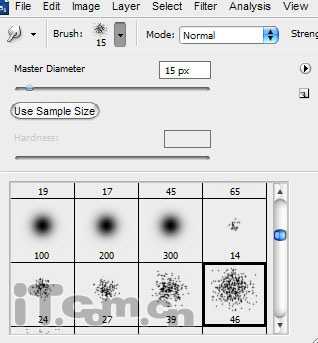
5、选择“涂抹工具”设置强度为100%并设置画笔笔尖,如图所示。
涂抹激光电流,效果如图所示。

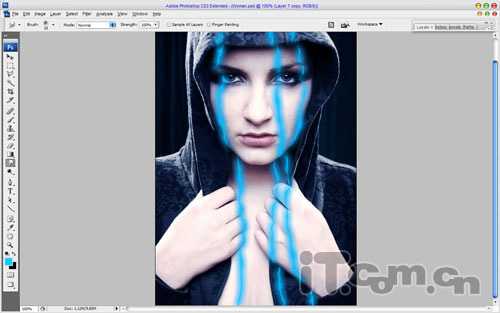
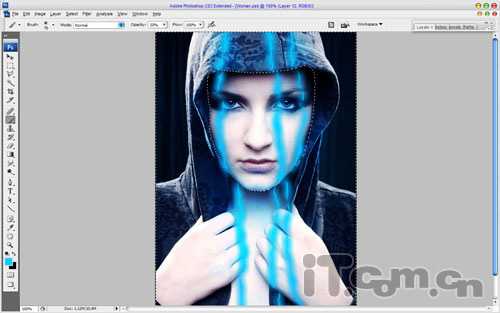
效果不错吧,使用前面步骤的方法,制作多道激光电流,如图所示。
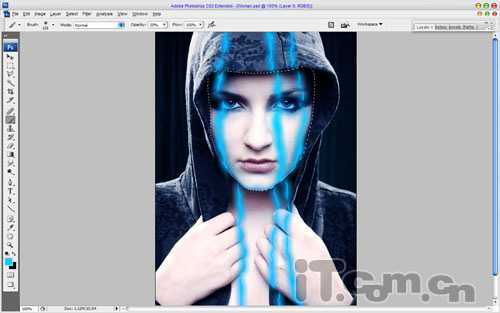
6、制作三道激光电流就足够了。接下来我分辨率再调整一个人物面部和衣服的光暗色调。
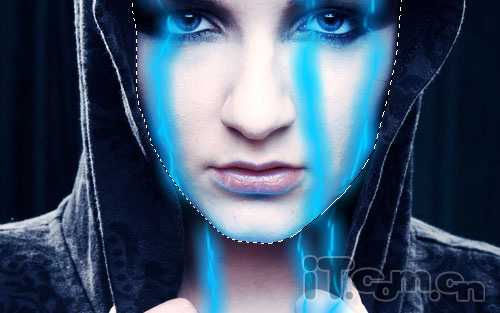
选择“磁性套索工具”创建人物面部选区,接着创建一个新图层,设置混合模式为“叠加”,如图所示。
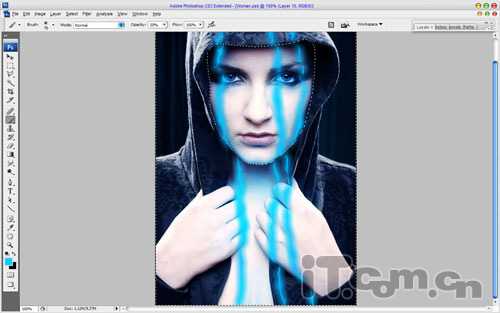
然后选择画笔工具,设置不透明度为20%,笔尖大小为“8像素”,画出人物的唇线和面部轮廓,如图所示。
7、参考前面步骤的方法,修改人物手部和颈部的色彩,如图所示。
8、最后调整一下衣服的色调为偏蓝色即可。
好了,按下Ctrl+Shift+E合并可见图层成完!最终效果如图所示。
开始制作前先在网上找一张合适的照片。
1、首先打开素材照片,调整一个照片的色调,使照片变成蓝色的冷色调。选择“图像—调整—色阶”。
调整RGB通道:
调整红通道:
调整绿通道:
调整蓝通道:
效果如图所示:
2、接着制作第一道激光电流。选择“画笔工具”并设置前景色“#00ccff”。然后选择“钢笔工具”(确保属性样中选择的是“路径”按钮,而不是“形状图层”),在人物的面上创建路径,如图所示。
创建路径后,创建一个新图层并单击右键,选择“描边路径”,如图所示。
在弹出的对话框中取消“模拟压力”,选择“画笔(Brush)”,单击确定,如图所示。
描边后删除路径,效果如图所示。
3、设置激光电流的图层样式:“图层—图层样式—外发光”
效果如图所示:
4、选择“橡皮擦工具”,设置柔角画笔,擦除激光电流在面部折断的位置,效果如图所示。
5、选择“涂抹工具”设置强度为100%并设置画笔笔尖,如图所示。
涂抹激光电流,效果如图所示。
效果不错吧,使用前面步骤的方法,制作多道激光电流,如图所示。
6、制作三道激光电流就足够了。接下来我分辨率再调整一个人物面部和衣服的光暗色调。
选择“磁性套索工具”创建人物面部选区,接着创建一个新图层,设置混合模式为“叠加”,如图所示。
然后选择画笔工具,设置不透明度为20%,笔尖大小为“8像素”,画出人物的唇线和面部轮廓,如图所示。
7、参考前面步骤的方法,修改人物手部和颈部的色彩,如图所示。
8、最后调整一下衣服的色调为偏蓝色即可。
好了,按下Ctrl+Shift+E合并可见图层成完!最终效果如图所示。