用PS制作出漂亮的透明字体
平面设计 发布日期:2025/12/30 浏览次数:1
正在浏览:用PS制作出漂亮的透明字体
今天小编就为大家详细介绍用PS制作出漂亮的透明字体方法,操作很简单的,大家学会了吗?希望这篇文章能对大家有所帮助!
方法/步骤
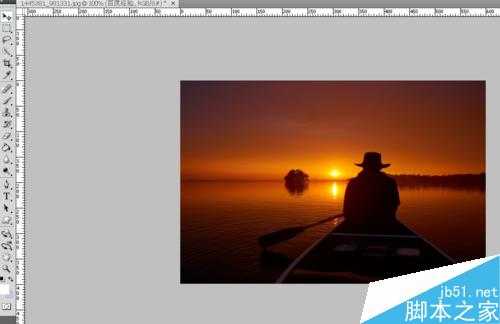
1、首先打开一张图片
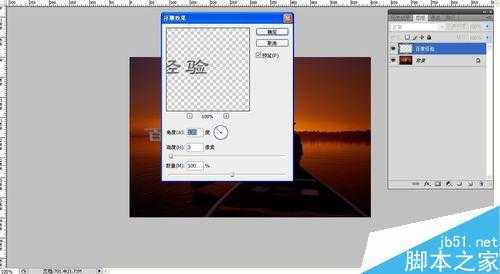
2、用左侧工具栏里的文字输出,打上想要的字。大小可以变换颜色是白色

3、然后图层右击“栅格化图层”

4、点击上面的“滤镜”

5、选择“风格化”“浮雕效果”点击确认
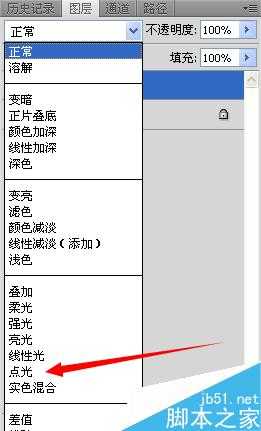
6、点击右面的图层 选择“点光”
7、最好效果图

注意事项
可以根据自己的喜欢来变换颜色 大小
以上就是用PS制作出漂亮的透明字体方法介绍,操作很简单的,大家学会了吗?希望大家喜欢本教程!