Photoshop打造出唯美的中秋霓虹光斑字
平面设计 发布日期:2026/6/10 浏览次数:1
正在浏览:Photoshop打造出唯美的中秋霓虹光斑字
效果图基本上用画笔来完成。过程:先设置好想要的笔刷,然后调整不同的大小给文字描边路径得到初步的光斑字;用渐变给文字加上彩色霓虹效果;再给文字增加高光,并调整颜色即可。
最终效果

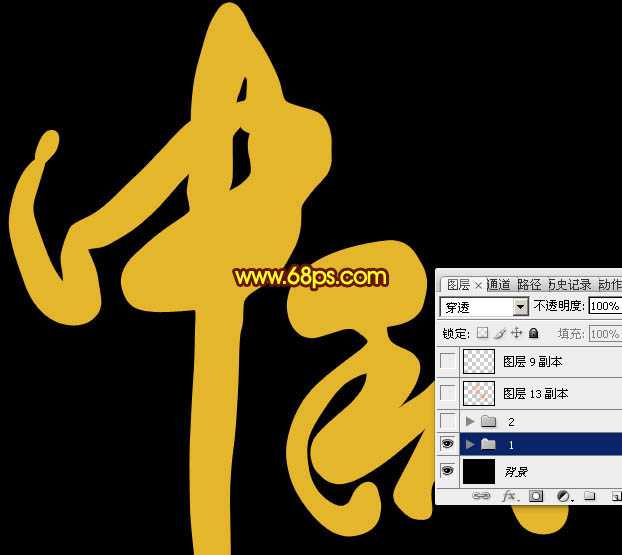
1、新建一个1000 * 750像素,分辨率为72的画布,背景填充黑色,然后新建一个组。
保持图1所示的文字素材,文字为PNG格式,用PS打开后拖到新建的组里面,调整好位置,如图2。

<图1>
<图2>
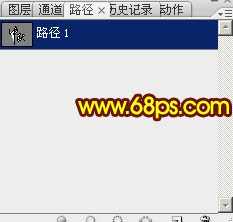
2、选择钢笔工具,进入路径面板,新建一个路径,按照文字的笔画勾出路径,如下图。

<图3>
<图4>
3、现在来制作一款简单的笔刷。新建一个100 * 100像素的画布,背景选择白色。
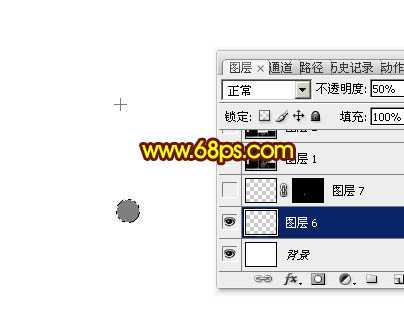
新建一个图层,选择椭圆选框工具,样式选择“固定大小”,然后把宽度和高度设置为24px,然后在画布上点一下得到所需的正圆选区,并用油漆桶工具填充黑色,不透明度改为:50%,如图6。暂时不要取消选区。

<图5>
<图6>
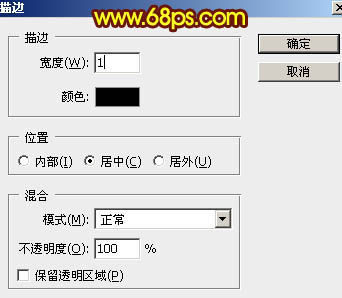
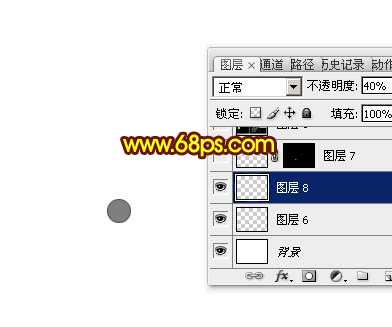
4、新建一个图层,选择菜单:编辑 > 描边,参数设置如图7,确定后把图层不透明度改为:40%,取消选区后效果如图8。
<图7>
<图8>
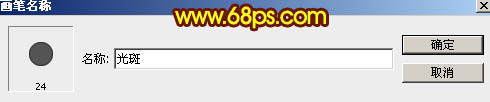
5、选择菜单:编辑 > 定义画笔,在弹出的对话框给画笔命名,如图9。然后关闭当前画布。
<图9>
6、回到之前的画布。选择画笔工具,按F5调出画笔预设面板,在画笔笔尖形状中选择刚才定义的24号画笔,直径设置为15px,其它设置如下图。
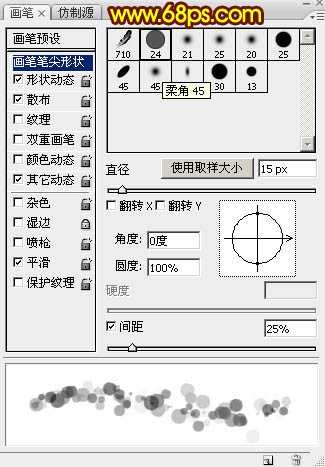
<图10>
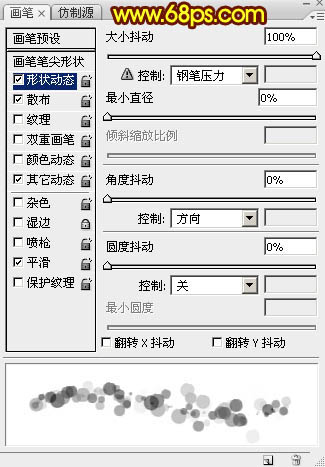
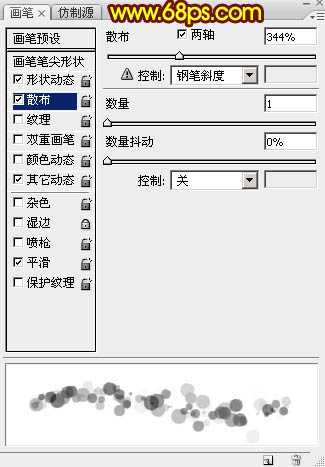
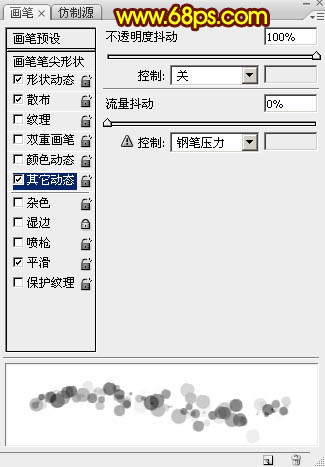
再设置形状动态,散布,其它动态参数设置如图11 - 13,然后勾选“平滑选项”,设置好后按F5隐藏画笔预设面板。
<图11>
<图12>
<图13>
7、在属性栏把画笔的透明度及流量都设置为100%,如下图。

<图14>
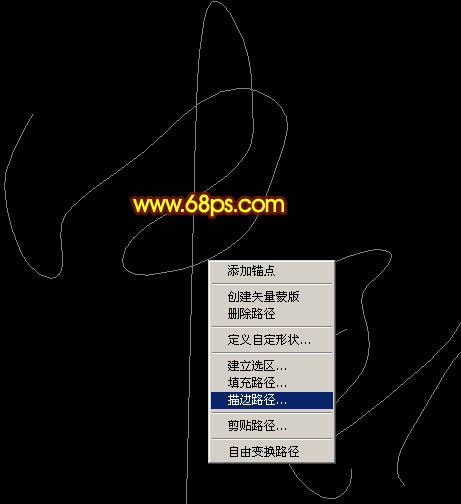
8、新建一个组,在组里新建一个图层,把文字组隐藏,前景色设置为白色。进入路径面板,调出文字路径。回到图层面板,选择钢笔工具,在路径上右键选择“描边路径”。
<图15>
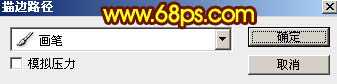
9、在弹出的对话框选择“画笔”,然后确定,如下图。暂时不要隐藏路径,后面还会用到。
<图16>
10、选择画笔工具,在属性栏把画笔大小设置为10px,新建一个图层,选择钢笔工具同上的方法描边路径,得到图18所示的效果。

<图17>
<图18>
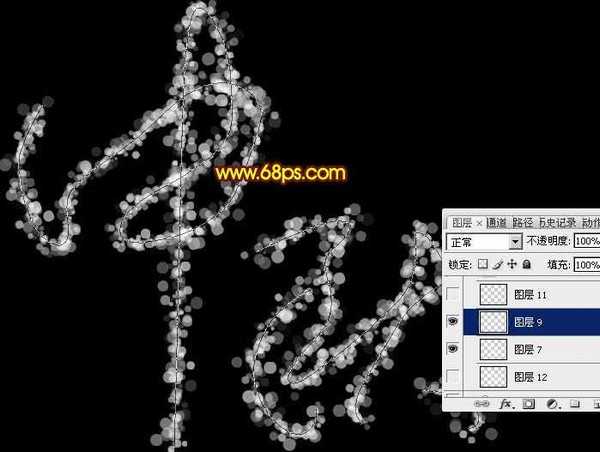
11、新建一个图层,选择画笔工具把大小设置为5px,同上的方法描边路径。

<图19>
上一页12 下一页 阅读全文
最终效果
1、新建一个1000 * 750像素,分辨率为72的画布,背景填充黑色,然后新建一个组。
保持图1所示的文字素材,文字为PNG格式,用PS打开后拖到新建的组里面,调整好位置,如图2。
<图1>
<图2>
2、选择钢笔工具,进入路径面板,新建一个路径,按照文字的笔画勾出路径,如下图。
<图3>
<图4>
3、现在来制作一款简单的笔刷。新建一个100 * 100像素的画布,背景选择白色。
新建一个图层,选择椭圆选框工具,样式选择“固定大小”,然后把宽度和高度设置为24px,然后在画布上点一下得到所需的正圆选区,并用油漆桶工具填充黑色,不透明度改为:50%,如图6。暂时不要取消选区。
<图5>
<图6>
4、新建一个图层,选择菜单:编辑 > 描边,参数设置如图7,确定后把图层不透明度改为:40%,取消选区后效果如图8。
<图7>
<图8>
5、选择菜单:编辑 > 定义画笔,在弹出的对话框给画笔命名,如图9。然后关闭当前画布。
<图9>
6、回到之前的画布。选择画笔工具,按F5调出画笔预设面板,在画笔笔尖形状中选择刚才定义的24号画笔,直径设置为15px,其它设置如下图。
<图10>
再设置形状动态,散布,其它动态参数设置如图11 - 13,然后勾选“平滑选项”,设置好后按F5隐藏画笔预设面板。
<图11>
<图12>
<图13>
7、在属性栏把画笔的透明度及流量都设置为100%,如下图。
<图14>
8、新建一个组,在组里新建一个图层,把文字组隐藏,前景色设置为白色。进入路径面板,调出文字路径。回到图层面板,选择钢笔工具,在路径上右键选择“描边路径”。
<图15>
9、在弹出的对话框选择“画笔”,然后确定,如下图。暂时不要隐藏路径,后面还会用到。
<图16>
10、选择画笔工具,在属性栏把画笔大小设置为10px,新建一个图层,选择钢笔工具同上的方法描边路径,得到图18所示的效果。
<图17>
<图18>
11、新建一个图层,选择画笔工具把大小设置为5px,同上的方法描边路径。
<图19>
上一页12 下一页 阅读全文