Photoshop打造出超酷超霸气的武侠游戏标题立体字
平面设计 发布日期:2026/4/14 浏览次数:1
正在浏览:Photoshop打造出超酷超霸气的武侠游戏标题立体字
教程重点是文字质感部分的渲染,最好的方法就是找一些纹理及高光素材,通过修改混合式模式叠加到文字上面,控制好范围及颜色即可。
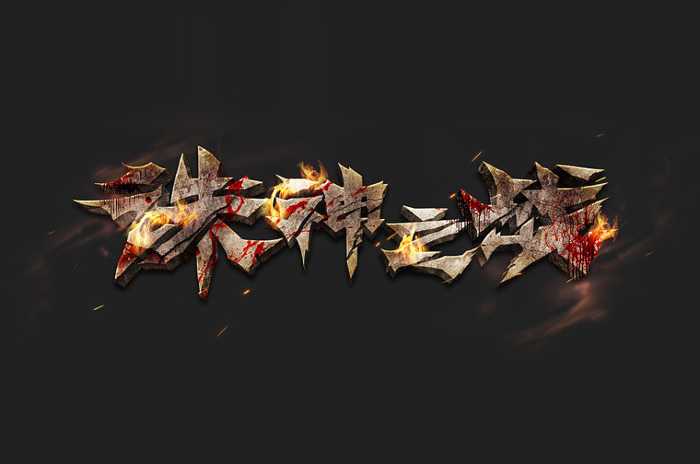
最终效果
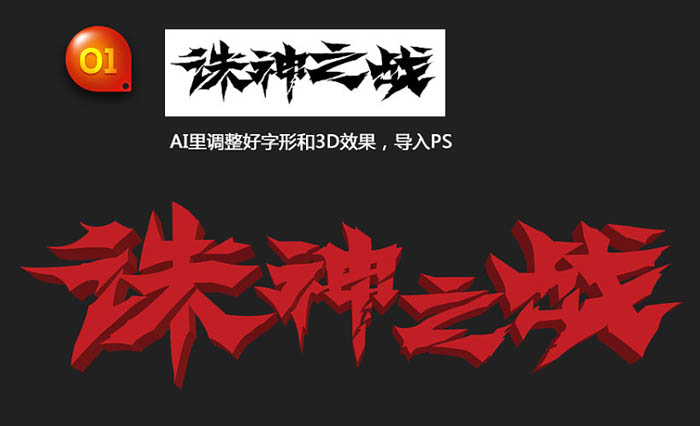
1、AI里调整好字形和3D效果,然后导入PS,也可以直接使用文字素材。
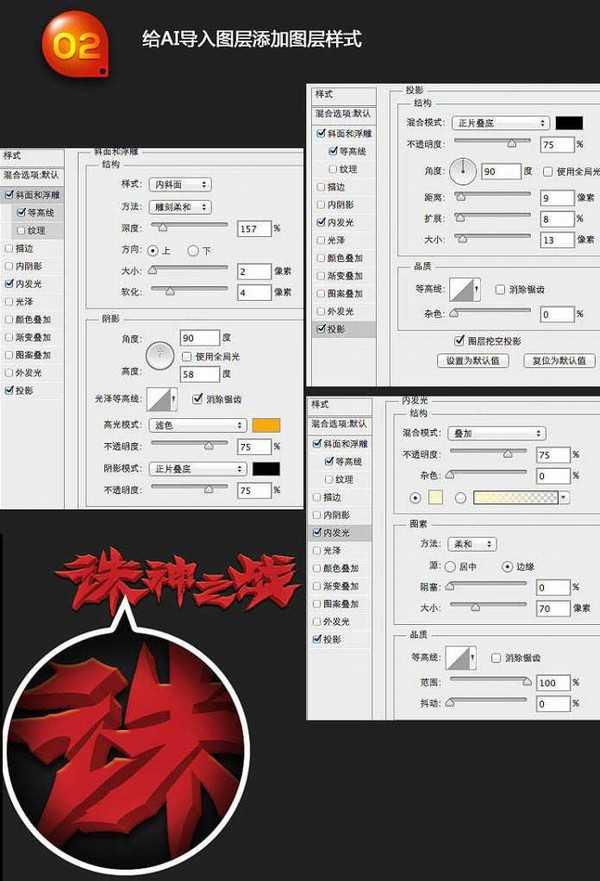
2、给导入的文字添加图层样式。
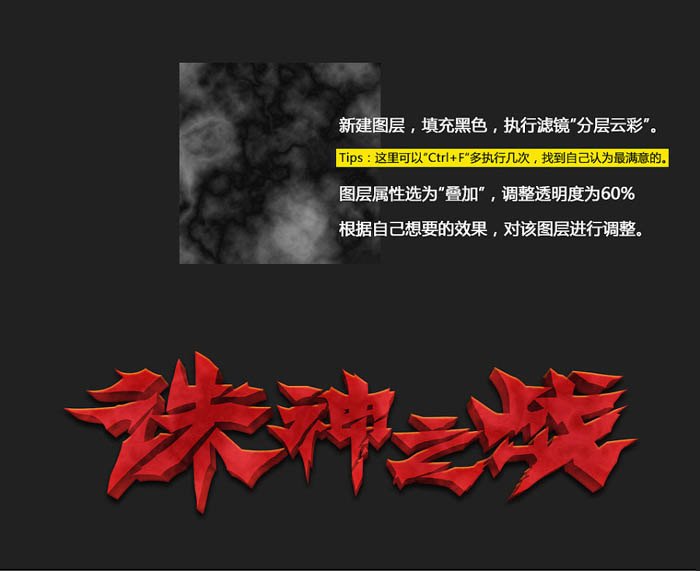
新建图层填充黑色,执行:滤镜 > 渲染 > 分层云彩,可以按Ctrl + F 多执行几次,找到自己认为最满意的。再把图层混合模式改为“叠加”,调整透明度为60%,根据自己想要的效果对该图层进行调整。
3、分别新建曲线、黑白、色相/饱和度及自然饱和度太欧战图层,参数设置如下图,注意好各层的混合模式及透明度设置。

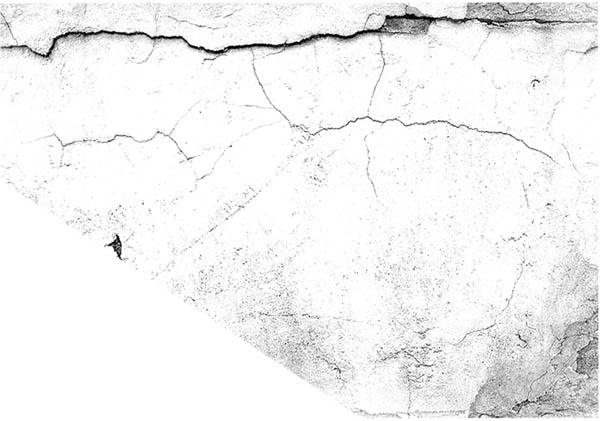
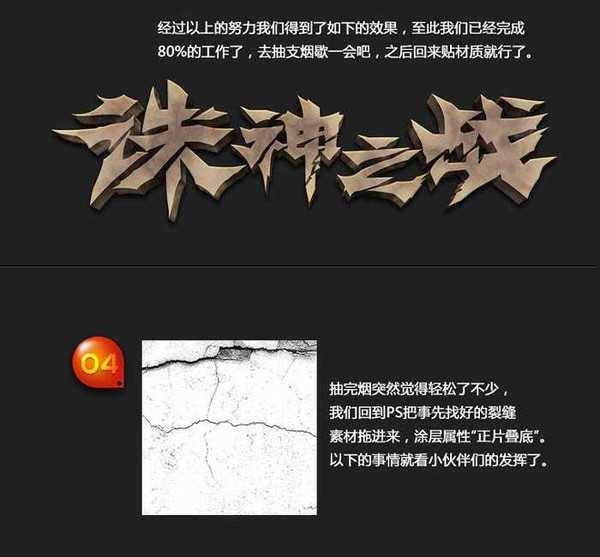
回到PS把事先找好的裂纹素材拖进来,图层混合模式改为“正片叠底”。
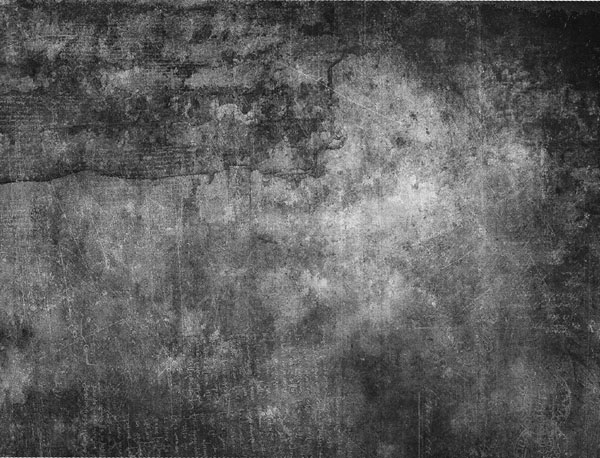
再打开下图所示的素材,拖进来,混合模式改为“叠加”。

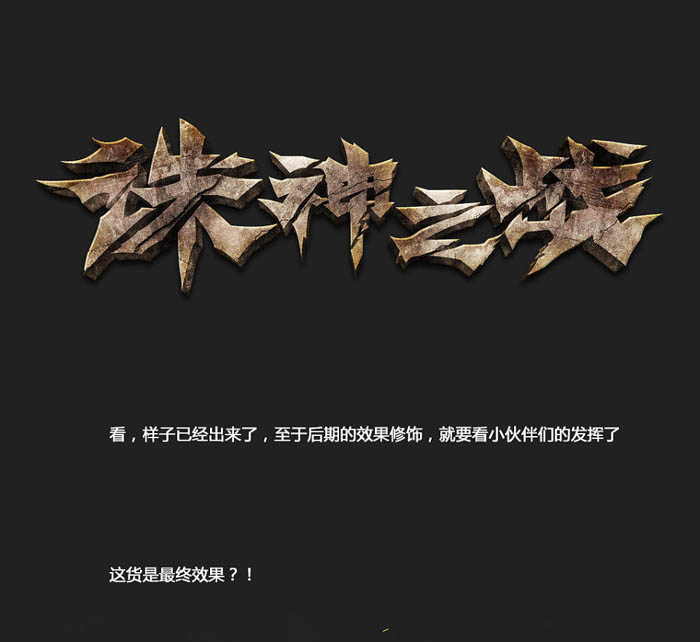
基本效果已经处理,后期可以在局部增加一点火焰效果。
最终效果:
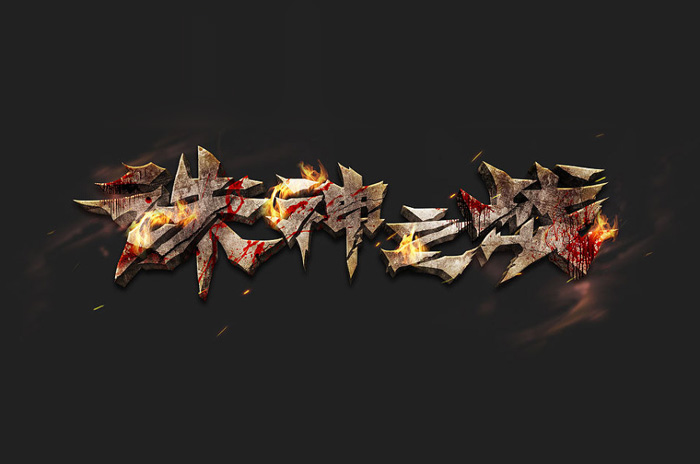
最终效果
1、AI里调整好字形和3D效果,然后导入PS,也可以直接使用文字素材。
2、给导入的文字添加图层样式。
新建图层填充黑色,执行:滤镜 > 渲染 > 分层云彩,可以按Ctrl + F 多执行几次,找到自己认为最满意的。再把图层混合模式改为“叠加”,调整透明度为60%,根据自己想要的效果对该图层进行调整。
3、分别新建曲线、黑白、色相/饱和度及自然饱和度太欧战图层,参数设置如下图,注意好各层的混合模式及透明度设置。
回到PS把事先找好的裂纹素材拖进来,图层混合模式改为“正片叠底”。
再打开下图所示的素材,拖进来,混合模式改为“叠加”。
基本效果已经处理,后期可以在局部增加一点火焰效果。
最终效果: