photoshop制作触电字效果
平面设计 发布日期:2026/5/30 浏览次数:1
正在浏览:photoshop制作触电字效果
;
看来效果图之后,现在进入正题,教你开始制作触电字的具体操作步骤如下:
1、新建一个500X300(px)的图像文件,并将背景色设为黑色。


4、执行图像——旋转画布——顺时针90度
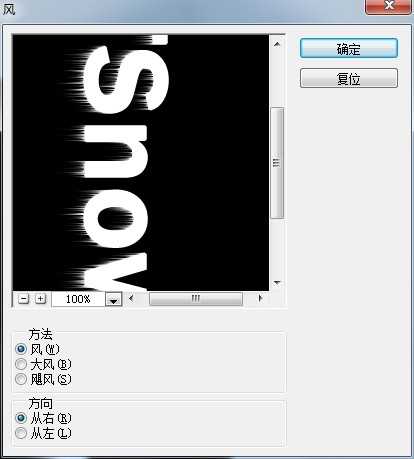
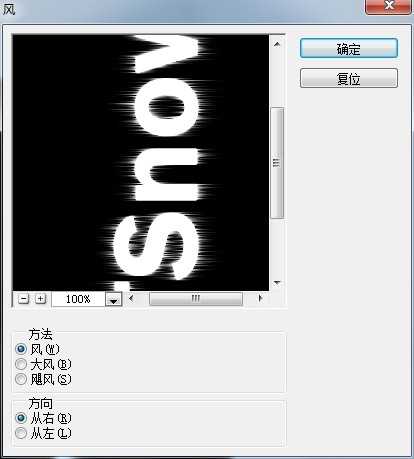
5、再执行风滤镜(滤镜——风格化——风)默认,并重复1次此滤镜(ctrl+F)

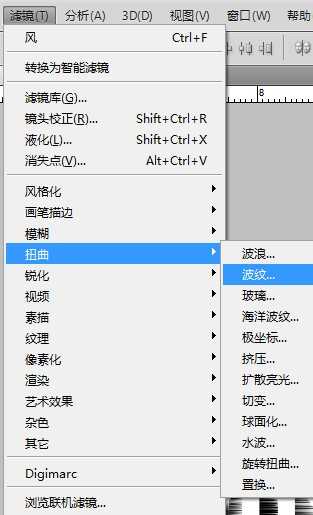
9、执行滤镜——扭曲——波纹(参数默认)
12、在文字层的上方新建一个图层,在选区中填充黑色。大致的效果图如下:
看来效果图之后,现在进入正题,教你开始制作触电字的具体操作步骤如下:
1、新建一个500X300(px)的图像文件,并将背景色设为黑色。
4、执行图像——旋转画布——顺时针90度
5、再执行风滤镜(滤镜——风格化——风)默认,并重复1次此滤镜(ctrl+F)
9、执行滤镜——扭曲——波纹(参数默认)
12、在文字层的上方新建一个图层,在选区中填充黑色。大致的效果图如下: