Photoshop设计制作出漂亮的水晶珠边塑料字
平面设计 发布日期:2026/6/24 浏览次数:1
正在浏览:Photoshop设计制作出漂亮的水晶珠边塑料字
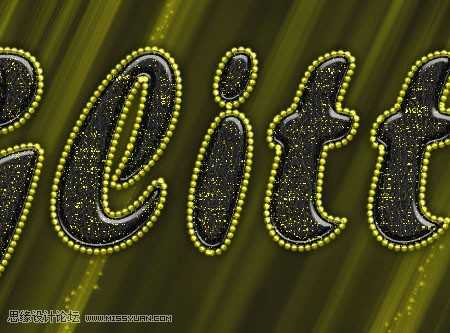
最终效果

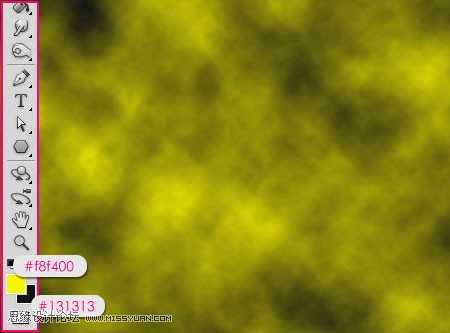
1、新建1024*768文件,设置前景色 #f8f400,背景色#131313。滤镜--渲染--云彩。
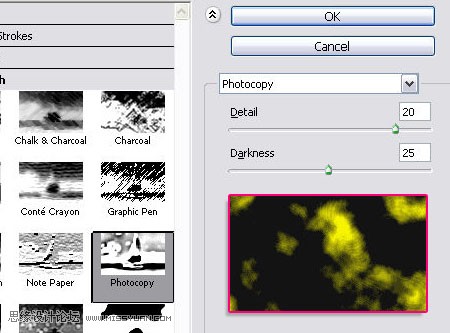
2、滤镜--素描--影印。细节数值20,暗度25。
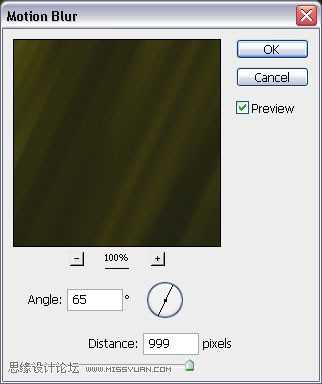
3、滤镜--模糊--动感模糊。角度65,距离为最大值999。
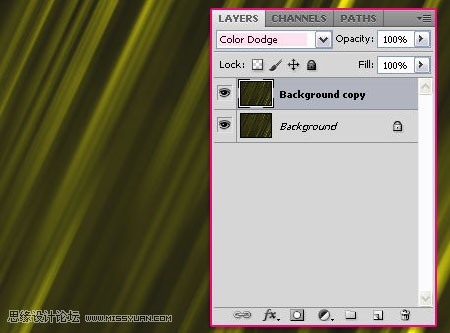
4、回到你的文件,复制背景层,改变图层模式为颜色浅淡。
5、打开笔刷面板(窗口--笔刷)在笔刷笔尖形状预览中选择一种可用的星光类笔刷,改变大小在25像素左右,间距35%。
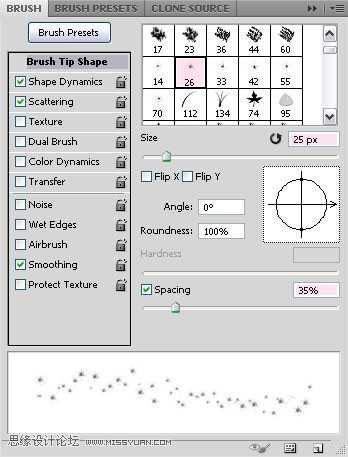
6、点进下面的形状动态选项中,将大小抖动改为100%。

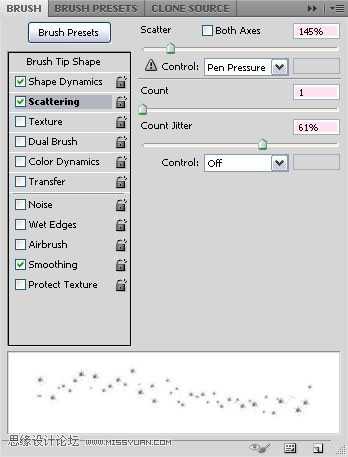
7、散布选项中,改变散布为145%,数量为1,数量抖动61%。
8、新建一层,并名为“BG Sparkles”,图层模式为颜色浅淡。使用钢笔工具画线(在你想要的起点和终点位置点击。)最好是在背景层发光的区域画线。
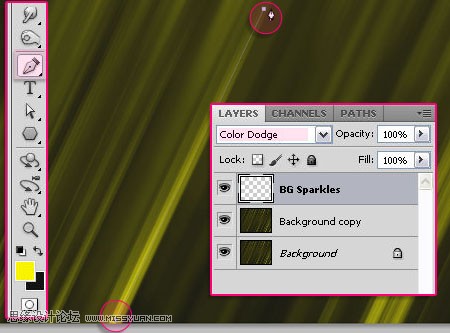
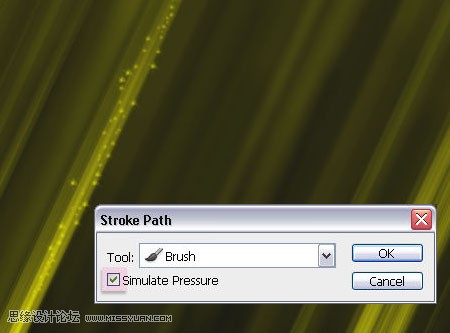
9、确认选中的是“BG Sparkles”层。在你所画的路径上右键,描边路径。

10、在工具下拉对话框中选择画笔,勾选模拟压力。点击确认除掉路径。重复画线,数量依照自己意愿。
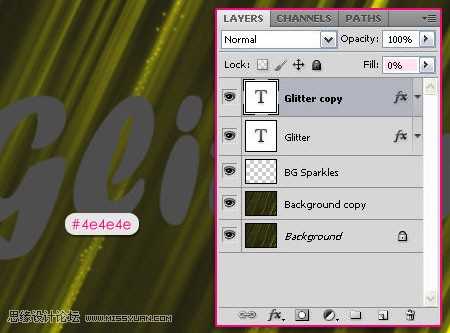
11、用#4e4e4颜色打字,这里运用的字体是Forte,大小300像素。打好字后复制字体层,并改变其填充为0。
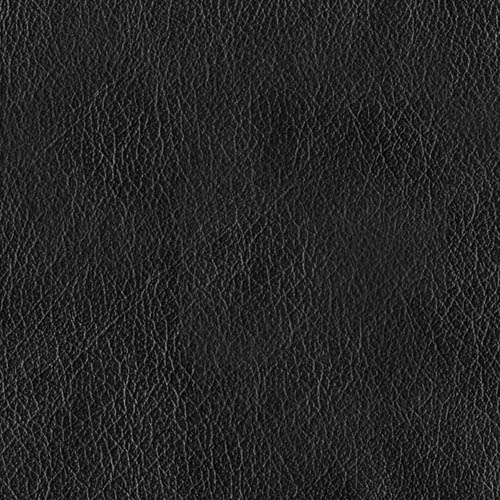
12、打开皮革蔬菜,选择菜单:编辑--自定义图案,输入自己想要的名称。
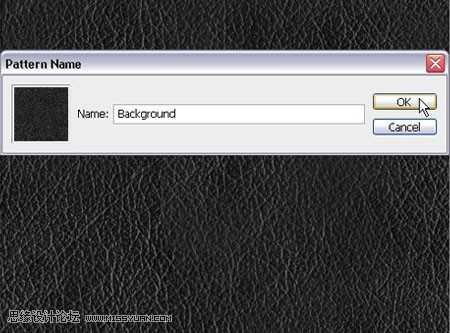
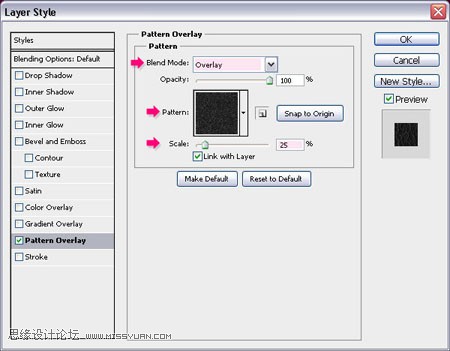
13、双击字体正本(原始)层,添加混合选项--图案叠加(模式:叠加,在下拉菜单中选择图案样式,缩放为25%) 。
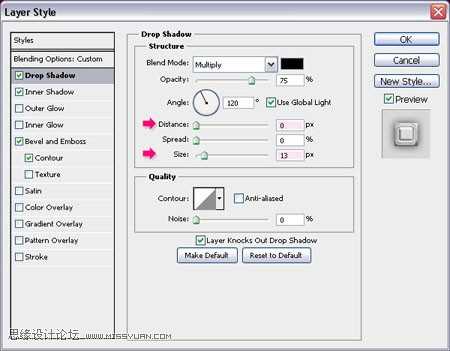
14、现在,双击复制的文本图层,添加以下样式:投影(距离-0,大小-13) 。
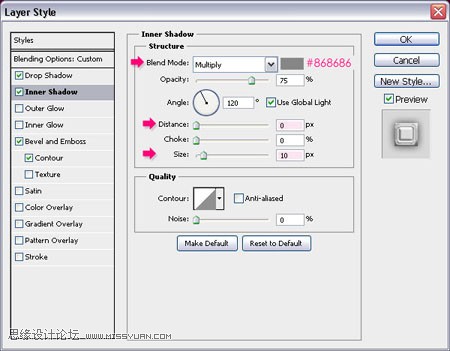
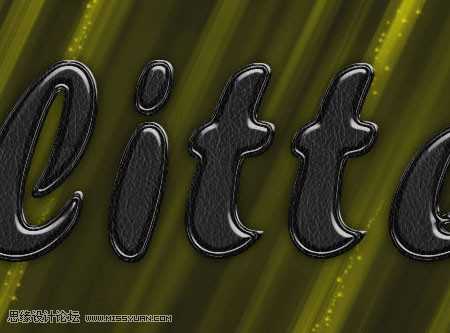
15、内发光(混合模式:正片叠底,颜色#868686,距离:0,大小:10) 。
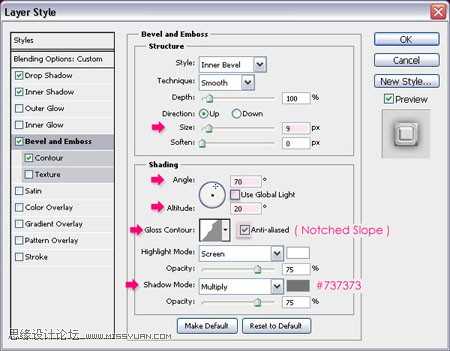
16、斜面和浮雕(大小:9,勾除使用全局光的选项。角度:70,高度:20.光泽等高线:锯齿斜面。勾选消除锯齿选项。阴影模式:正片叠底,颜色#737373) 。
17、等高线--环形 - 三环。
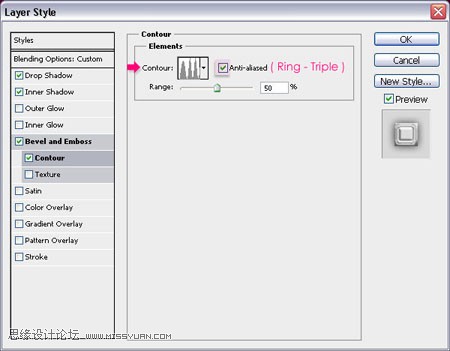
18、你设置好的结果应该和下图差不多。
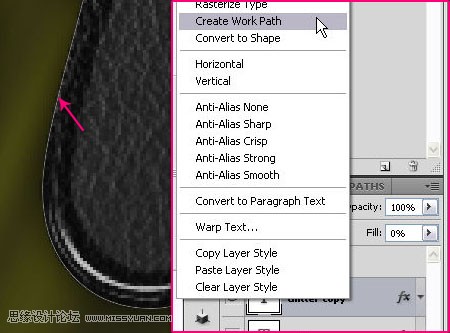
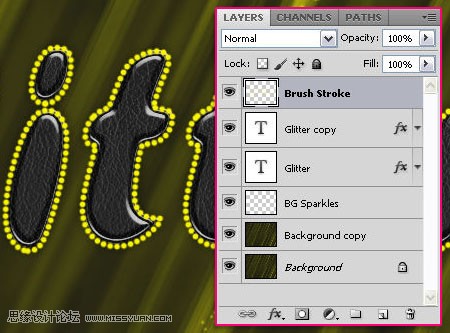
19、右键点击文本图层的任意位置选择创建工作路径。
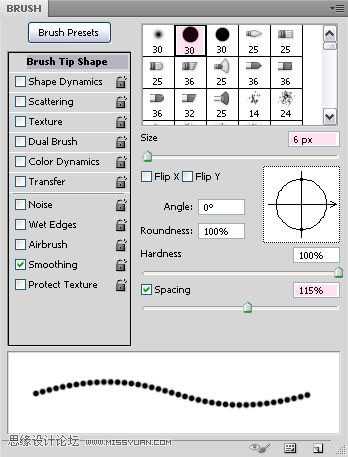
20、再次打开笔刷面板,这次,选择普通尖角笔刷,大小6像素,间距115%,勾除其他属性选项。在所有层上面新建一层,命名为“Brush Stroke”。
21、仍然选择画笔,改变前景色为#fff43e,将光标贴近工作路径并点击确认。这样,画笔将会对工作路径进行描边。按ctrl+h消除工作路径。
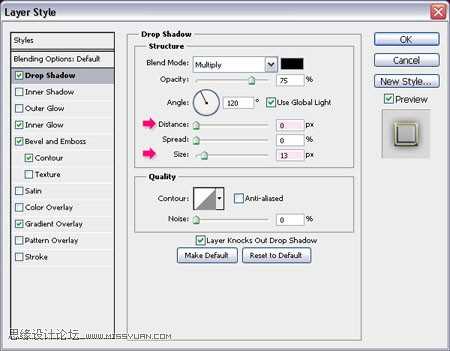
22、双击“Brush Stroke”层应用以下混合选项: 投影(距离:0,大小:13)。
23、内发光(模式:叠加,颜色:#fff43e) 。

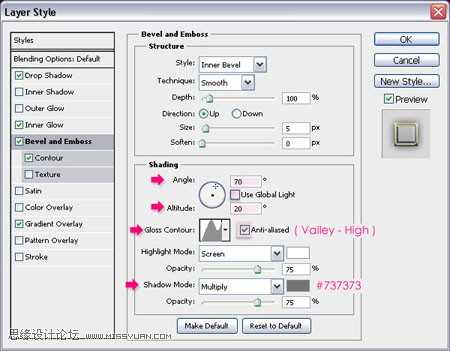
24、斜面和浮雕(勾除使用全局光选项。角度:70,高度:20,光泽等高线:凹槽-高,勾选消除锯齿选项。阴影模式颜色:#737373)。
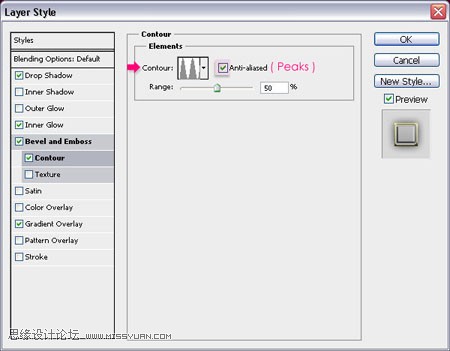
25、等高线--顶点。
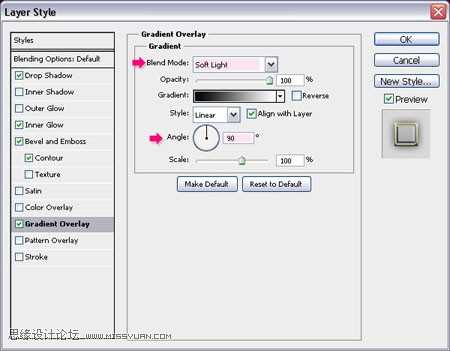
26、渐变叠加(模式:柔光,角度:90) 。
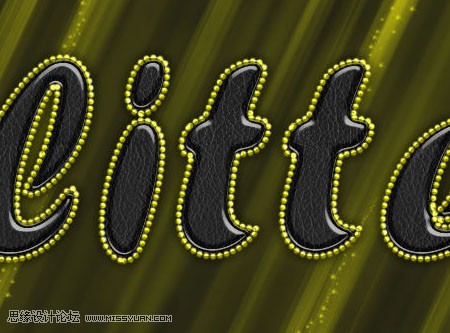
27、这可以是边缘看起来有坡度并且有些光泽。
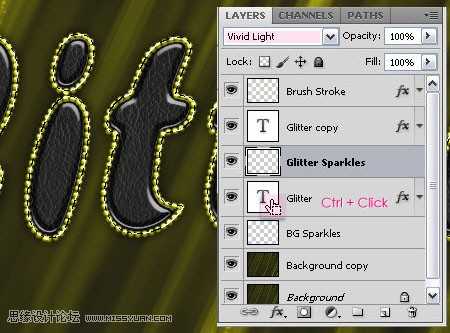
28、在两个文本(原始和复制的)之间新建一层,命名为“Glitter Sparkles”,模式--强光。按住ctrl,点间某一个文本图层的缩略图以创建选区。
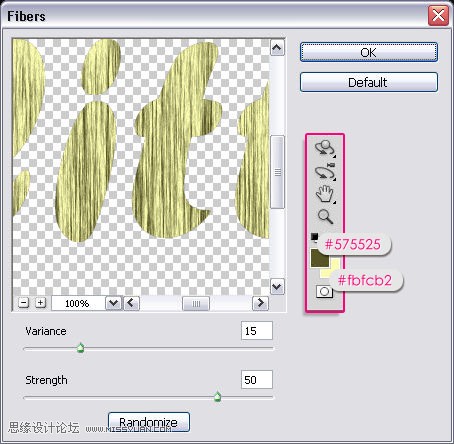
29、设置前景色为#575525,背景色为#fbfcb2。确认当前所选图层为“Glitter Sparkles”层,在选区内填充前景色。 滤镜--渲染--纤维。差异:15,强度:50。
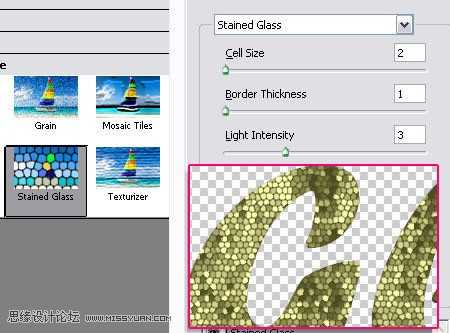
30、滤镜--纹理--染色玻璃。单元格大小:2,边缘粗细:1,光照强度:3。
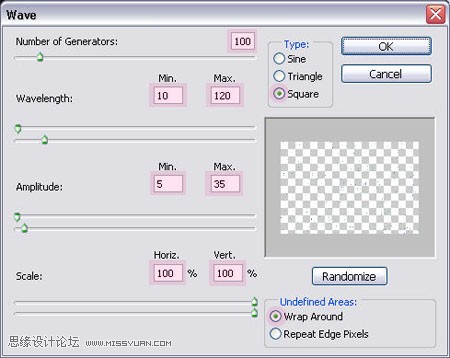
31、滤镜--扭曲--波浪。数值如下所示。
32、点击确认,就看到了最终效果。
33、在最顶层添加色相-饱和度调整层。改变饱和度数值为50.这样会使你的颜色看起来更艳丽。你也可以改变色相来调整颜色。

这是改变色相的最终效果:

1、新建1024*768文件,设置前景色 #f8f400,背景色#131313。滤镜--渲染--云彩。
2、滤镜--素描--影印。细节数值20,暗度25。
3、滤镜--模糊--动感模糊。角度65,距离为最大值999。
4、回到你的文件,复制背景层,改变图层模式为颜色浅淡。
5、打开笔刷面板(窗口--笔刷)在笔刷笔尖形状预览中选择一种可用的星光类笔刷,改变大小在25像素左右,间距35%。
6、点进下面的形状动态选项中,将大小抖动改为100%。
7、散布选项中,改变散布为145%,数量为1,数量抖动61%。
8、新建一层,并名为“BG Sparkles”,图层模式为颜色浅淡。使用钢笔工具画线(在你想要的起点和终点位置点击。)最好是在背景层发光的区域画线。
9、确认选中的是“BG Sparkles”层。在你所画的路径上右键,描边路径。
10、在工具下拉对话框中选择画笔,勾选模拟压力。点击确认除掉路径。重复画线,数量依照自己意愿。
11、用#4e4e4颜色打字,这里运用的字体是Forte,大小300像素。打好字后复制字体层,并改变其填充为0。
12、打开皮革蔬菜,选择菜单:编辑--自定义图案,输入自己想要的名称。
13、双击字体正本(原始)层,添加混合选项--图案叠加(模式:叠加,在下拉菜单中选择图案样式,缩放为25%) 。
14、现在,双击复制的文本图层,添加以下样式:投影(距离-0,大小-13) 。
15、内发光(混合模式:正片叠底,颜色#868686,距离:0,大小:10) 。
16、斜面和浮雕(大小:9,勾除使用全局光的选项。角度:70,高度:20.光泽等高线:锯齿斜面。勾选消除锯齿选项。阴影模式:正片叠底,颜色#737373) 。
17、等高线--环形 - 三环。
18、你设置好的结果应该和下图差不多。
19、右键点击文本图层的任意位置选择创建工作路径。
20、再次打开笔刷面板,这次,选择普通尖角笔刷,大小6像素,间距115%,勾除其他属性选项。在所有层上面新建一层,命名为“Brush Stroke”。
21、仍然选择画笔,改变前景色为#fff43e,将光标贴近工作路径并点击确认。这样,画笔将会对工作路径进行描边。按ctrl+h消除工作路径。
22、双击“Brush Stroke”层应用以下混合选项: 投影(距离:0,大小:13)。
23、内发光(模式:叠加,颜色:#fff43e) 。
24、斜面和浮雕(勾除使用全局光选项。角度:70,高度:20,光泽等高线:凹槽-高,勾选消除锯齿选项。阴影模式颜色:#737373)。
25、等高线--顶点。
26、渐变叠加(模式:柔光,角度:90) 。
27、这可以是边缘看起来有坡度并且有些光泽。
28、在两个文本(原始和复制的)之间新建一层,命名为“Glitter Sparkles”,模式--强光。按住ctrl,点间某一个文本图层的缩略图以创建选区。
29、设置前景色为#575525,背景色为#fbfcb2。确认当前所选图层为“Glitter Sparkles”层,在选区内填充前景色。 滤镜--渲染--纤维。差异:15,强度:50。
30、滤镜--纹理--染色玻璃。单元格大小:2,边缘粗细:1,光照强度:3。
31、滤镜--扭曲--波浪。数值如下所示。
32、点击确认,就看到了最终效果。
33、在最顶层添加色相-饱和度调整层。改变饱和度数值为50.这样会使你的颜色看起来更艳丽。你也可以改变色相来调整颜色。
这是改变色相的最终效果: