Photoshop设计制作出非常华丽的金边红色玉石字
平面设计 发布日期:2026/6/18 浏览次数:1
正在浏览:Photoshop设计制作出非常华丽的金边红色玉石字
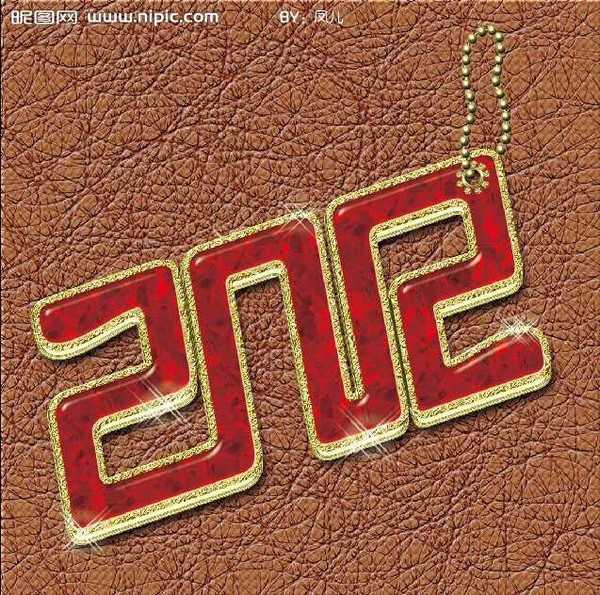
最终效果
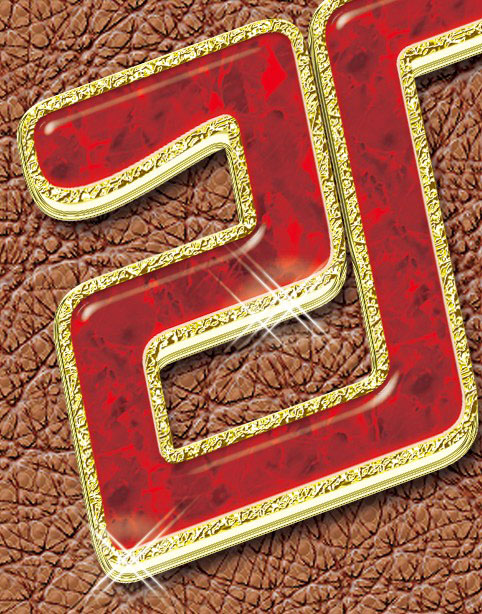
局部放大
1、新建文件。
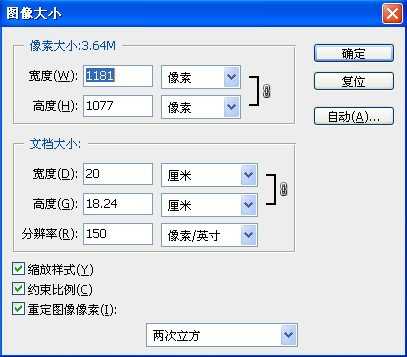
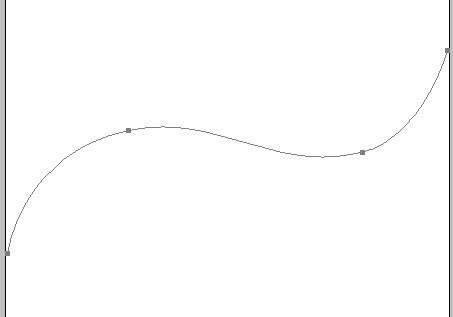
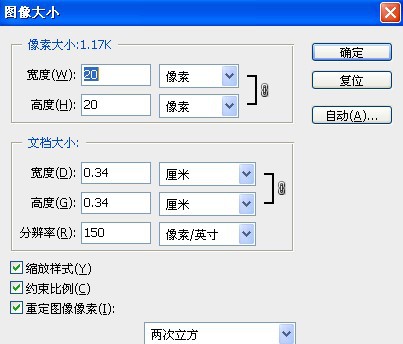
2、用钢笔工具画出如下路径。
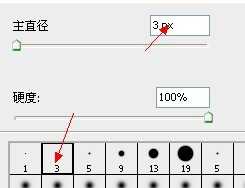
3、设置画笔参数如下:(注意不要使用柔边画笔)。
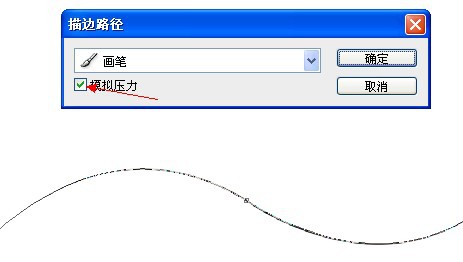
4、勾选画笔模拟压力:填充路径。
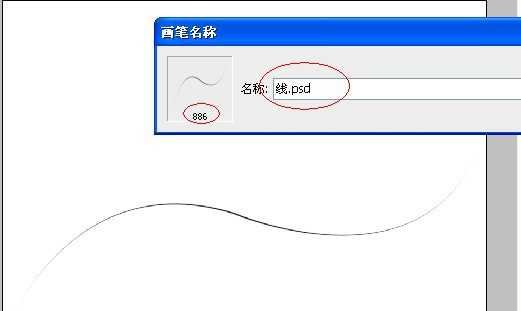
5、编辑 > 定义画笔笔刷。
6、再新建一个画布,参数如下。
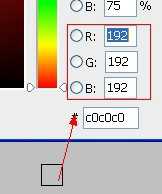
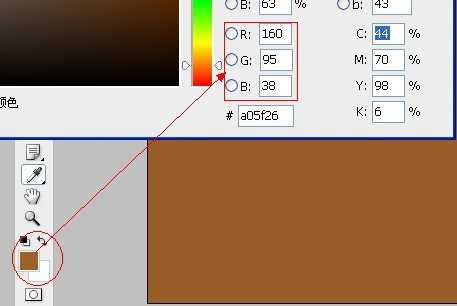
7、填充灰色(参数如下:)。
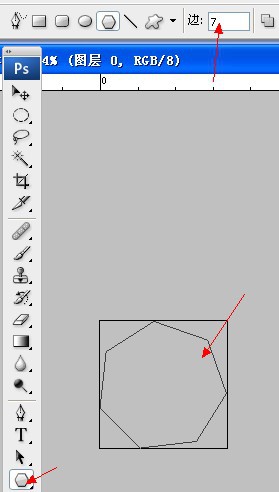
8、用7边形路径画出下面的形状,其实用圆形也可以的,只不过效果不太好。
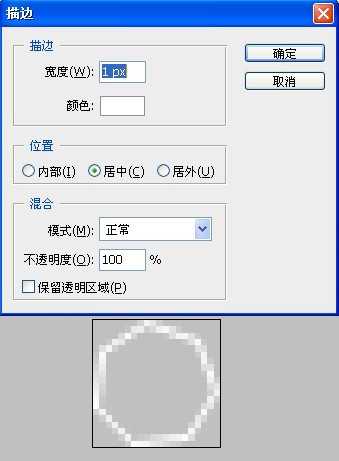
9、对路径进行1个像素的描边。
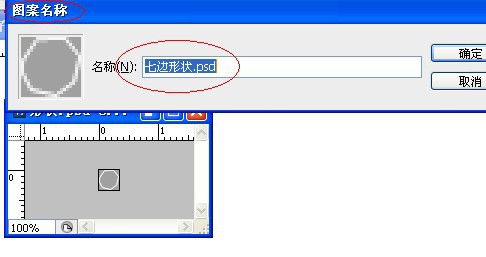
10、把刚才画的图案定义为图案:编辑 > 定义图案。
11、我们回到我们第一次新建的画布,填充以下颜色(那些路径和图案定义好了就可以关闭不用管了)。
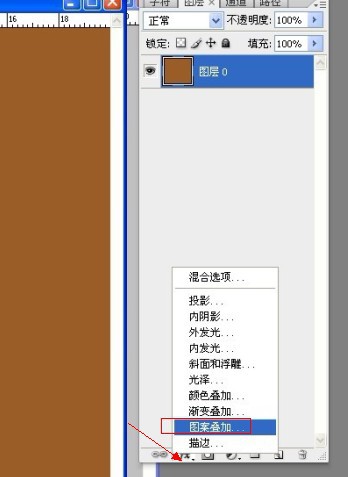
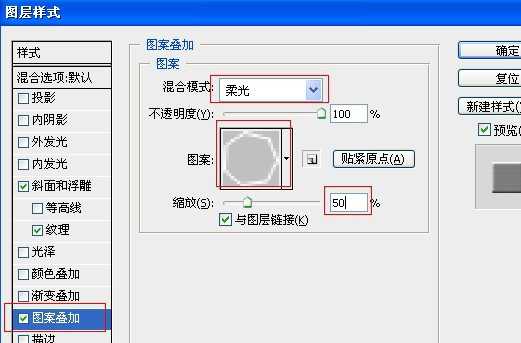
12、对此画布进行图案叠加设置。
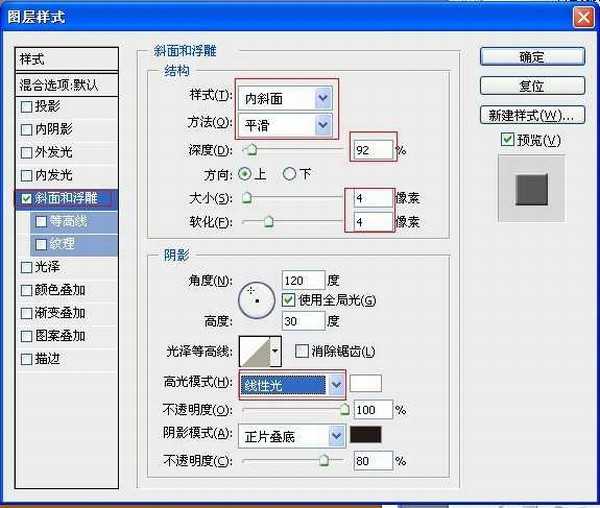
13、图层样式设置如下。

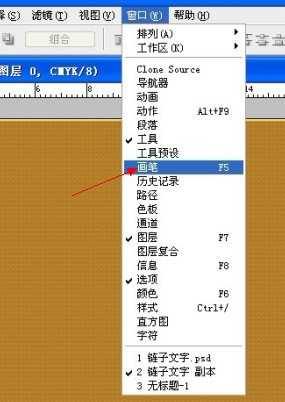
14、在ps窗口中打开画笔工具。
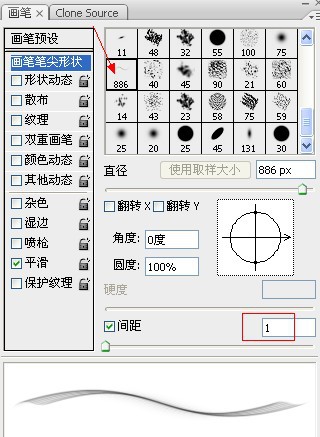
15、在不勾选任何任务的情况下选取,刚才我们定义的画笔笔刷,然后再勾选平滑选项,设置间距为1。
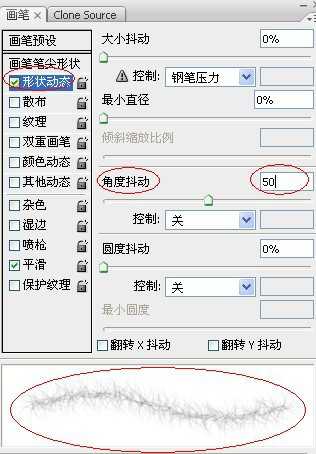
16、在形状动态栏设置如下。
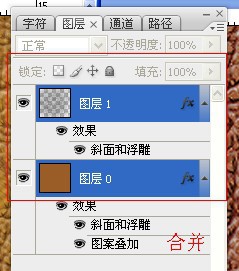
17、新建一个图层,用我们设置好的画笔在新建图层上随意涂抹。
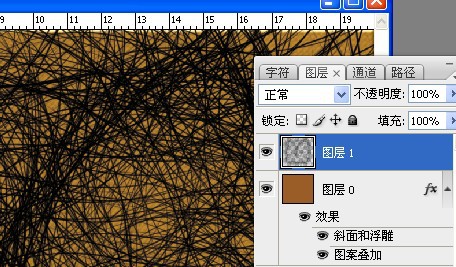
18、涂抹效果如下。
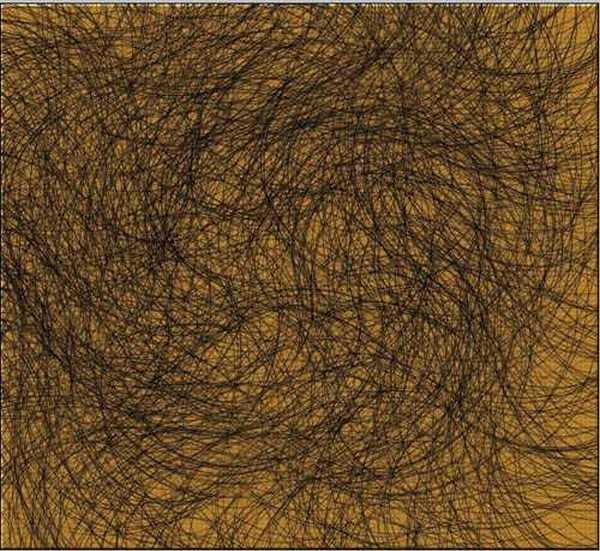
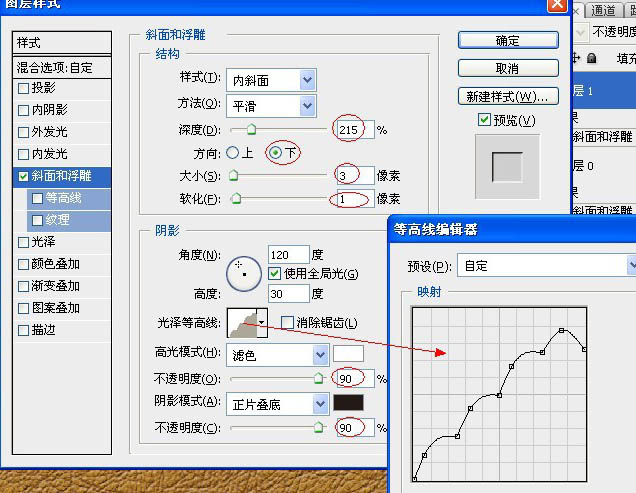
19、对那些乱七八糟的线条图层进行图层样式设置:参数如下。
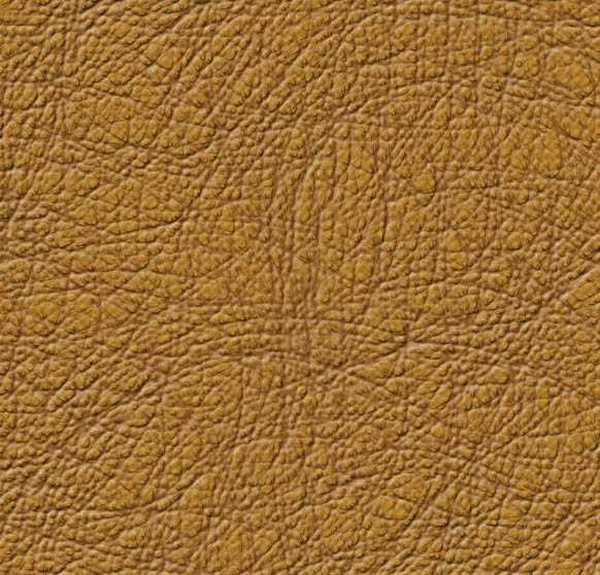
20、完成效果如下:(切记!线条图层样式完成后请把混合模式改为“柔光”)。
21、把线条和下面的背景合并起来。
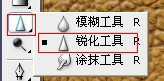
22、在工具栏中使用:“锐化工具画笔”。
23、使用锐化工具进行涂抹(直径可以设置大一些)效果如下。

24、适当的改变下色相饱和度(根据自己的喜好调整颜色)。
25、为了方便观察,我把皮革图层隐藏,用一个灰底来观察,输入字体进行参照(这里我选的是:“方正稚艺”)。

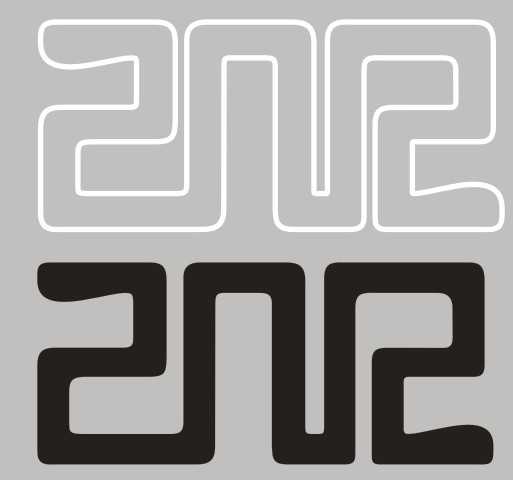
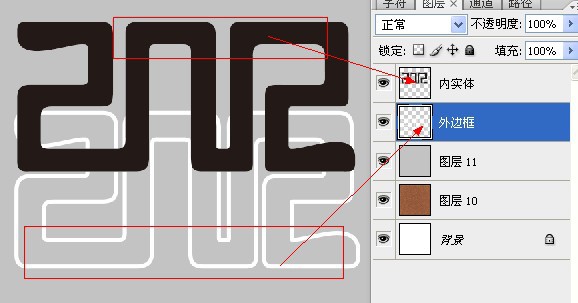
26、把笔画进行合并。

27、笔画加粗。

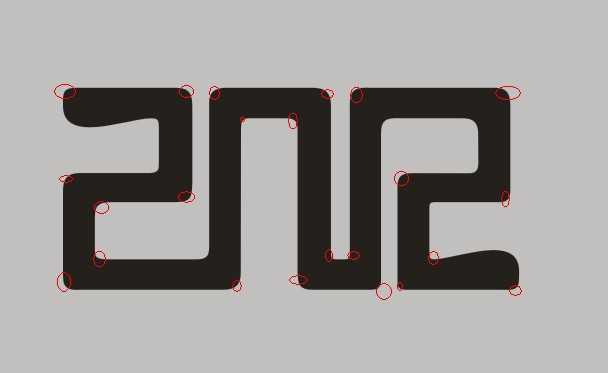
28、把边缘不够圆滑的地方修整圆滑。
29、描边。

30、把边框和黑色字体分开。
31、我这里分为:“内实体”和“外边框”以便读者区分。
32、把刚才黑色字体的部分填充为“红色”。

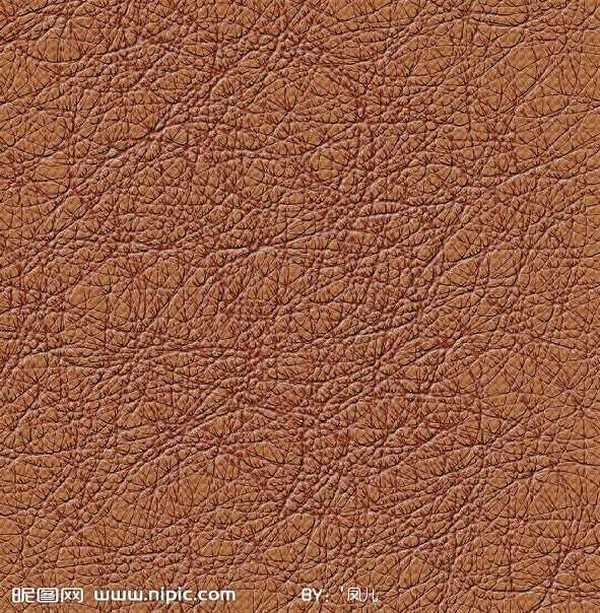
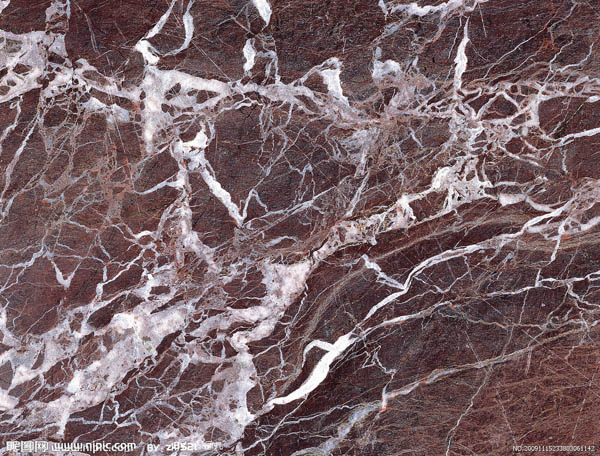
33、打开素材图片。
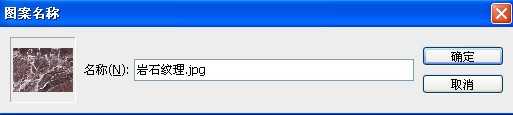
34、编辑 > 定义图案。
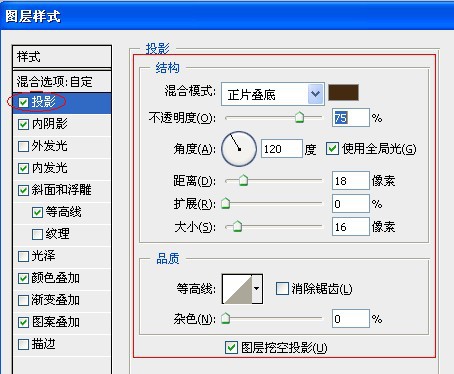
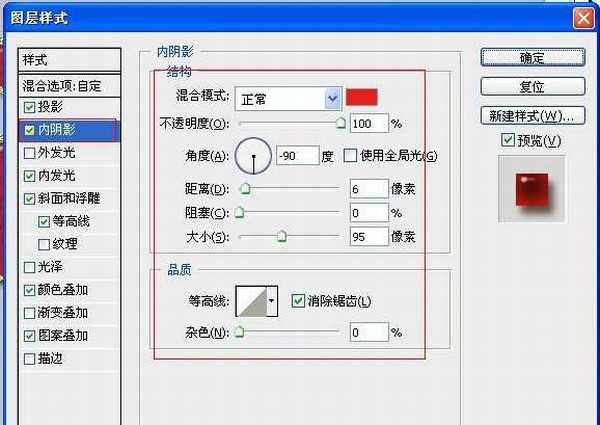
35、对刚才红色的字体进行图层样式设置,参数如下。
上一页12 下一页 阅读全文
局部放大
1、新建文件。
2、用钢笔工具画出如下路径。
3、设置画笔参数如下:(注意不要使用柔边画笔)。
4、勾选画笔模拟压力:填充路径。
5、编辑 > 定义画笔笔刷。
6、再新建一个画布,参数如下。
7、填充灰色(参数如下:)。
8、用7边形路径画出下面的形状,其实用圆形也可以的,只不过效果不太好。
9、对路径进行1个像素的描边。
10、把刚才画的图案定义为图案:编辑 > 定义图案。
11、我们回到我们第一次新建的画布,填充以下颜色(那些路径和图案定义好了就可以关闭不用管了)。
12、对此画布进行图案叠加设置。
13、图层样式设置如下。
14、在ps窗口中打开画笔工具。
15、在不勾选任何任务的情况下选取,刚才我们定义的画笔笔刷,然后再勾选平滑选项,设置间距为1。
16、在形状动态栏设置如下。
17、新建一个图层,用我们设置好的画笔在新建图层上随意涂抹。
18、涂抹效果如下。
19、对那些乱七八糟的线条图层进行图层样式设置:参数如下。
20、完成效果如下:(切记!线条图层样式完成后请把混合模式改为“柔光”)。
21、把线条和下面的背景合并起来。
22、在工具栏中使用:“锐化工具画笔”。
23、使用锐化工具进行涂抹(直径可以设置大一些)效果如下。
24、适当的改变下色相饱和度(根据自己的喜好调整颜色)。
25、为了方便观察,我把皮革图层隐藏,用一个灰底来观察,输入字体进行参照(这里我选的是:“方正稚艺”)。
26、把笔画进行合并。
27、笔画加粗。
28、把边缘不够圆滑的地方修整圆滑。
29、描边。
30、把边框和黑色字体分开。
31、我这里分为:“内实体”和“外边框”以便读者区分。
32、把刚才黑色字体的部分填充为“红色”。
33、打开素材图片。
34、编辑 > 定义图案。
35、对刚才红色的字体进行图层样式设置,参数如下。
上一页12 下一页 阅读全文