Photoshop打造蓝色冷艳的霓虹字
平面设计 发布日期:2026/6/6 浏览次数:1
正在浏览:Photoshop打造蓝色冷艳的霓虹字
第二部分是中间高光部分的制作,需要用到路径描边及图层样式来制作。最后一部分就是整体高光的渲染,这一步很重要,可以让文字更加艳丽。
最终效果

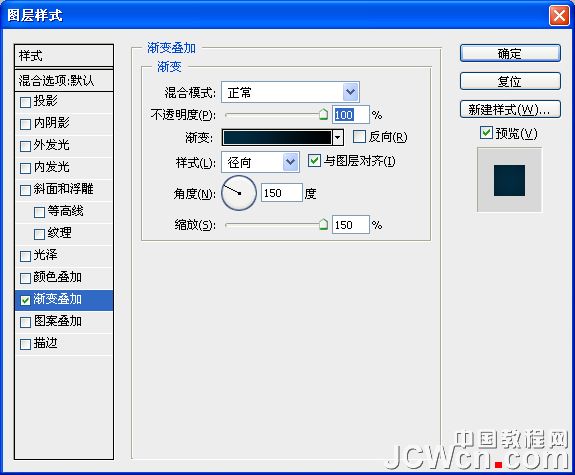
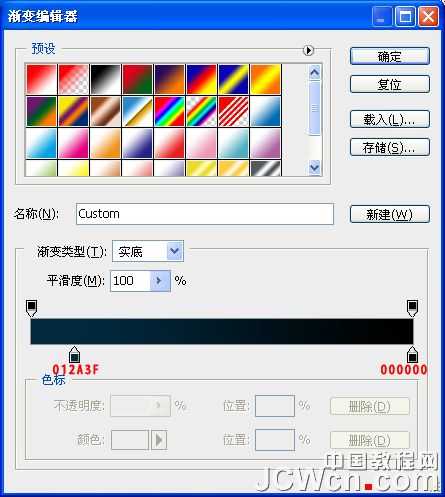
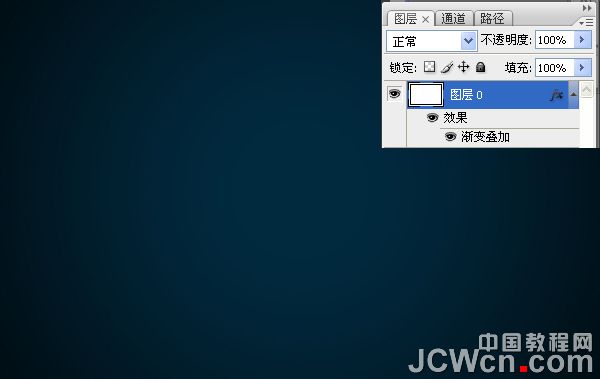
1、新建(CTRL+N)一个1900*1200px,72分辨率,RGB模式的新文件。双击背景层解锁,得到图层0,点击“添加图层样式”按钮,选择渐变叠加,样式选择径向,角度150,缩放150,如图。
2、新建一层,得到图层1,选择一个柔角画笔,直径215px,设置前景色为#03334C,在画布的中间涂抹,效果如图。

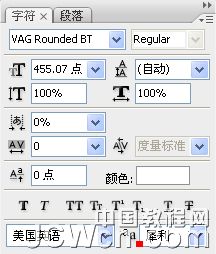
3、设置前景色为白色,选择文字工具,输入文字,这里使用的是VAG Rounded BT字体。

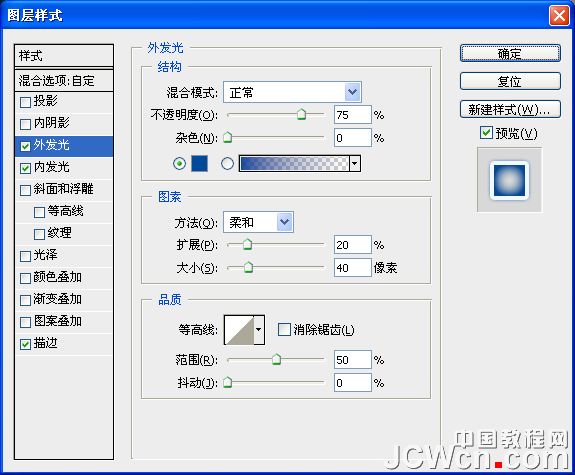
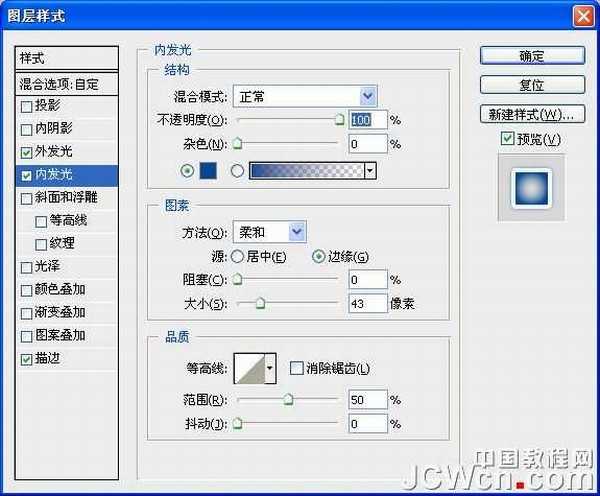
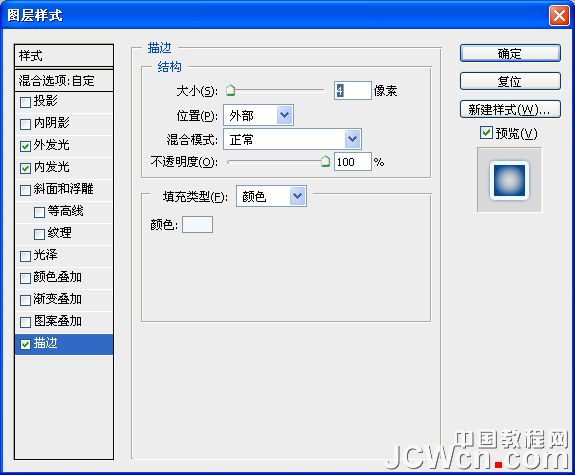
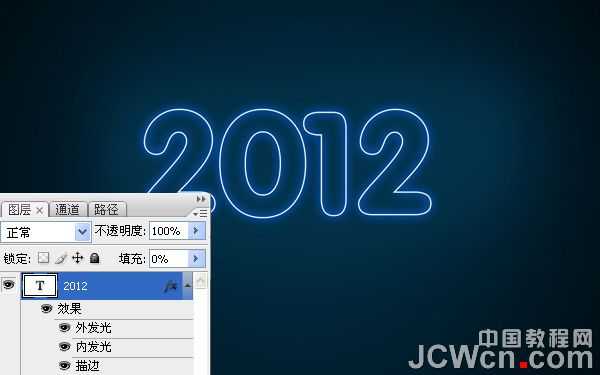
4、设置文字层填充度为0,并为其添加图层样式,数值如图。
5、栅格化文字,并复制一层,选择文字层和文字层副本,按Ctrl+E向下合并,并为其添加图层蒙板,选择黑色柔角画笔,设置不透明度为80%,直径400,在文字上涂抹,改变其透明度,效果如图。
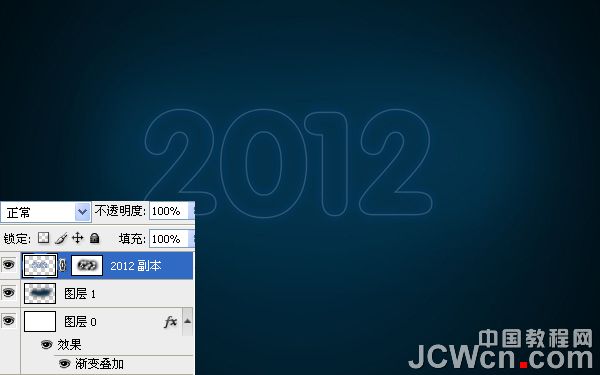
6、将画笔直径缩小至50,将设置前景色为白色,继续在蒙板上涂抹,让部分文字显得的更亮,效果如图。

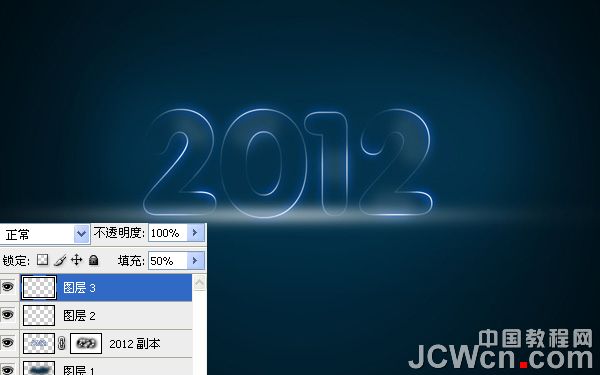
7、新建一层,得到图层2,选择一个柔角画笔,设置不透明度为10%,设置前景色为白色,在文字上方涂抹几笔,效果如图。

8、新建一层,得到图层3,选择一个柔角画笔,直径100,在文字底部点一下,效果如图。

9、按Ctrl+T自由变换,将其拉扁,形成渐隐效果,如图,并设置填充度为50%。
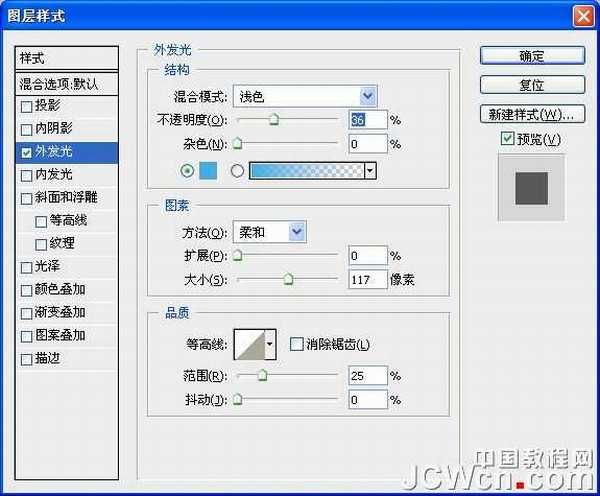
10、为图层3添加图层样式,选择外发光,设置如图,注意混合模式的设定。

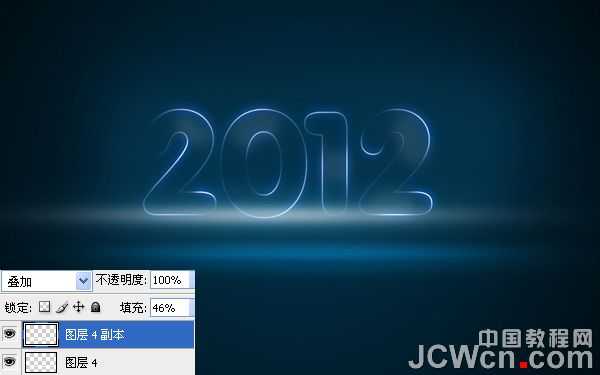
11、重复十三步和十四步的步骤再制作一条光影,得到图层4,如图。

12、设置图层4的填充度为46%,图层混合模式为叠加。

13、复制图层4,得到图层4副本,按Ctrl+T自由变换,略微放大一些,如图。
14、为了让光感更强一些,再次复制图层4副本,得到图层4副本2,效果如图。

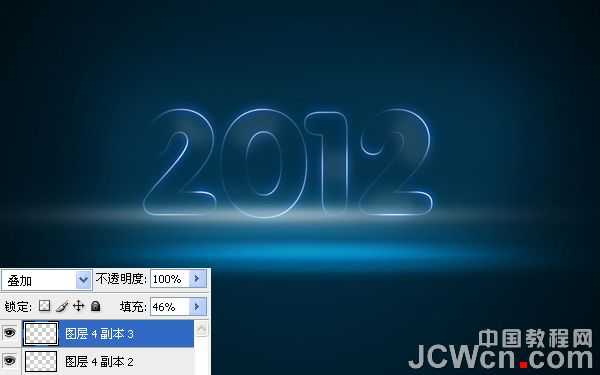
15、复制图层4副本2,得到图层4副本3,将其移动到图层3和图层4的中间,如图。
16、新建一层,得到图层5,选择一个白色的软画笔,设置不透明度为10%,图层混合模式为浅色,在数字下方中间位置涂抹,效果如图。

17、新建一层,得到图层6,选择一个白色的软画笔,在数字右侧点一下,如图。

18、按Ctrl+T自由变换,拉出如图效果。

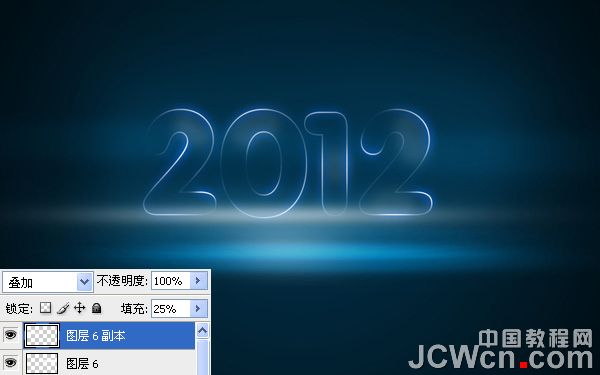
19、设置这一层的填充度为25%,设置图层混合模式为叠加。

20、复制图层6,复制图层6副本,按Ctrl+t水平翻转,并移动到数字的左面居中位置,如图。
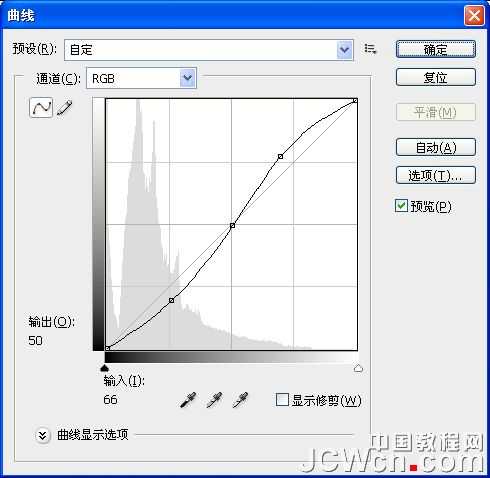
21、添加曲线调整层,调整一下色彩,如图设置。

22、选择钢笔工具,在数字中间画一根路径,如图。

上一页12 下一页 阅读全文
最终效果
1、新建(CTRL+N)一个1900*1200px,72分辨率,RGB模式的新文件。双击背景层解锁,得到图层0,点击“添加图层样式”按钮,选择渐变叠加,样式选择径向,角度150,缩放150,如图。
2、新建一层,得到图层1,选择一个柔角画笔,直径215px,设置前景色为#03334C,在画布的中间涂抹,效果如图。
3、设置前景色为白色,选择文字工具,输入文字,这里使用的是VAG Rounded BT字体。
4、设置文字层填充度为0,并为其添加图层样式,数值如图。
5、栅格化文字,并复制一层,选择文字层和文字层副本,按Ctrl+E向下合并,并为其添加图层蒙板,选择黑色柔角画笔,设置不透明度为80%,直径400,在文字上涂抹,改变其透明度,效果如图。
6、将画笔直径缩小至50,将设置前景色为白色,继续在蒙板上涂抹,让部分文字显得的更亮,效果如图。
7、新建一层,得到图层2,选择一个柔角画笔,设置不透明度为10%,设置前景色为白色,在文字上方涂抹几笔,效果如图。
8、新建一层,得到图层3,选择一个柔角画笔,直径100,在文字底部点一下,效果如图。
9、按Ctrl+T自由变换,将其拉扁,形成渐隐效果,如图,并设置填充度为50%。
10、为图层3添加图层样式,选择外发光,设置如图,注意混合模式的设定。
11、重复十三步和十四步的步骤再制作一条光影,得到图层4,如图。
12、设置图层4的填充度为46%,图层混合模式为叠加。
13、复制图层4,得到图层4副本,按Ctrl+T自由变换,略微放大一些,如图。
14、为了让光感更强一些,再次复制图层4副本,得到图层4副本2,效果如图。
15、复制图层4副本2,得到图层4副本3,将其移动到图层3和图层4的中间,如图。
16、新建一层,得到图层5,选择一个白色的软画笔,设置不透明度为10%,图层混合模式为浅色,在数字下方中间位置涂抹,效果如图。
17、新建一层,得到图层6,选择一个白色的软画笔,在数字右侧点一下,如图。
18、按Ctrl+T自由变换,拉出如图效果。
19、设置这一层的填充度为25%,设置图层混合模式为叠加。
20、复制图层6,复制图层6副本,按Ctrl+t水平翻转,并移动到数字的左面居中位置,如图。
21、添加曲线调整层,调整一下色彩,如图设置。
22、选择钢笔工具,在数字中间画一根路径,如图。
上一页12 下一页 阅读全文