Photoshop打造漂亮的紫色潮流光感字
平面设计 发布日期:2026/4/14 浏览次数:1
正在浏览:Photoshop打造漂亮的紫色潮流光感字
最终效果

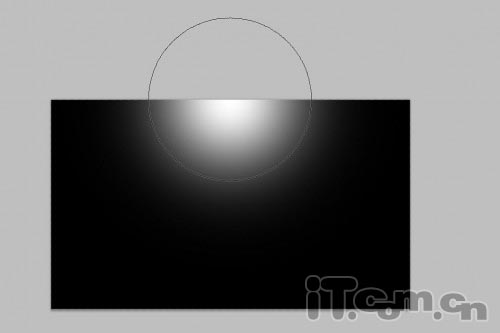
1、创建一个新图片,大小为1200*700,背景填充黑色,创建一个新图层命名为“光源”,使用白色的画笔工具在上方单击,得到一个光源,如图所示。
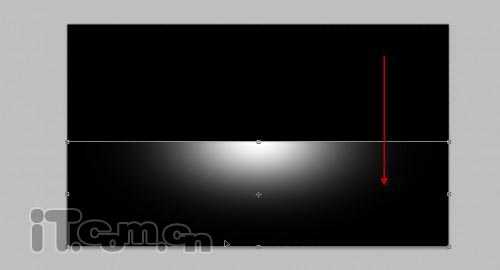
2、按下Ctrl+T进入自由变换状态,然后拖动上面的调整点,效果如图所示。
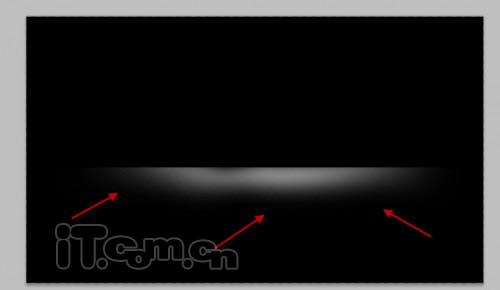
3、使用柔角的橡皮擦清除底部的的小部分。
4、使用横排文字工具输入文字,如图所示。

5、给文字图层添加一个图层蒙版,然后使用黑的画笔工具在蒙版上涂抹,如图所示。


6、按下Ctrl+J复制文字图层,执行“滤镜—模糊—高斯模糊”,如图所示。

7、设置模糊图层的不透明度50%左右,效果如图所示。

8、在原来的文字图层下面创建一个新图层,然后在上面添加一些云雾的效果。你可以使用云雾笔刷添加。

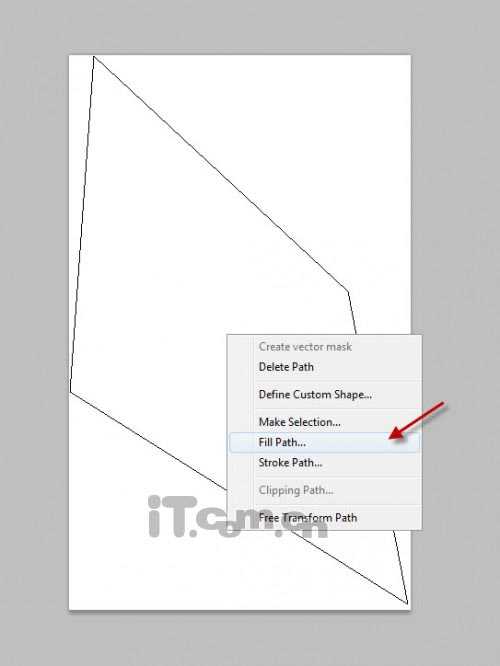
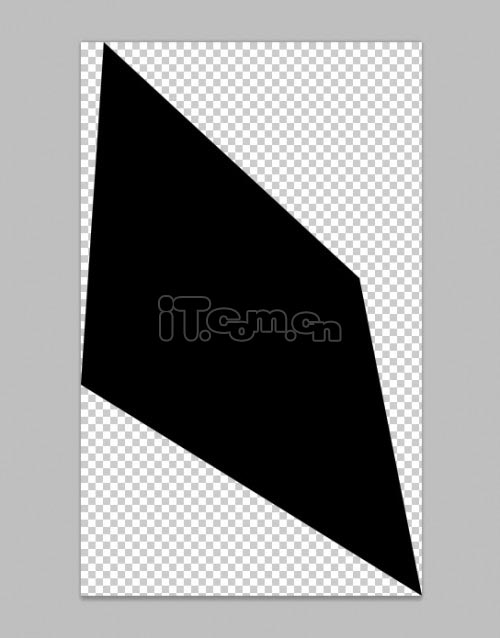
9、下面我们要自制一个粒子笔刷。创建一个新图片,使用钢笔工具绘制下图所示的形状,并填充黑色。
补充:背景必需为透明。
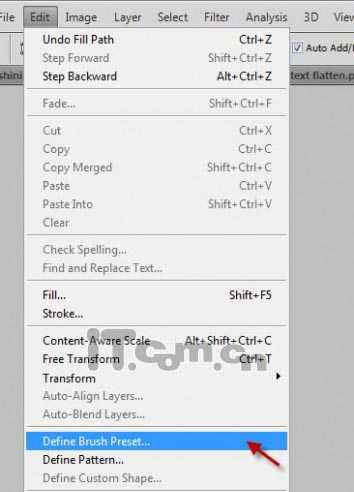
10、执行“编辑—定义笔刷预设”,如图所示。
上一页12 下一页 阅读全文
1、创建一个新图片,大小为1200*700,背景填充黑色,创建一个新图层命名为“光源”,使用白色的画笔工具在上方单击,得到一个光源,如图所示。
2、按下Ctrl+T进入自由变换状态,然后拖动上面的调整点,效果如图所示。
3、使用柔角的橡皮擦清除底部的的小部分。
4、使用横排文字工具输入文字,如图所示。
5、给文字图层添加一个图层蒙版,然后使用黑的画笔工具在蒙版上涂抹,如图所示。
6、按下Ctrl+J复制文字图层,执行“滤镜—模糊—高斯模糊”,如图所示。
7、设置模糊图层的不透明度50%左右,效果如图所示。
8、在原来的文字图层下面创建一个新图层,然后在上面添加一些云雾的效果。你可以使用云雾笔刷添加。
9、下面我们要自制一个粒子笔刷。创建一个新图片,使用钢笔工具绘制下图所示的形状,并填充黑色。
补充:背景必需为透明。
10、执行“编辑—定义笔刷预设”,如图所示。
上一页12 下一页 阅读全文