Photoshop打造绚丽的潮流高光字
平面设计 发布日期:2026/6/6 浏览次数:1
正在浏览:Photoshop打造绚丽的潮流高光字
原图

最终效果

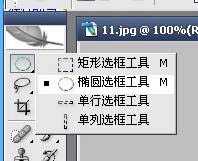
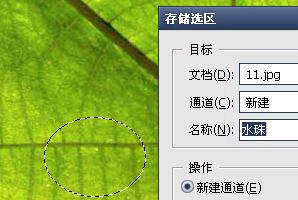
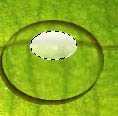
1、打开树叶图片,用椭圆选框工具选取你想做水滴的区域,并保存选区。
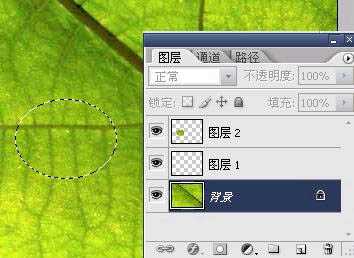
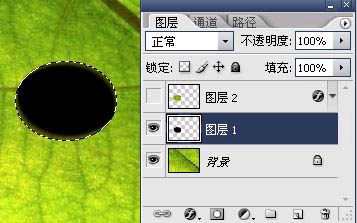
2、复制选区,粘贴在新层。(偶在两层之间预留的那层是之后做阴影用的,个人习惯。)
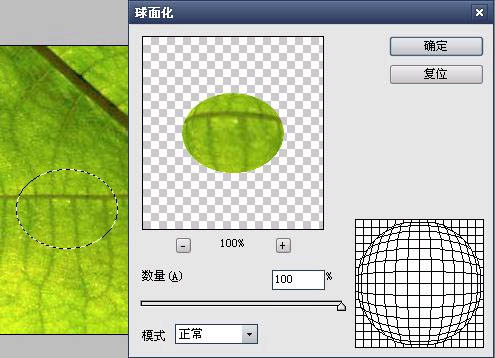
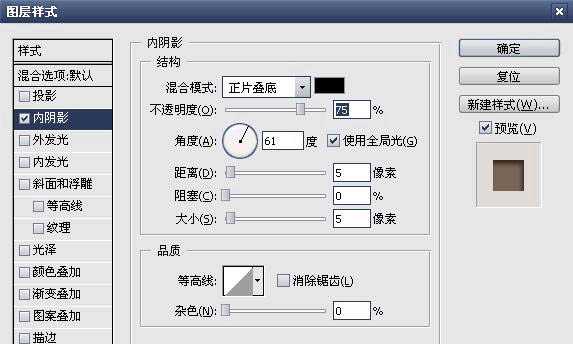
3、在图层2保持选区,选择滤镜-->球面化。继续保持选区,在图层样式种选择内阴影。
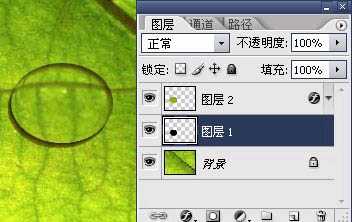
4、关闭水滴图层2,在中间层制作阴影。个人习惯,主要用滤镜中的模糊,随便试试吧,高斯模糊动感模糊等等的随便用。自己看哪个效果好就用哪个吧。偶比较喜欢动感模糊的说。
5、打开水滴层看看效果。
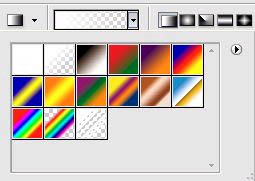
6、选择一个你看着顺眼的高光选区,保持选区时,使用渐变工具从上到下拉一下。
7、之后在高光下方再做一个向上渐变的光晕,随便模糊一下,完成最终效果:
最终效果
1、打开树叶图片,用椭圆选框工具选取你想做水滴的区域,并保存选区。
2、复制选区,粘贴在新层。(偶在两层之间预留的那层是之后做阴影用的,个人习惯。)
3、在图层2保持选区,选择滤镜-->球面化。继续保持选区,在图层样式种选择内阴影。
4、关闭水滴图层2,在中间层制作阴影。个人习惯,主要用滤镜中的模糊,随便试试吧,高斯模糊动感模糊等等的随便用。自己看哪个效果好就用哪个吧。偶比较喜欢动感模糊的说。
5、打开水滴层看看效果。
6、选择一个你看着顺眼的高光选区,保持选区时,使用渐变工具从上到下拉一下。
7、之后在高光下方再做一个向上渐变的光晕,随便模糊一下,完成最终效果: