Photoshop happy文字 怀旧版的2010新年贺卡
平面设计 发布日期:2025/12/27 浏览次数:1
正在浏览:Photoshop happy文字 怀旧版的2010新年贺卡
我们先看效果图:

最终效果
制作步骤:
1、选择“文件/新建”菜单,打开”新建”或者Ctrl+N对话框 名称为:happy new year,宽度:为800像素, 高度:为600像素, “分辨率”为72 , “模式”为RGB颜色的文档,如图1所示。
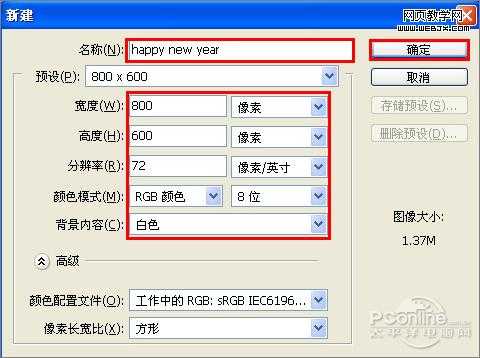
图1
2、执行菜单:“滤镜”/“杂色”/“添加杂色”,弹出添加杂色的对话框,设置数量为3%,分布为高斯分布,勾选单色,图如图2所示。
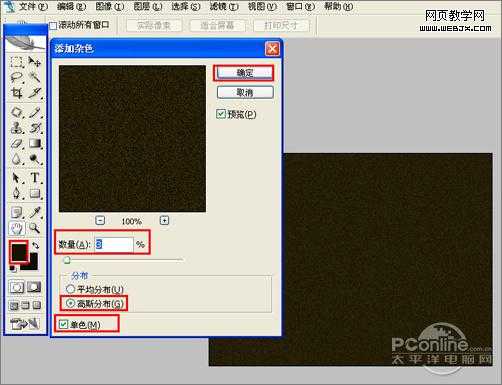
图2
3、单击工具箱中的横排文字工具 ,输入happy,然后在工具选项栏上设置字体:Arial Black,大小:136点,颜色:白色,设置消除锯齿的方法:锐利,如图3所示。
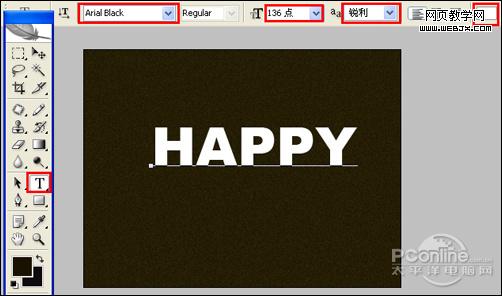
图3
4、在图层面板上单击创建新图层按钮,命名为线,再用矩形工具,拖出矩形的形状,并调整角度与方向,复制6条矩形副本摆在英文文字不用的位置,选择所有矩形图层与英文字合并成一个图层happy图层,效果图如图4所示。
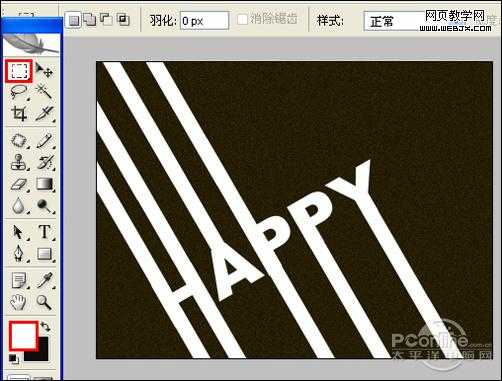
图4
5、双单击happy文字图层进入到图层样式,分别勾选投影、斜面和浮雕、渐变叠加、描边选项。设置它们的参考值分别如图5、6、7、8、效果图如图9所示。
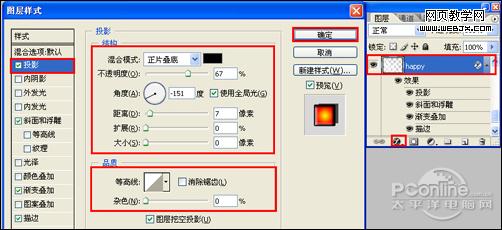
图5
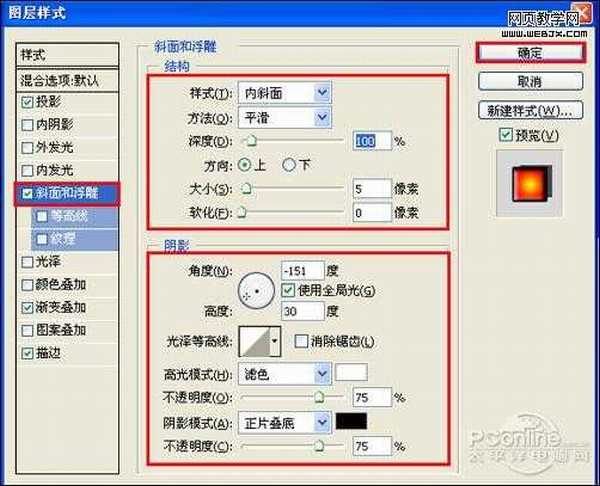
图6
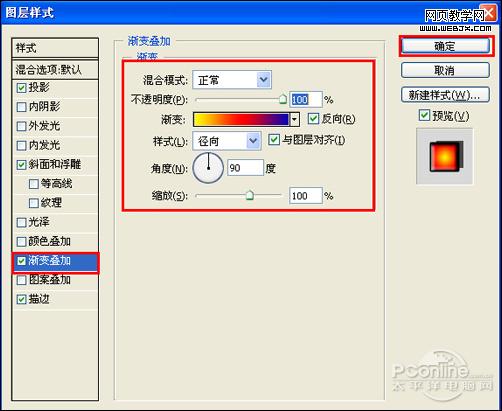
图7

图8
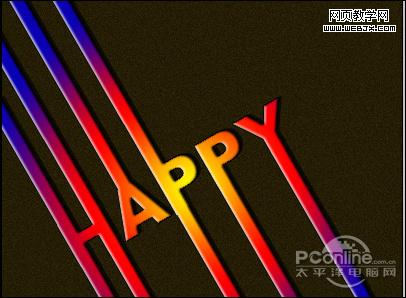
图9
6、在图层面板上单击创建新图层按钮,再用钢笔工具,画出一个无规则的形状,设置前景色为橘黄色,按键盘快捷键Ctrl+Enter转换为选区,接着按键盘快捷键Alt+Delete填充,按键盘快捷键Ctrl+D取消选区,效果图如图10所示。
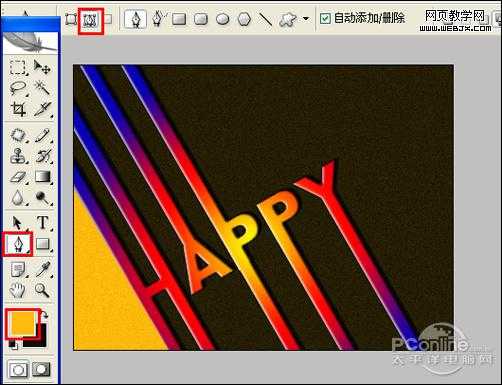
图10
7、执行菜单:“滤镜”/“杂色”/“添加杂色”,弹出添加杂色的对话框,设置数量为3%,分布为高斯分布,勾选单色,如图11所示。效果如图12所示。
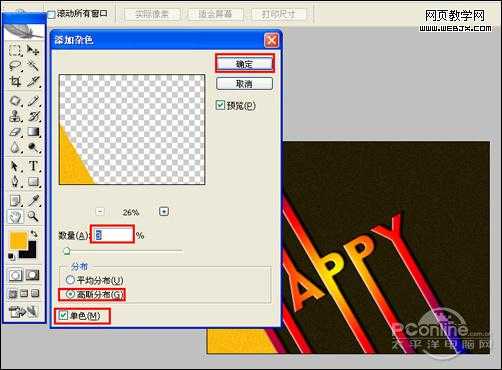
图11
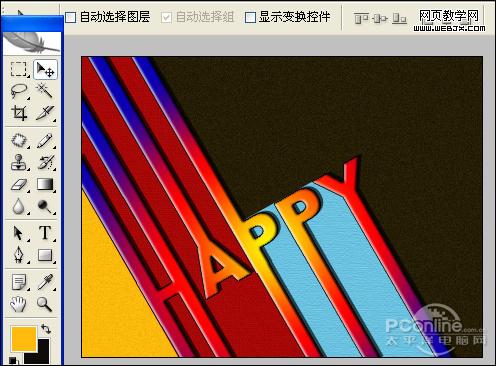
图12
8、单击工具箱中的横排文字工具 ,分别输入输入2010、虎、new year,然后在工具选项栏上设置字体:Arial Black,大小:22点,颜色:白色,设置消除锯齿的方法:锐利,如图13所示。
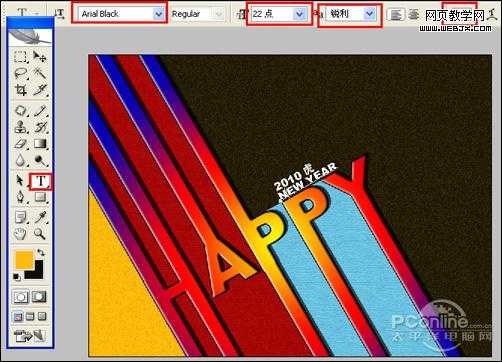
图13
9、单击工具箱中的横排文字工具 ,输入happy,然后在工具选项栏上设置字体:Arial Black,大小:136点,颜色:白色,设置消除锯齿的方法:锐利,并设置不透明度为6%,如图14所示。效果图如图15所示。
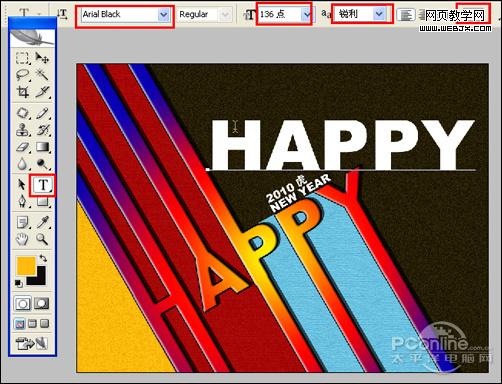
图14
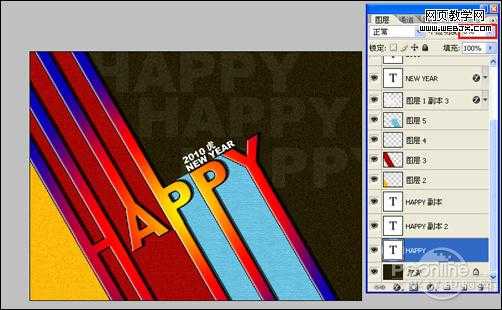
图15
10、在图层面板上单击创建新图层按钮,命名为画笔,选择画笔粉笔60像素,设置前景色为白色,接着在工作区随意画一下,如图16所示。

图16
11、选择画笔图层,复制一个副本画笔图层,移动到不同的位置并调整大小,设置图层混合模式为正片叠加,如图17所示。
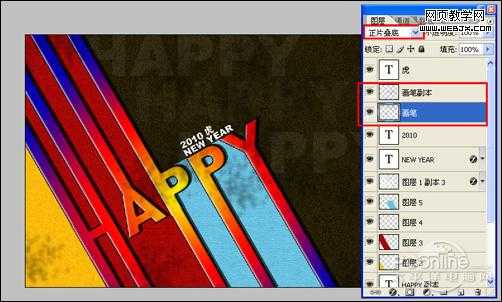
图17
最终效果
制作步骤:
1、选择“文件/新建”菜单,打开”新建”或者Ctrl+N对话框 名称为:happy new year,宽度:为800像素, 高度:为600像素, “分辨率”为72 , “模式”为RGB颜色的文档,如图1所示。
图1
2、执行菜单:“滤镜”/“杂色”/“添加杂色”,弹出添加杂色的对话框,设置数量为3%,分布为高斯分布,勾选单色,图如图2所示。
图2
3、单击工具箱中的横排文字工具 ,输入happy,然后在工具选项栏上设置字体:Arial Black,大小:136点,颜色:白色,设置消除锯齿的方法:锐利,如图3所示。
图3
4、在图层面板上单击创建新图层按钮,命名为线,再用矩形工具,拖出矩形的形状,并调整角度与方向,复制6条矩形副本摆在英文文字不用的位置,选择所有矩形图层与英文字合并成一个图层happy图层,效果图如图4所示。
图4
5、双单击happy文字图层进入到图层样式,分别勾选投影、斜面和浮雕、渐变叠加、描边选项。设置它们的参考值分别如图5、6、7、8、效果图如图9所示。
图5
图6
图7
图8
图9
6、在图层面板上单击创建新图层按钮,再用钢笔工具,画出一个无规则的形状,设置前景色为橘黄色,按键盘快捷键Ctrl+Enter转换为选区,接着按键盘快捷键Alt+Delete填充,按键盘快捷键Ctrl+D取消选区,效果图如图10所示。
图10
7、执行菜单:“滤镜”/“杂色”/“添加杂色”,弹出添加杂色的对话框,设置数量为3%,分布为高斯分布,勾选单色,如图11所示。效果如图12所示。
图11
图12
8、单击工具箱中的横排文字工具 ,分别输入输入2010、虎、new year,然后在工具选项栏上设置字体:Arial Black,大小:22点,颜色:白色,设置消除锯齿的方法:锐利,如图13所示。
图13
9、单击工具箱中的横排文字工具 ,输入happy,然后在工具选项栏上设置字体:Arial Black,大小:136点,颜色:白色,设置消除锯齿的方法:锐利,并设置不透明度为6%,如图14所示。效果图如图15所示。
图14
图15
10、在图层面板上单击创建新图层按钮,命名为画笔,选择画笔粉笔60像素,设置前景色为白色,接着在工作区随意画一下,如图16所示。
图16
11、选择画笔图层,复制一个副本画笔图层,移动到不同的位置并调整大小,设置图层混合模式为正片叠加,如图17所示。
图17