Photoshop教程:制作闪电文字
平面设计 发布日期:2026/6/5 浏览次数:1
正在浏览:Photoshop教程:制作闪电文字
闪电如夜空中的精灵带来一种神奇的视觉效果,它变幻莫测、转瞬即逝。下面我们用Photoshop制作一款闪电文字。
1、新建一个文件。单击工具箱中的文字工具,在字符面板中设置各项参数,颜色RGB分别为254、1、1,在窗口中输入文字,调整文字大小和位置,效果如图01所示。
1、新建一个文件。单击工具箱中的文字工具,在字符面板中设置各项参数,颜色RGB分别为254、1、1,在窗口中输入文字,调整文字大小和位置,效果如图01所示。

图1 Photoshop键入所需文字

图25 最终完成效果
2、双击文字图层,在弹出的图层样式对话框中选择“投影”、“内发光”、“斜面和浮雕”、“等高线”、“光泽”样式,设置参数如图02—06所示,文字效果如图07所示。
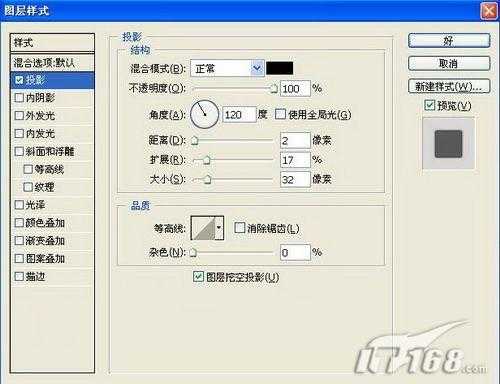
图2 Photoshop投影图层样式
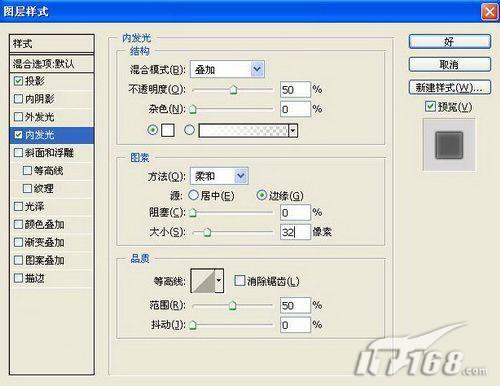
图3 Photoshop内发光图层样式
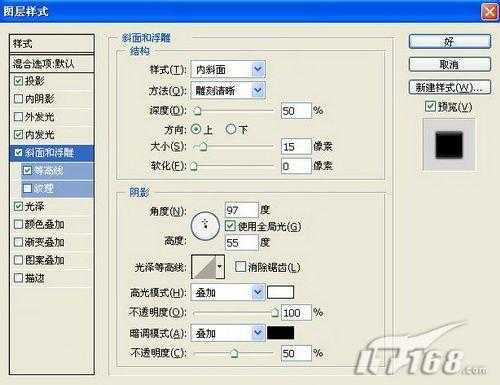
图4 Photoshop斜面和浮雕图层样式
上一页12 下一页 阅读全文
下一篇:PS滤镜和图层样式制作破旧金属字