Photoshop将外景人物图片调出绚丽多彩的蓝色调
平面设计 发布日期:2025/12/30 浏览次数:1
正在浏览:Photoshop将外景人物图片调出绚丽多彩的蓝色调
原图

最终效果

1、打开原图素材,按Ctrl + J 把背景图层复制一层,点通道面板,选择绿色通道按Ctrl + A 全选,按Ctrl + C 复制。点蓝色通道按Ctrl + V 粘贴,对到图层面板后效果如下图。

<图1>
2、创建可选颜色调整图层,对青色进行调整,参数设置如图2,这一步是调整背景部分青色调,效果如图3。

<图2>

<图3>
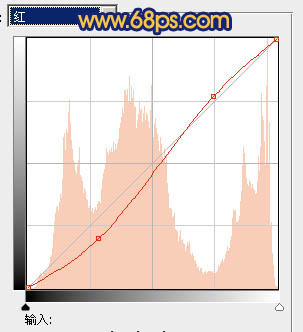
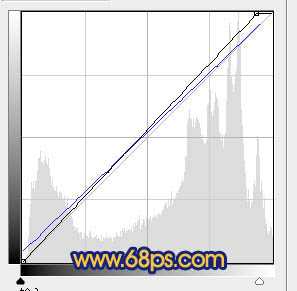
3、创建曲线调整图层分别对红,绿,蓝进行调整,参数设置如图4 - 6,调出的效果人物部分颜色会有点失真,暂时不用理会。效果如图7。

<图4>

<图5>

<图6>

<图7>
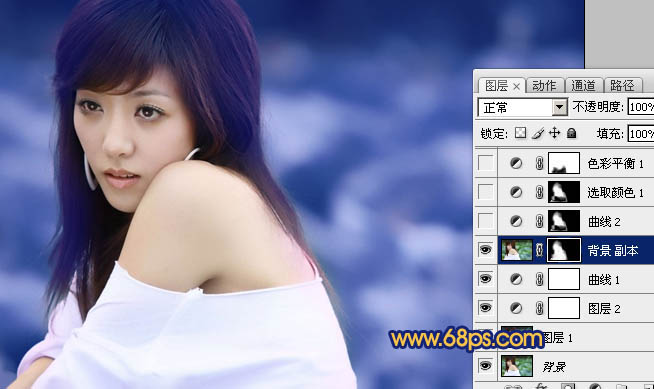
4、把背景图层复制一层,按Ctrl + Shift + ] 置顶,加上图层蒙版,只保留人物部分,其它部分用黑色画笔擦掉,效果如下图。

<图8>
5、调出当前图层蒙版选区,再创建曲线调整图层,对RGB及蓝色进行调整,参数设置如图9,效果如图10。

<图9>

<图10>
上一页12 下一页 阅读全文

最终效果

1、打开原图素材,按Ctrl + J 把背景图层复制一层,点通道面板,选择绿色通道按Ctrl + A 全选,按Ctrl + C 复制。点蓝色通道按Ctrl + V 粘贴,对到图层面板后效果如下图。

<图1>
2、创建可选颜色调整图层,对青色进行调整,参数设置如图2,这一步是调整背景部分青色调,效果如图3。

<图2>

<图3>
3、创建曲线调整图层分别对红,绿,蓝进行调整,参数设置如图4 - 6,调出的效果人物部分颜色会有点失真,暂时不用理会。效果如图7。

<图4>

<图5>

<图6>

<图7>
4、把背景图层复制一层,按Ctrl + Shift + ] 置顶,加上图层蒙版,只保留人物部分,其它部分用黑色画笔擦掉,效果如下图。

<图8>
5、调出当前图层蒙版选区,再创建曲线调整图层,对RGB及蓝色进行调整,参数设置如图9,效果如图10。

<图9>

<图10>
上一页12 下一页 阅读全文