Photoshop 为偏灰的人物磨皮及加彩妆教程
平面设计 发布日期:2026/6/29 浏览次数:1
正在浏览:Photoshop 为偏灰的人物磨皮及加彩妆教程
原图

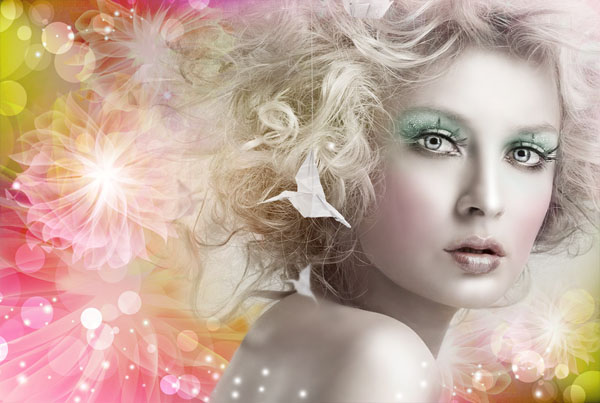
最终效果
1、打开原图素材,由于作者没有提供原始的PSD素材,操作的时候直接在原图素材上操作,不需要把人物再扣出来(下图是在PSD素材中操作的,人物与背景是分开的)。

<图1>
2、使用“套索”工具,在人物的皮肤图像上创建选区,如图2、3所示。
<图2>
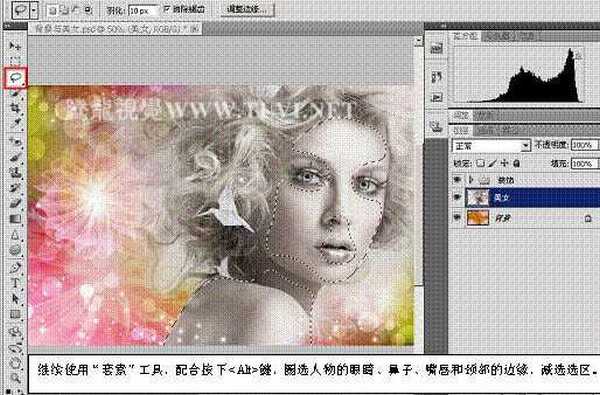
<图3>
3、拷贝图像,然后执行“滤镜”→“模糊”→“高斯模糊”命令,对选区内的图像进行模糊处理,如图4所示。
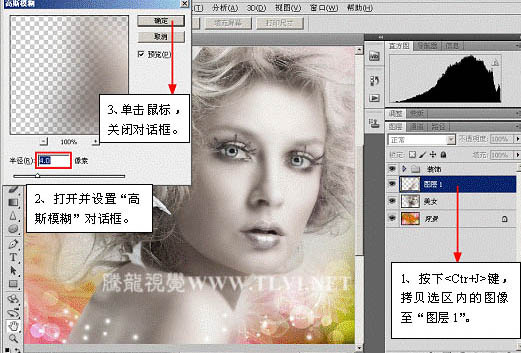
<图4>
4、在“图层”调板中为“图层 1”添加图层蒙版,并对人物脸部边缘和眼睛处的蒙版进行编辑。如图5所示。
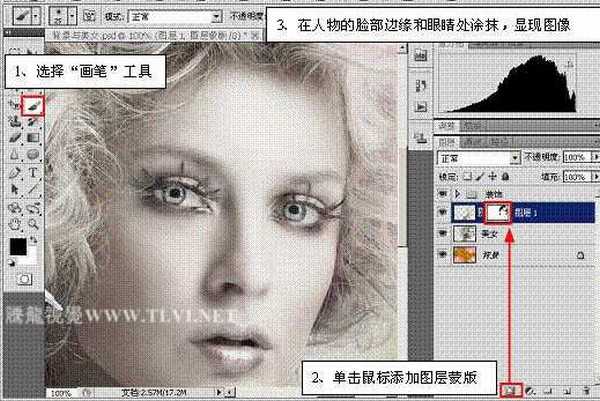
<图5>
5、参照以上方法,继续使用“画笔”工具,显现图像,如图6所示。
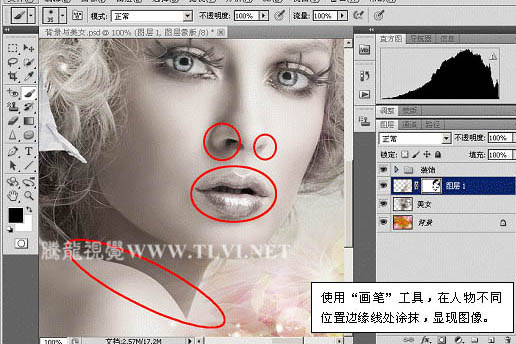
<图6>
6、选择“锐化”工具,对人物的眼睛进行锐化处理,使眼睛更具有神色,如图7所示。
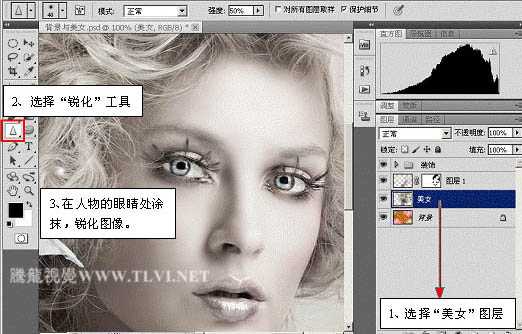
<图7>
7、设置“前景色”为白色,使用“画笔”工具,绘制人物的高光效果,如图8所示。提示:在绘制高光时画笔的“不透明度”和“大小”要适当的调整。
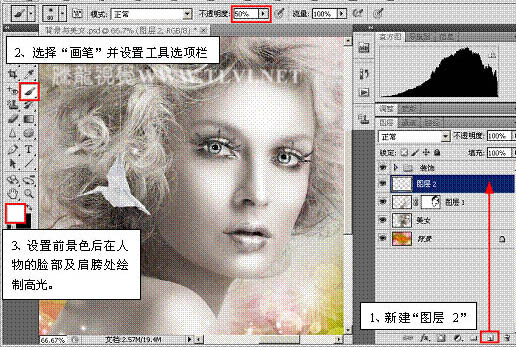
<图8>
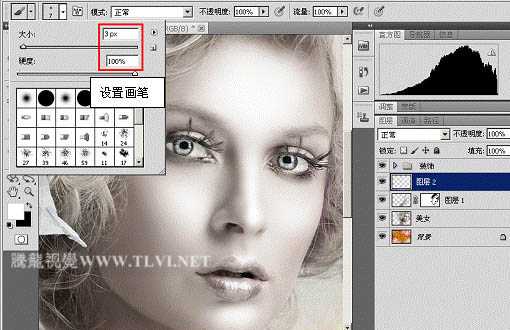
<图9>
8、使用“钢笔”工具,在视图中相应的位置绘制路径,并为其描边,如图10、11所示。
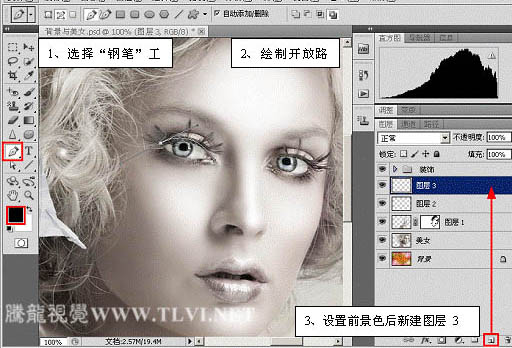
<图10>
上一页12 下一页 阅读全文
最终效果
1、打开原图素材,由于作者没有提供原始的PSD素材,操作的时候直接在原图素材上操作,不需要把人物再扣出来(下图是在PSD素材中操作的,人物与背景是分开的)。
<图1>
2、使用“套索”工具,在人物的皮肤图像上创建选区,如图2、3所示。
<图2>
<图3>
3、拷贝图像,然后执行“滤镜”→“模糊”→“高斯模糊”命令,对选区内的图像进行模糊处理,如图4所示。
<图4>
4、在“图层”调板中为“图层 1”添加图层蒙版,并对人物脸部边缘和眼睛处的蒙版进行编辑。如图5所示。
<图5>
5、参照以上方法,继续使用“画笔”工具,显现图像,如图6所示。
<图6>
6、选择“锐化”工具,对人物的眼睛进行锐化处理,使眼睛更具有神色,如图7所示。
<图7>
7、设置“前景色”为白色,使用“画笔”工具,绘制人物的高光效果,如图8所示。提示:在绘制高光时画笔的“不透明度”和“大小”要适当的调整。
<图8>
<图9>
8、使用“钢笔”工具,在视图中相应的位置绘制路径,并为其描边,如图10、11所示。
<图10>
上一页12 下一页 阅读全文
下一篇:ps将手机照片转为逼真的手绘效果