ps将手机照片转为逼真的手绘效果
平面设计 发布日期:2026/4/9 浏览次数:1
正在浏览:ps将手机照片转为逼真的手绘效果
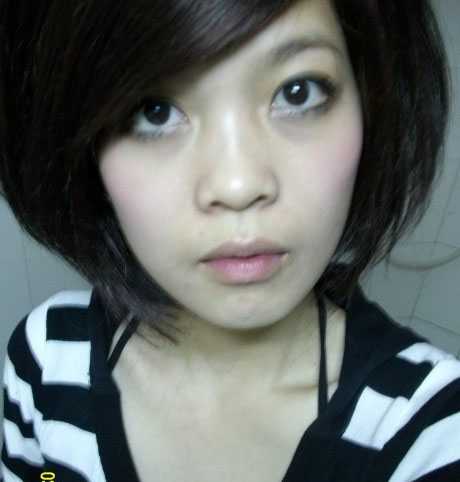
原图
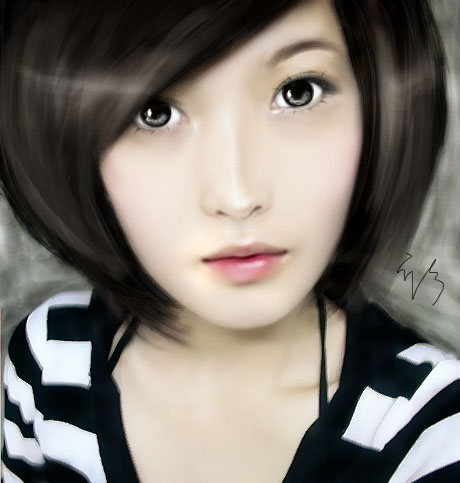
最终效果
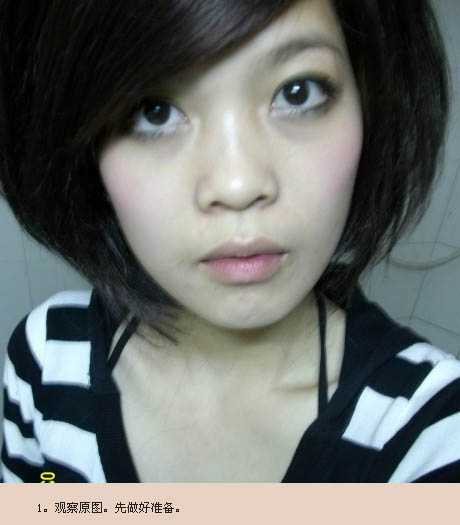
1、观察原图,先做好准备。
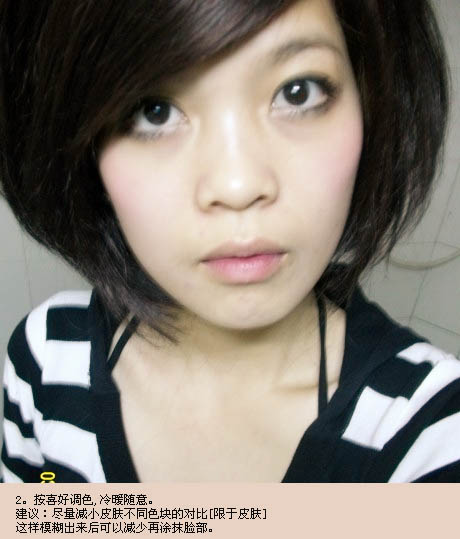
2、按喜好调色,冷暖随意。建议:尽量减小皮肤不同色块的对比[限于皮肤],这样模糊出来后可以减少涂抹脸部。
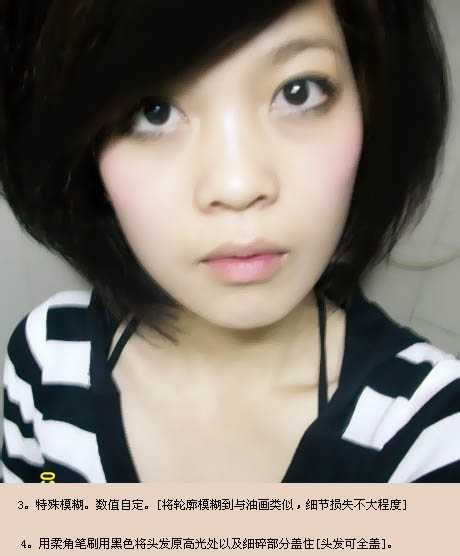
3、特殊模糊(滤镜 > 模糊 > 特殊模糊),数值自定。[将轮廓模糊到与油画类似,细节损失不大程度]
4、用柔角笔刷用黑色将头发原高光处以及细碎部分盖住[头发可全盖]。
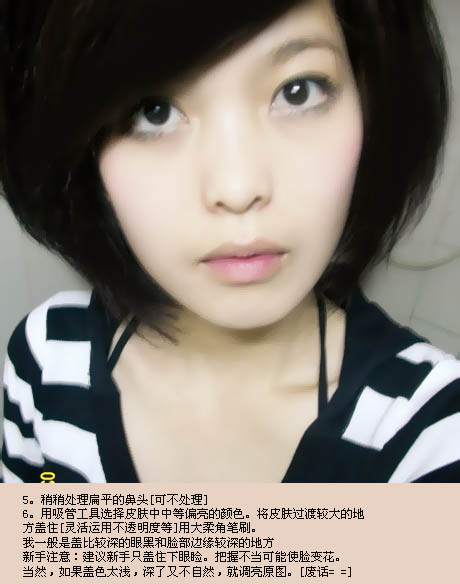
5、稍稍处理扁平的鼻头[可不处理]。
6、用吸管工具选择皮肤中中等偏亮的颜色,将皮肤过渡较大的地方盖住[灵活运用不透明度等]用大柔角笔刷。我一般是盖比较深的眼黑和脸部边缘较深的地方。新手注意:建议新手只盖住下眼睑,把握不当可能使脸变花。当然,如果盖色太浅,深了又不自然,就调亮原图。
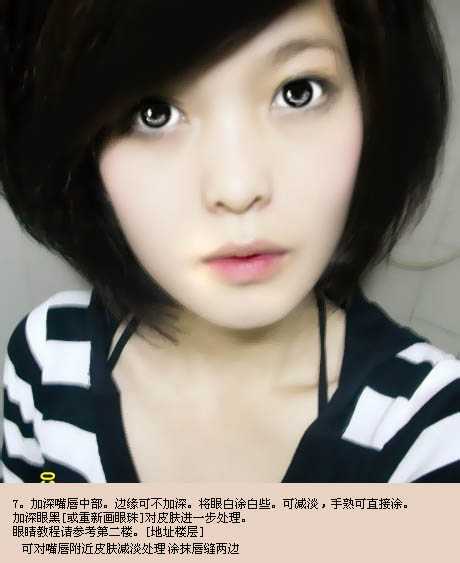
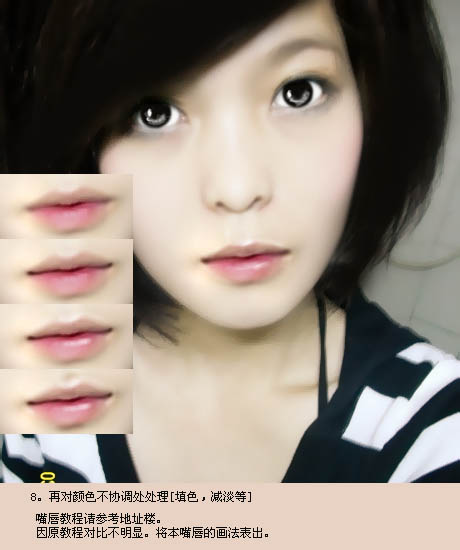
7、加深嘴唇中部。边缘可不加深,将眼白涂白些,可减淡,手熟可直接涂。加深眼黑[或重新画眼珠]对皮肤进一步处理。
眼睛部分转手绘的具体教程见下页。可对嘴唇附近皮肤减淡处理涂抹唇缝两边。
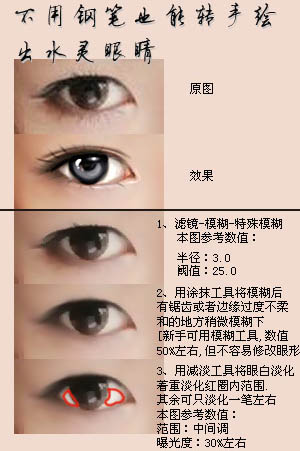
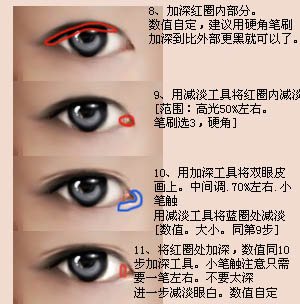
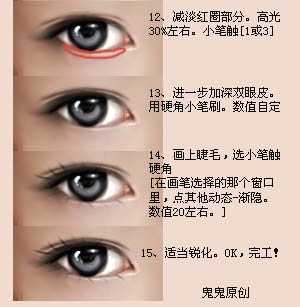
眼睛部分转手绘教程:
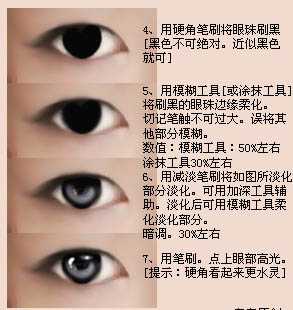
8、再对颜色不协调的地方进行处理[填色,减淡等]。
上一页12 下一页 阅读全文
最终效果
1、观察原图,先做好准备。
2、按喜好调色,冷暖随意。建议:尽量减小皮肤不同色块的对比[限于皮肤],这样模糊出来后可以减少涂抹脸部。
3、特殊模糊(滤镜 > 模糊 > 特殊模糊),数值自定。[将轮廓模糊到与油画类似,细节损失不大程度]
4、用柔角笔刷用黑色将头发原高光处以及细碎部分盖住[头发可全盖]。
5、稍稍处理扁平的鼻头[可不处理]。
6、用吸管工具选择皮肤中中等偏亮的颜色,将皮肤过渡较大的地方盖住[灵活运用不透明度等]用大柔角笔刷。我一般是盖比较深的眼黑和脸部边缘较深的地方。新手注意:建议新手只盖住下眼睑,把握不当可能使脸变花。当然,如果盖色太浅,深了又不自然,就调亮原图。
7、加深嘴唇中部。边缘可不加深,将眼白涂白些,可减淡,手熟可直接涂。加深眼黑[或重新画眼珠]对皮肤进一步处理。
眼睛部分转手绘的具体教程见下页。可对嘴唇附近皮肤减淡处理涂抹唇缝两边。
眼睛部分转手绘教程:
8、再对颜色不协调的地方进行处理[填色,减淡等]。
上一页12 下一页 阅读全文